photograph courtesy Provisuals Media
Well, that took forever. Our renovation is finally done! When we moved to Arizona, we were lucky to find a house that checked a lot of our boxes. However, the house we fell in love with had a 25 year old kitchen that had to go. The cabinets were original but so bad that they were falling apart in places and the general design of the kitchen wasted a lot of space and was dysfunctional. We had a large kitchen in Michigan and this new kitchen had very little storage space - there wasn't a single cabinet or drawer in the island! So, although a renovation was going to be a big project, I did get to design the kitchen the way I wanted. And, as long as we were renovating the kitchen, why not tear out the old laundry room and competely redo the Bar area? 😆 The last year has been a parade of workers in our home but it has been worth it.
kitchen before:
after:
photograph courtesy Provisuals Media
KITCHEN:
We were lucky in that the appliances in the home had been recently replaced and I liked them. I had specific needs for appliances - I wanted a large side-by-side fridge, two ovens and a 6-burner range. And this house had all of those. That was lucky because of all the backordered appliances during Covid, so I got to avoid that frustration.
The original kitchen was built in the 90s and both the island and the range were placed at an angle. This layout didn't use the space well, so we had the island completely ripped out and the angle in the corner straightened out, creating more counter space. The old island had zero storage and the new island has a ton of storage.
The microwave/oven combination had been placed so high that I couldn't reach into the microwave to clean it. We significantly lowered it to be more functional. It also helped lower the oven to a better height.
We raised the soffit way up and brought the cabinets up higher so everything was even.
photograph courtesy Provisuals Media
CABINETS: The biggest decision was going to be the cabinets and that was easy because I knew exactly what I wanted - slab cabinets in rift oak. I wanted a warm, bright modern kitchen but wanted something different than white cabinets, so a light rift oak fit the bill. I wanted slab fronts because I don't like anything catching dust - I have shaker cabinets in the bathrooms and I had cabinets in Michigan that were raised panel and I was constantly dusting them. Slab fronts don't catch any dust and are easy to wipe down.
Custom Cabinets: Distinctive Custom Cabinetry
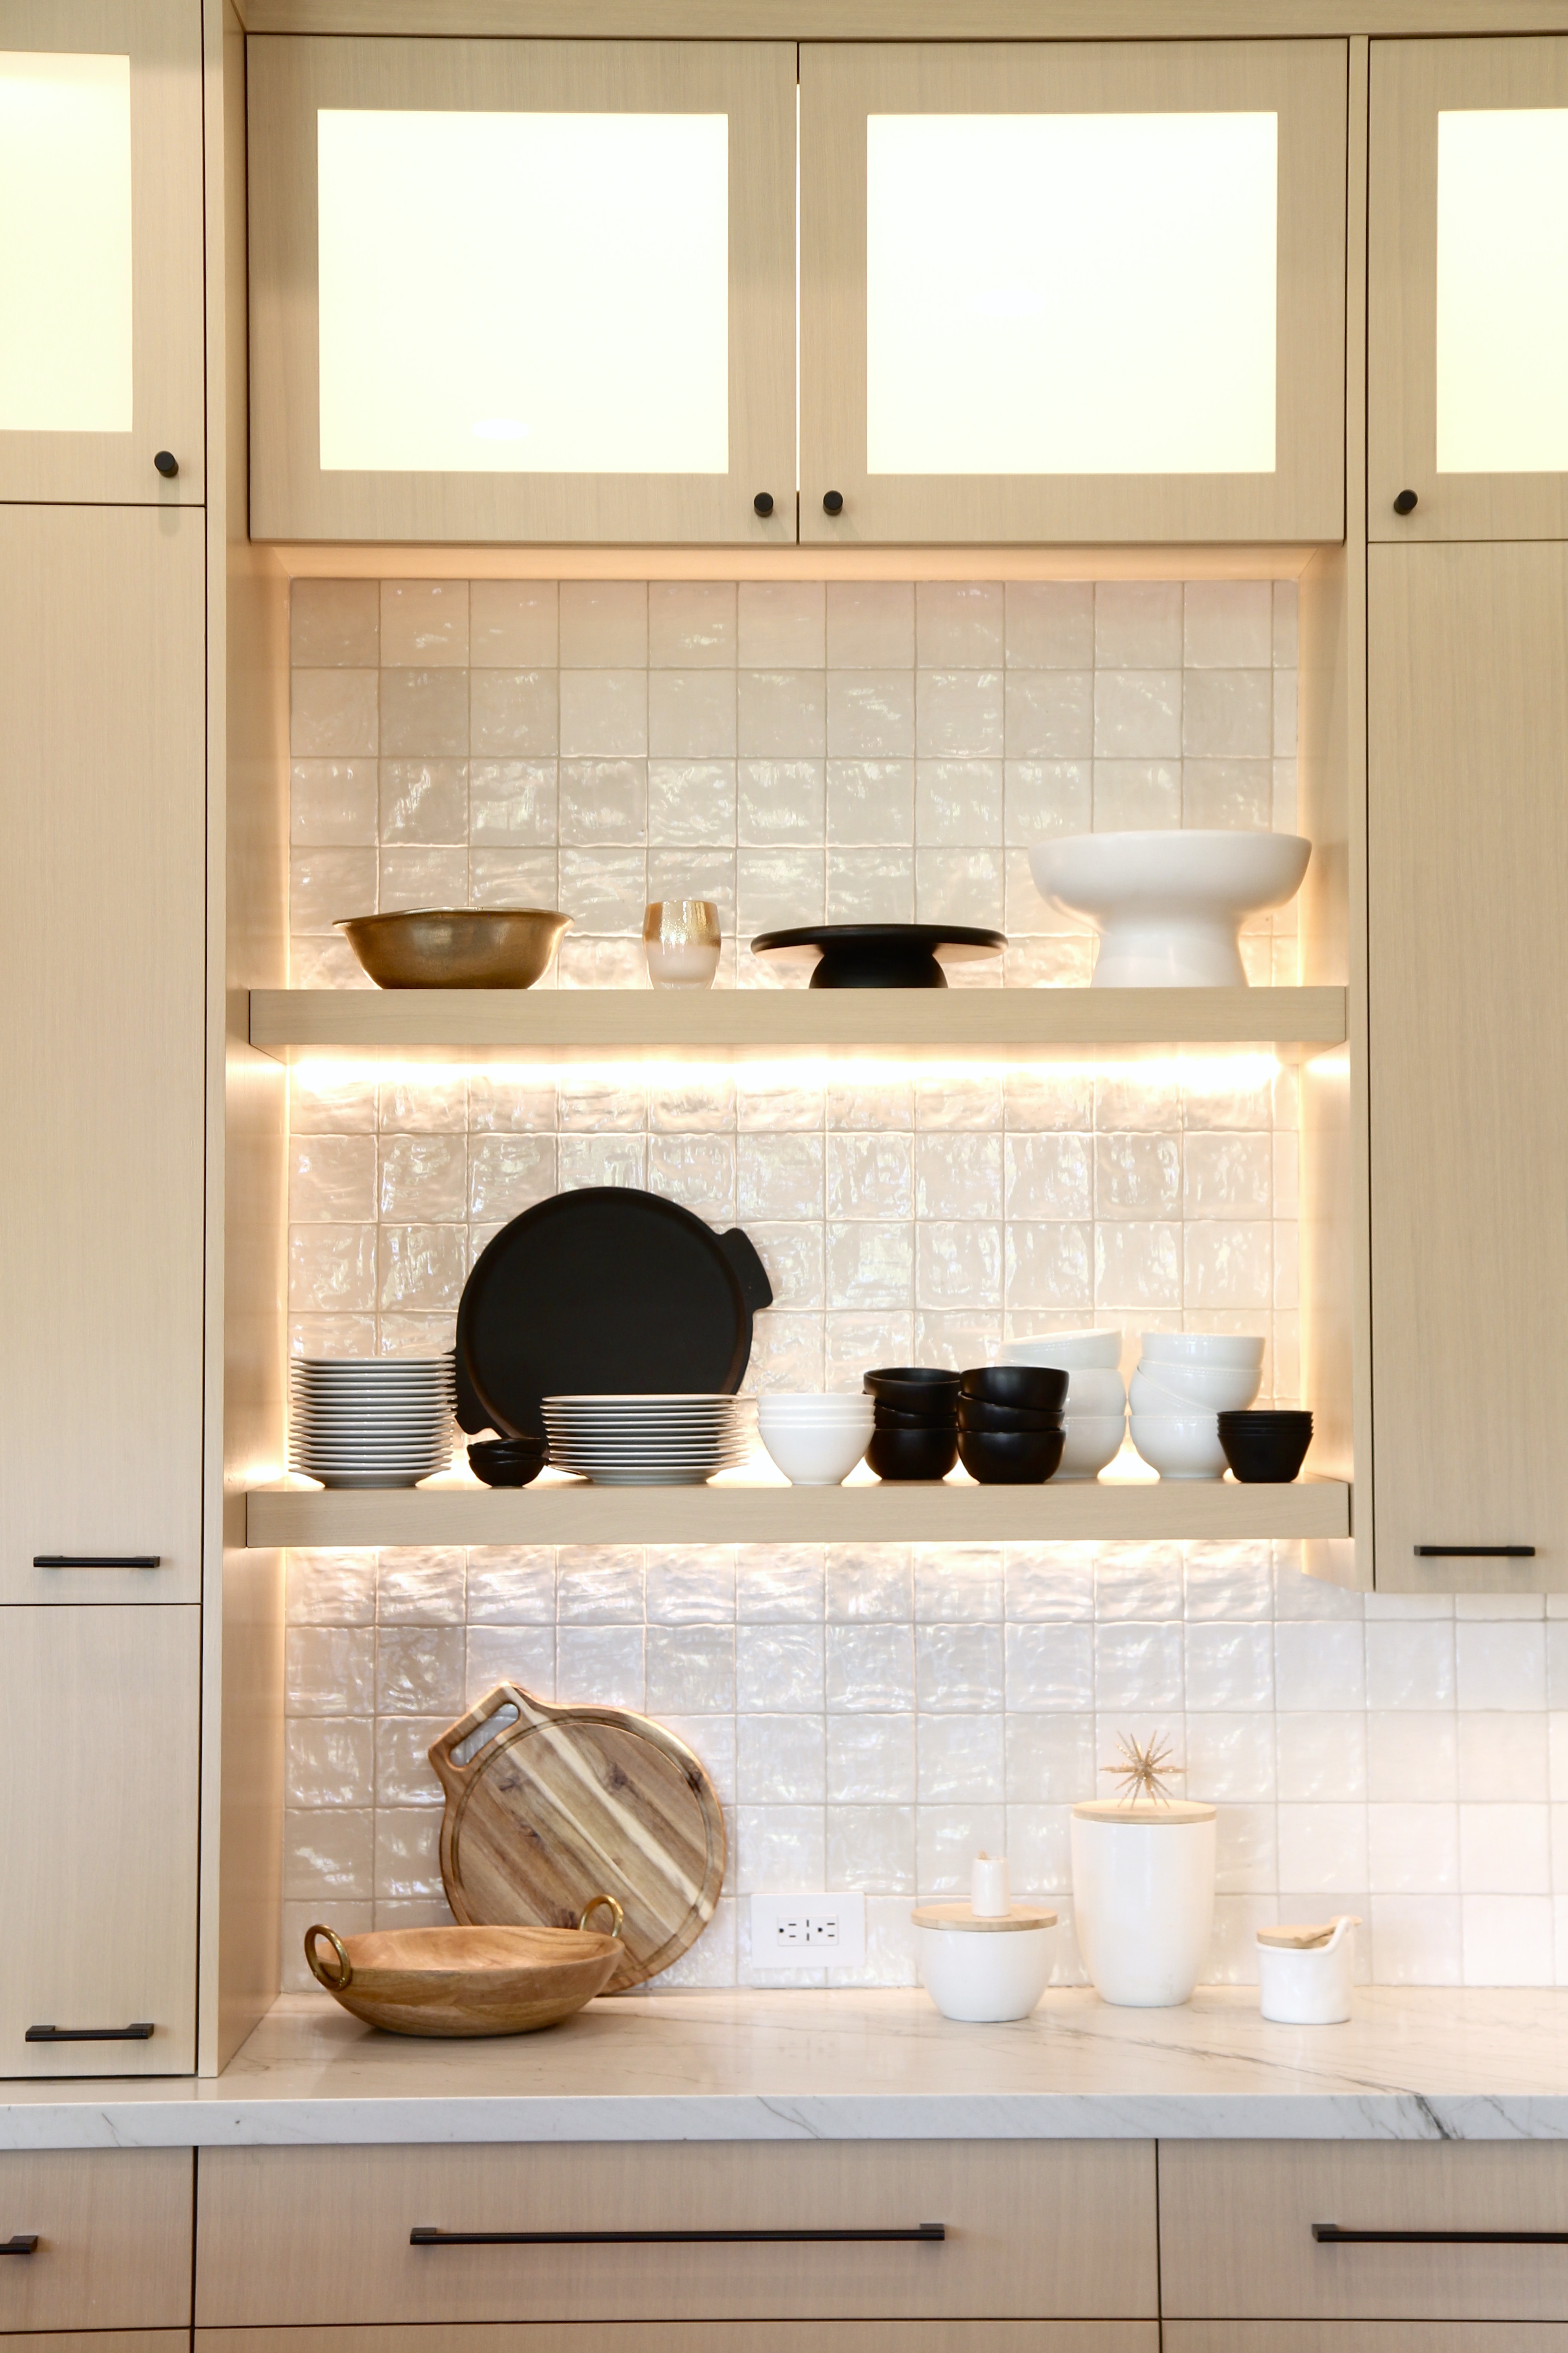
I like the look of open shelving and wanted some for the dishes that we use on a daily basis. They also break up the upper cabinets a bit. I love that I have easy access to these dishes and prep bowls. We had recessed lighting put in the shelves and it looks really pretty.
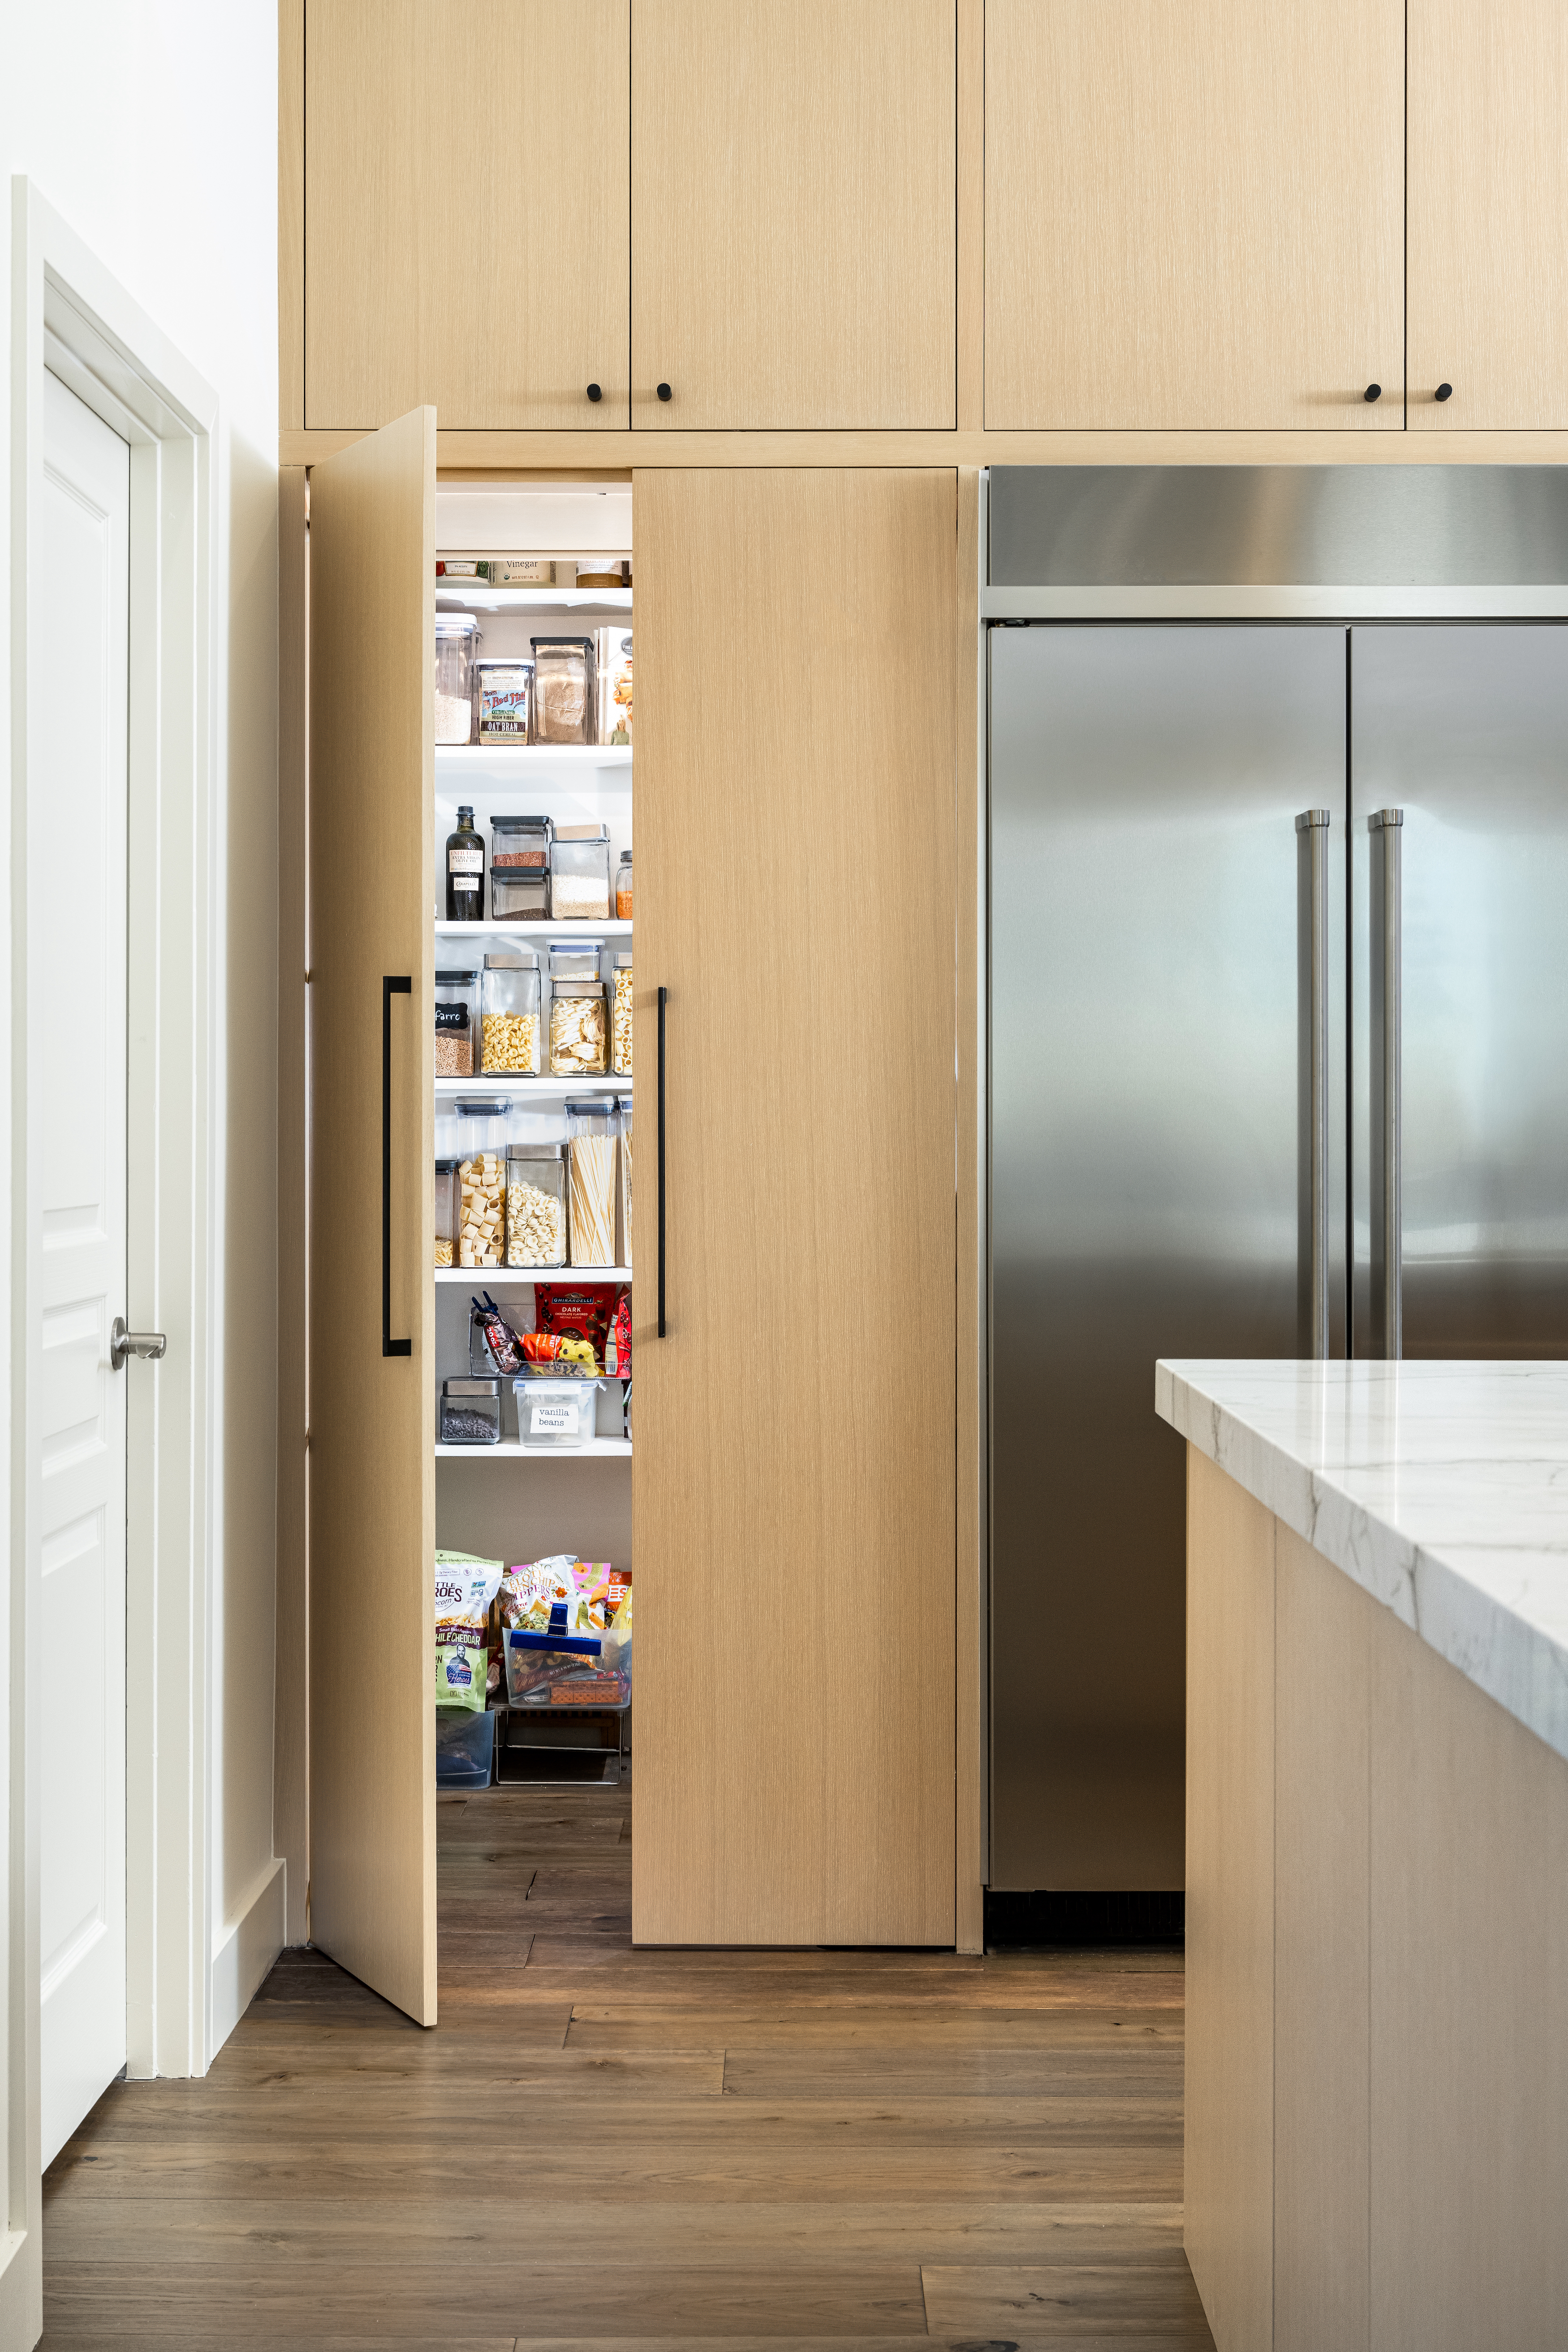
walk in pantry
photograph courtesy Provisuals Media
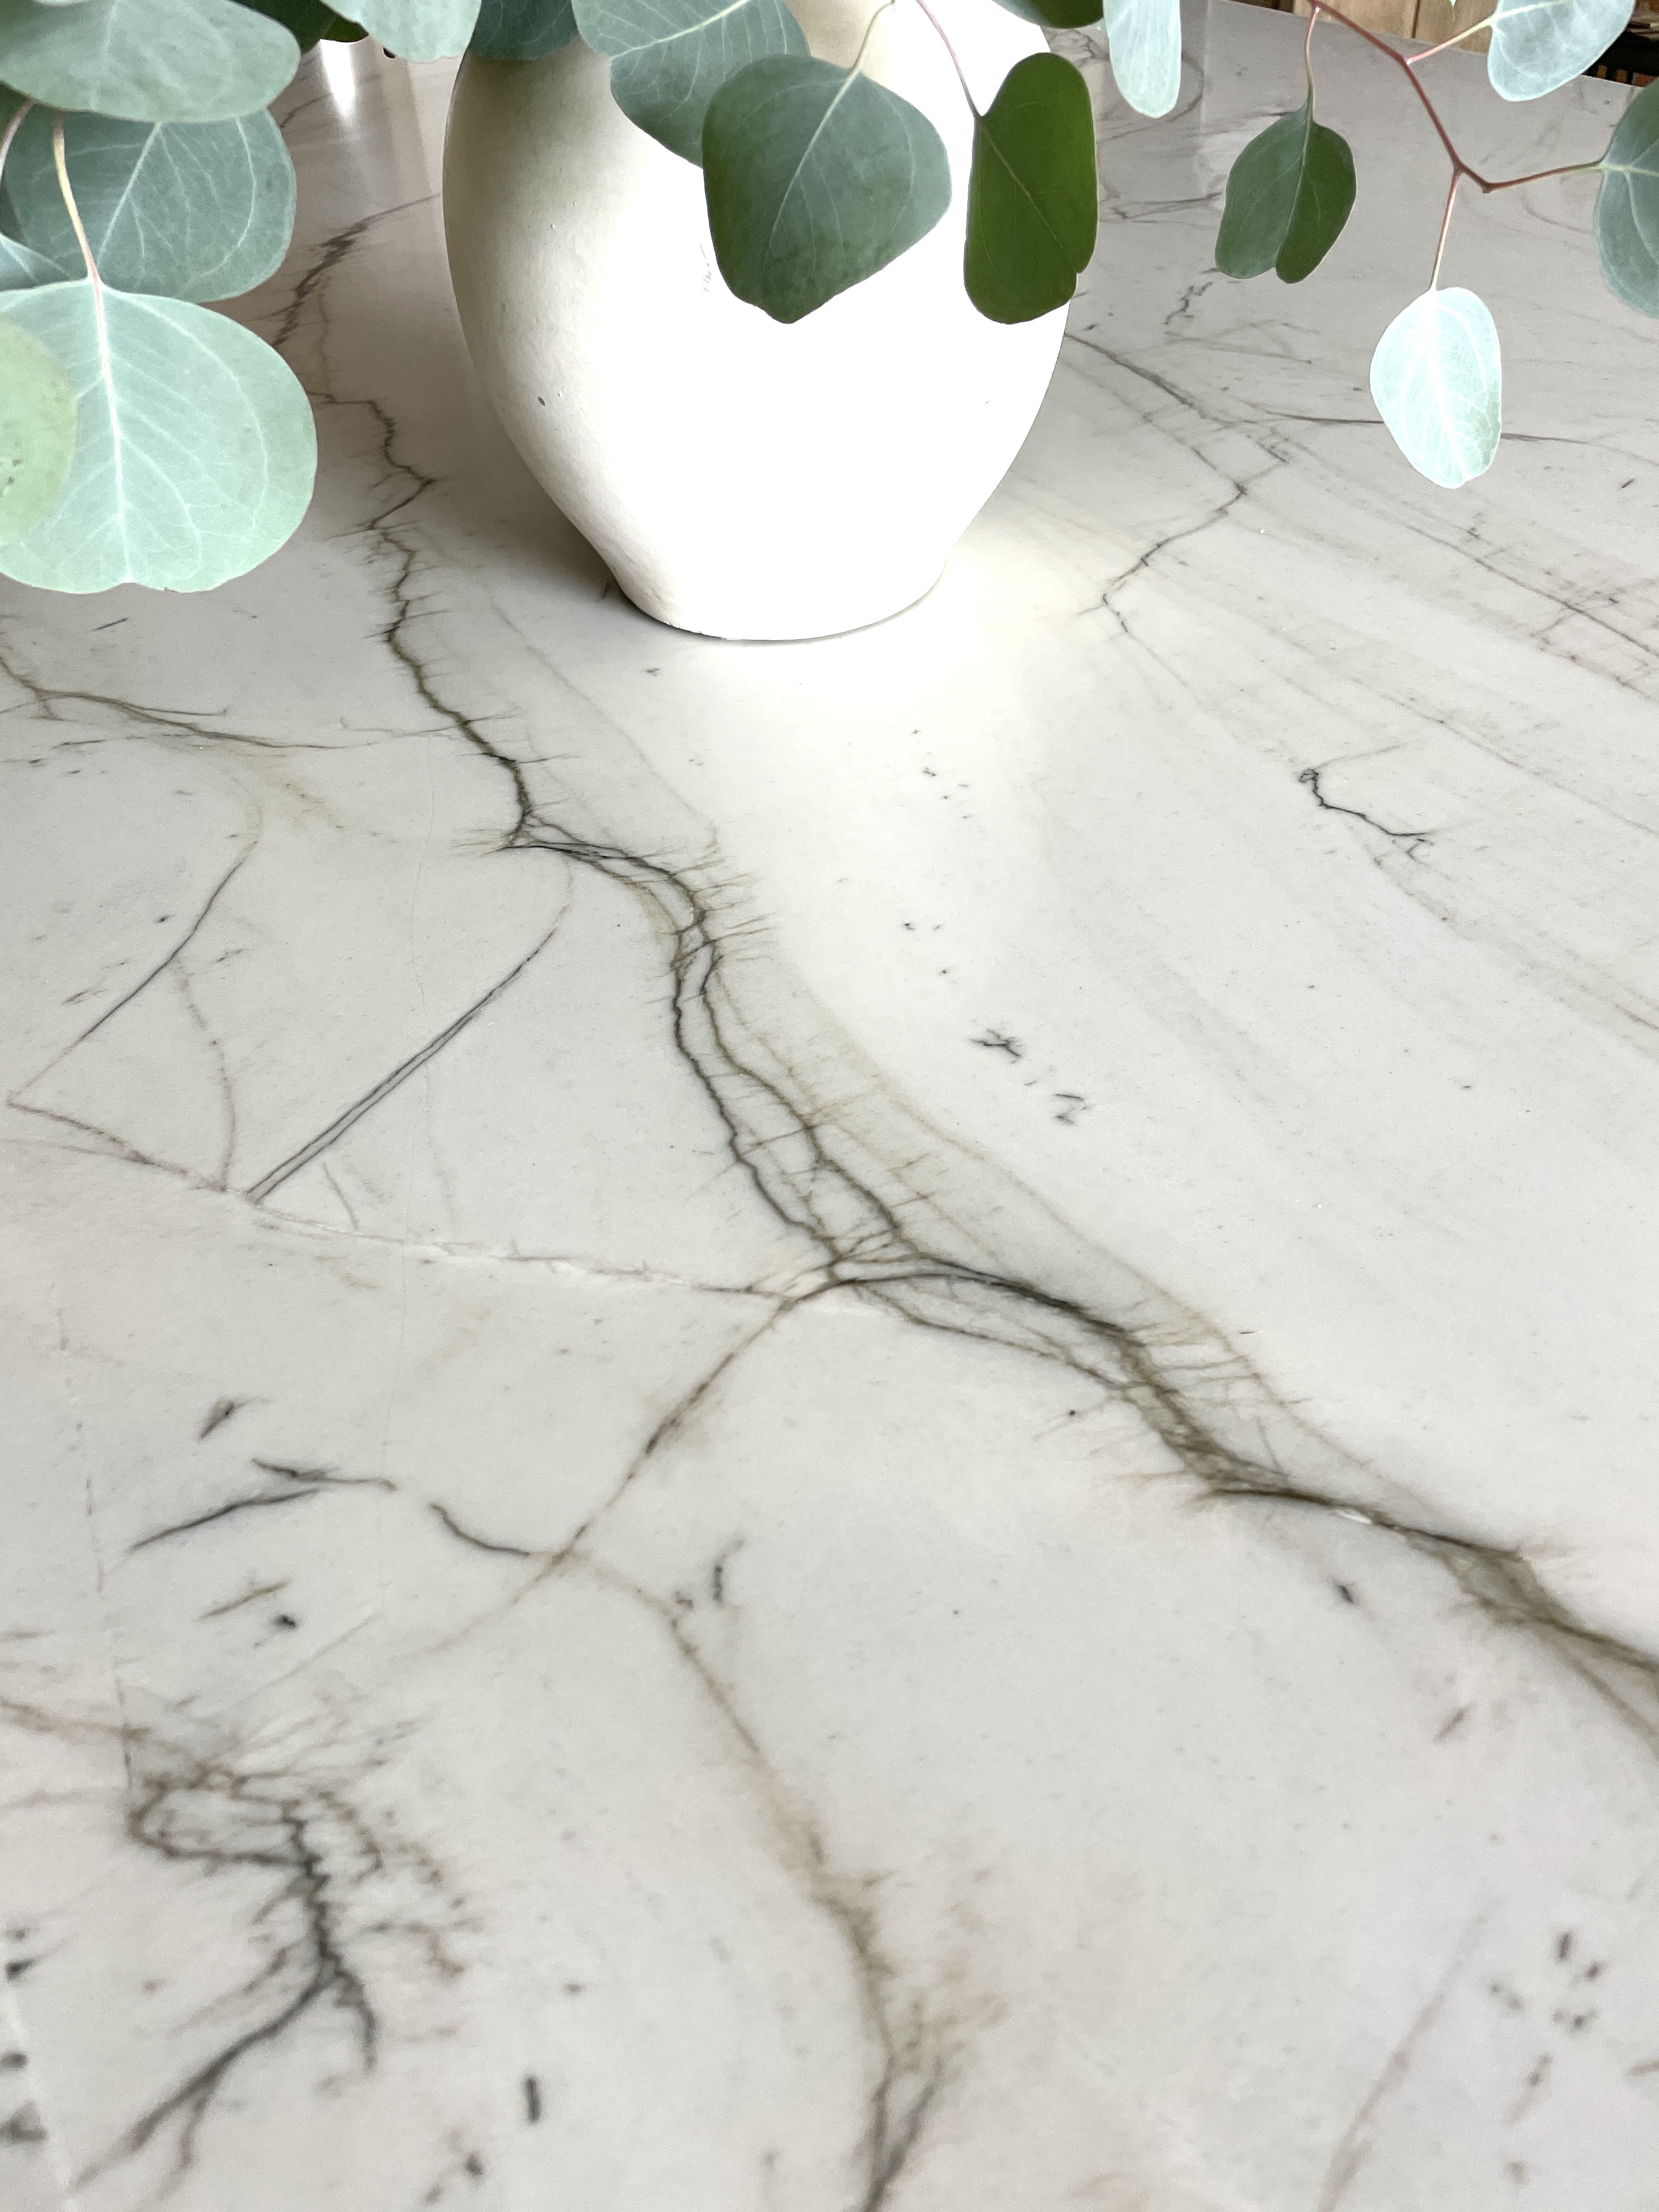
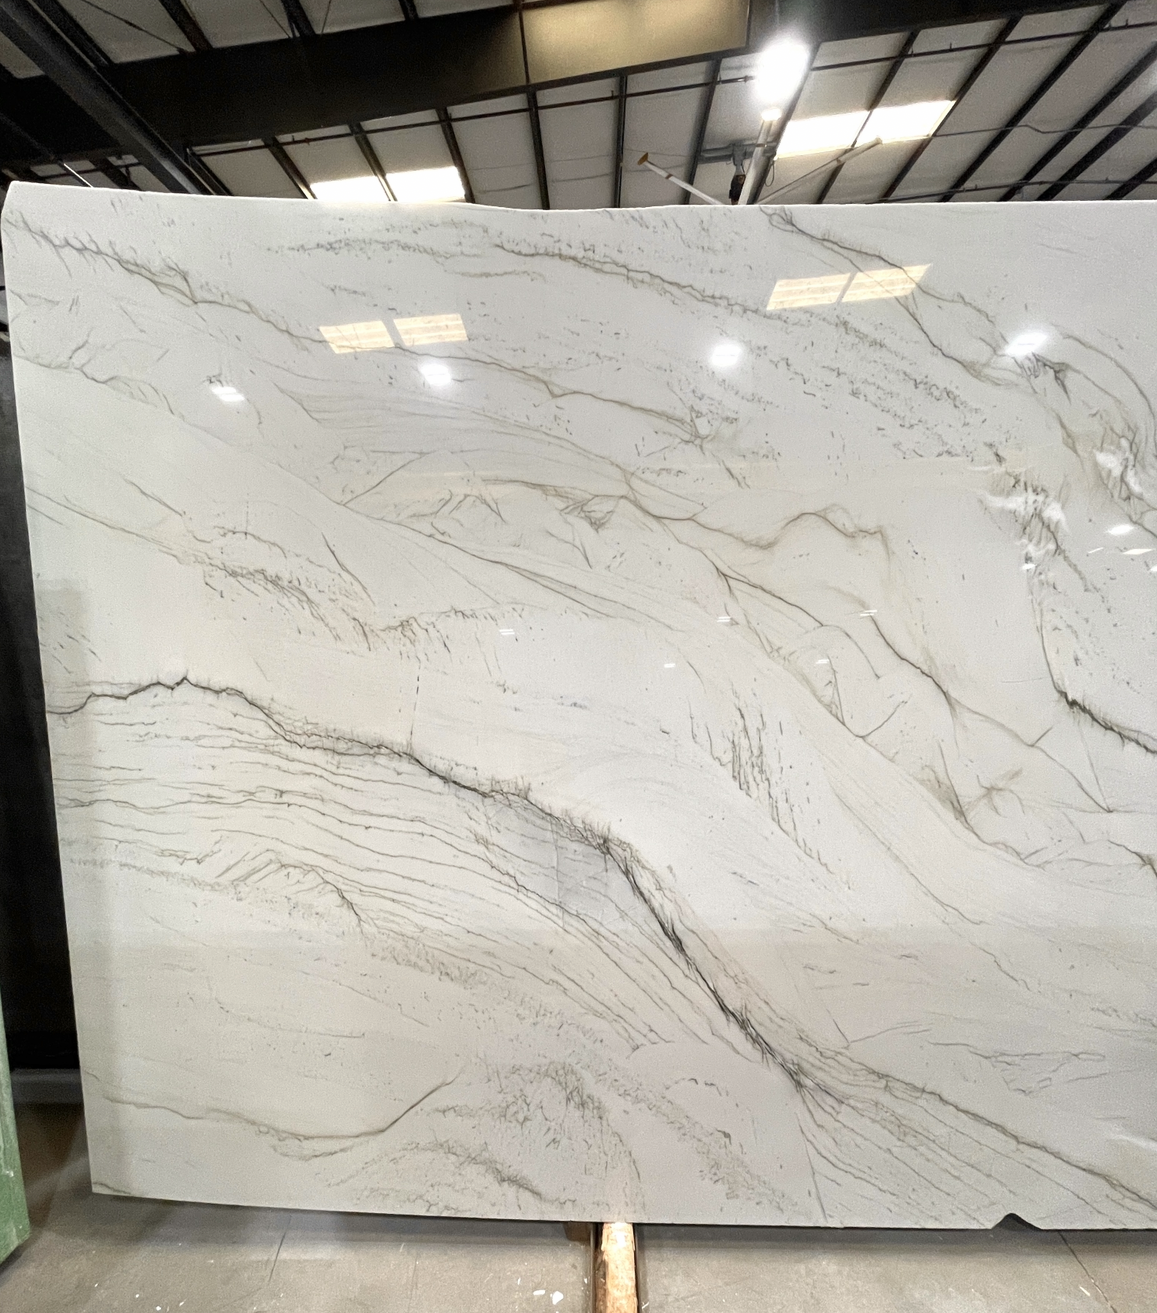
COUNTERTOPS: We wanted a natural quartzite in white with some veining. We ended up with some slabs we liked but they were polished and I ended up having them honed, which means they dulled them so they wouldn't be shiny - I'm not a fan of all those reflections you get from lights on polished countertops. Quartzite, unlike quartz, is a natural stone and you have to have it sealed. It's very durable.

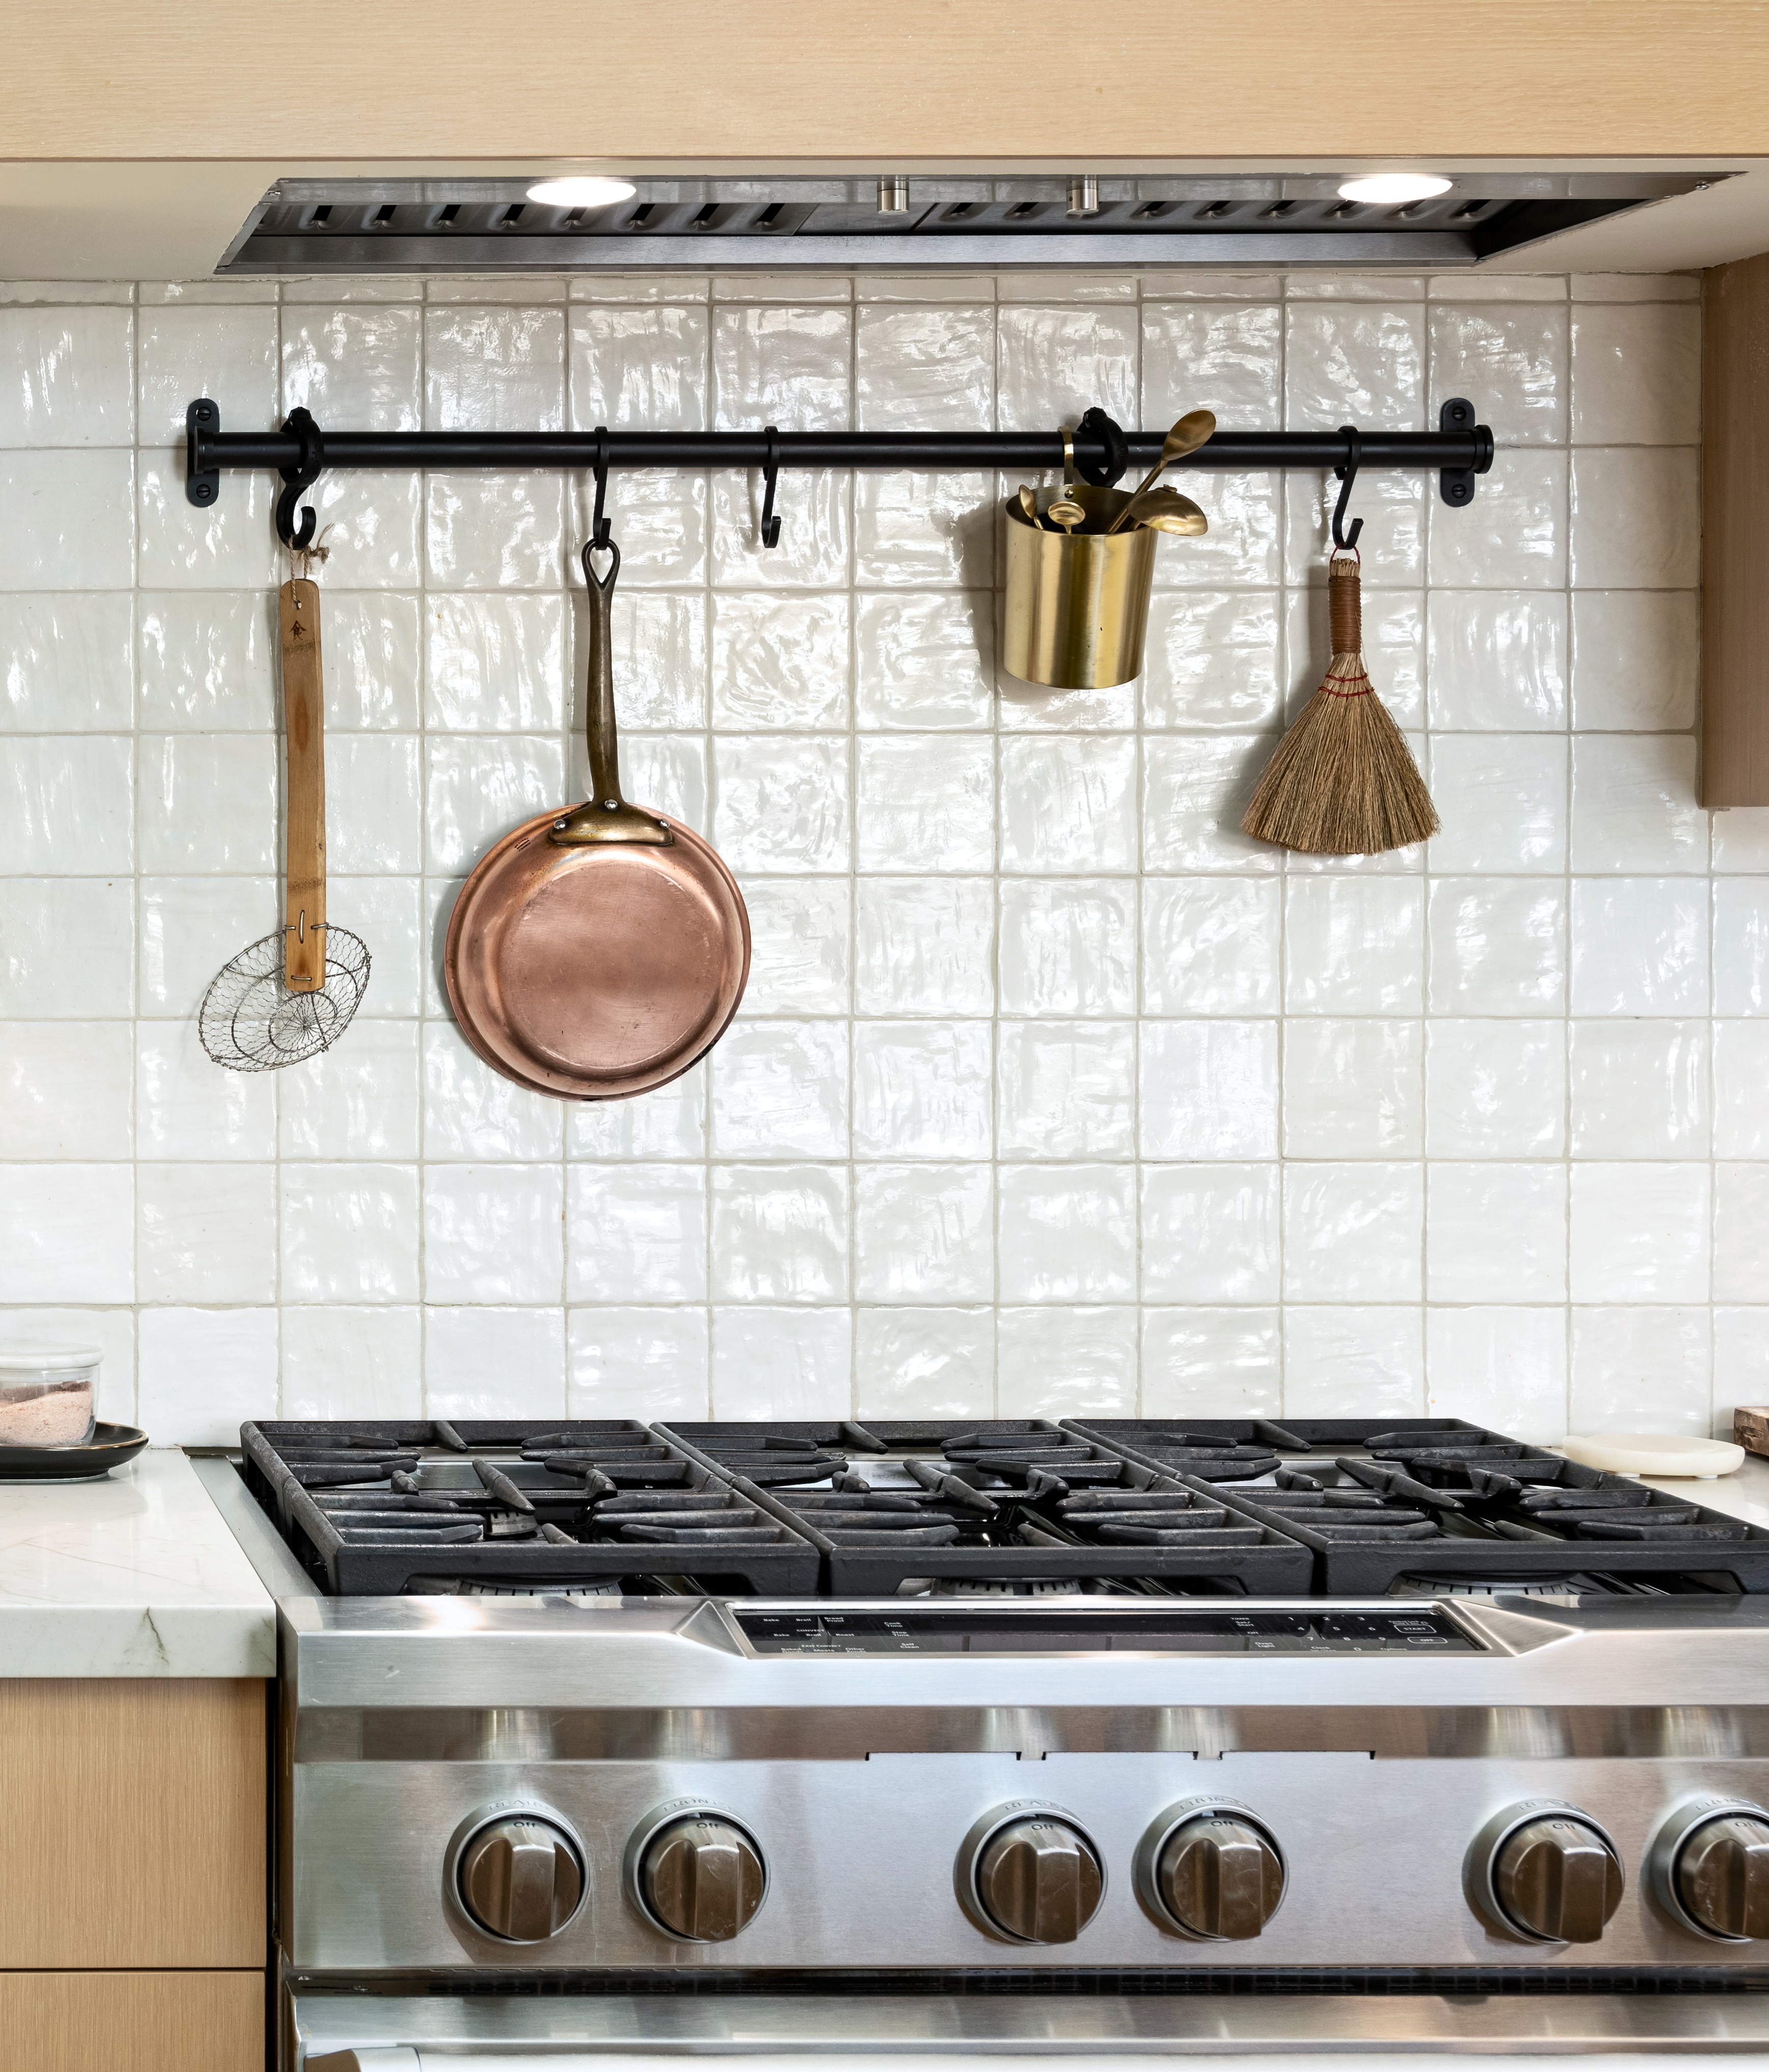
I had debated about whether to get a potfiller behind the stove or do a hang rail. I decided I really wanted the hang rail so I purchased this Brookside Hang Rail from Rejuvenation. I like being able to hang stuff I'm always grabbing from the rail plus I just really like the look.
Because I did not opt for a potfiller, I picked out a faucet that had a "potfiller" button. It has a high pressure option to fill pots quickly. I wanted a single hole faucet with a pull down spray, a Touchless feature and a very clean modern look with a big gooseneck style. I picked out the Kohler Crue Touchless Pull-Down Kitchen faucet. The faucet is beautiful.
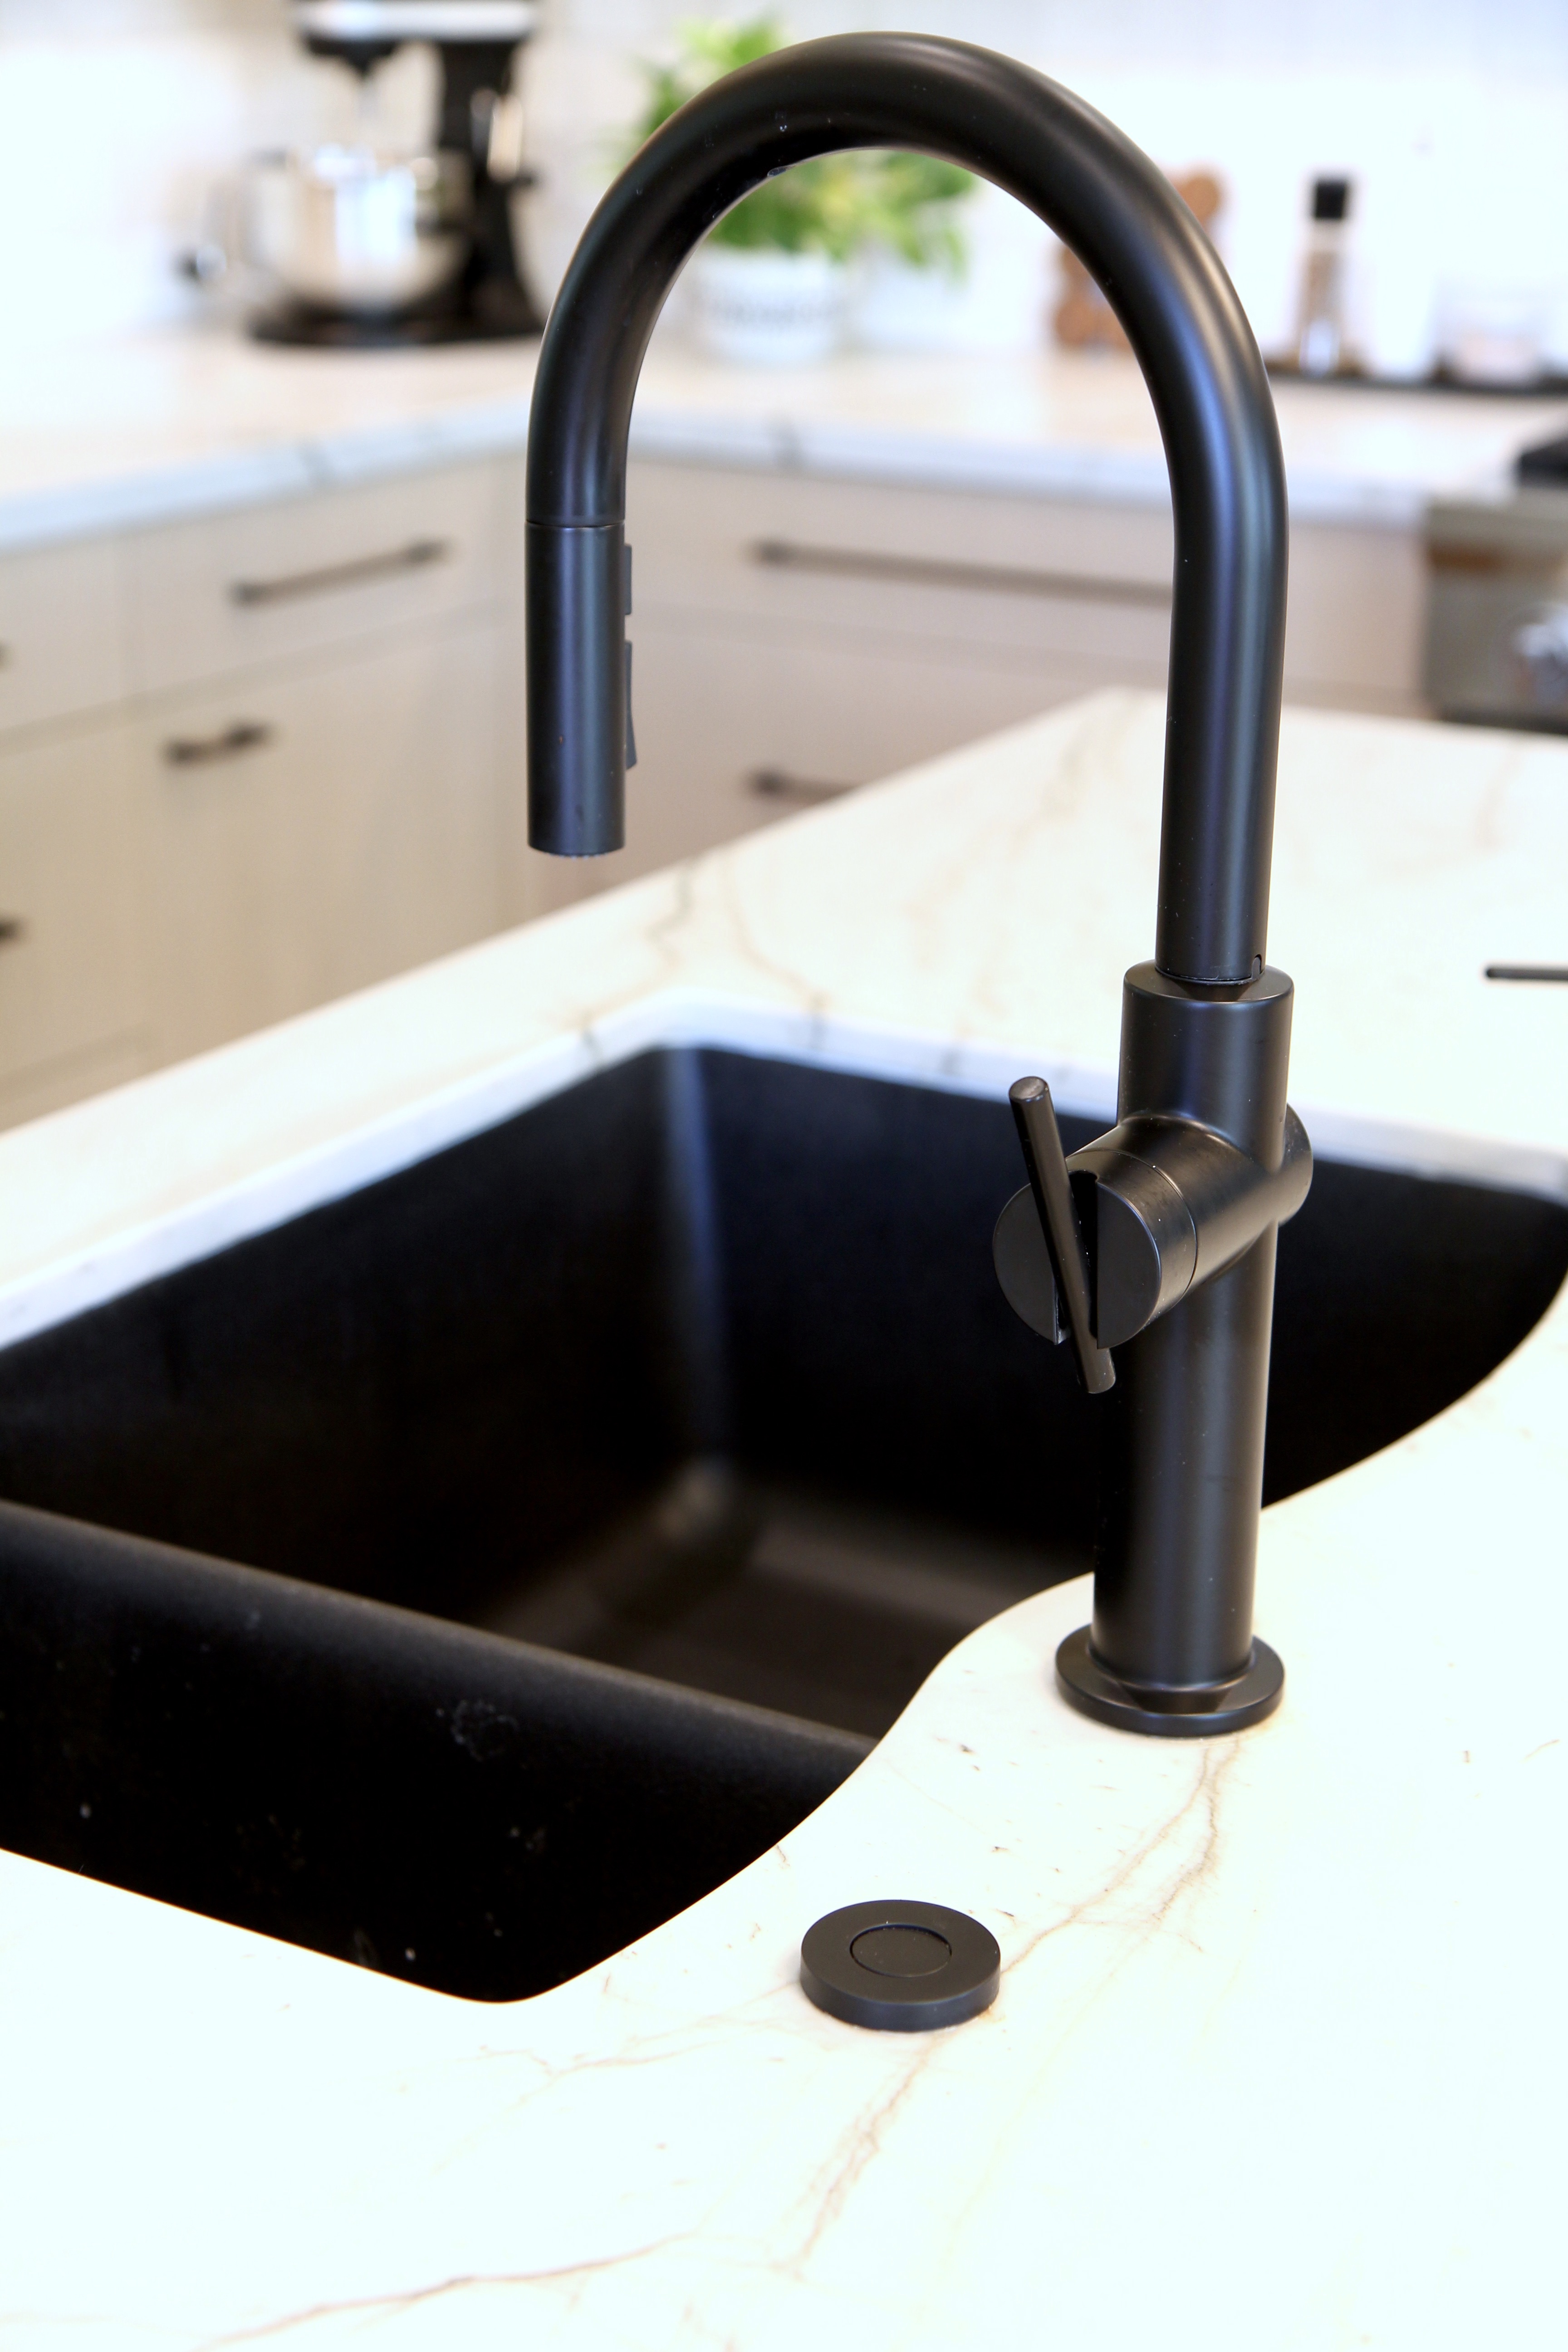
I had very specific ideas about the kitchen sink - it had to be an undermount and I really didn't want a single basin sink. As popular as these are, they are a food safety problem. If you handle raw meat or anything that's possibly contaminated in the sink, you will contaminate the whole sink. We have a large single basin sink at the family cottage and I don't like it. When people are scraping their dishes into the disposal and you're trying to wash dishes, it makes a mess of the whole sink. In my old house in Michigan, I had a Blanco double sink with a very unique configuration - one large basin which was big enough to place a whole sheet pan in and one very small basin for the disposal - just enough that you can make a mess in there and not contaminate the main basin. I looked for the kind of sink I had in Michigan and amazingly, I think Blanco is still the only manufacturer that makes this configuration. So I purchased this exact sink again, only the material now is even nicer and it comes in lots of colors. It's the Blanco Diamond 1-1/2 Dual Mount Silgranit Sink. The Silgranit material doesn't scratch, chip or discolor. It's great.
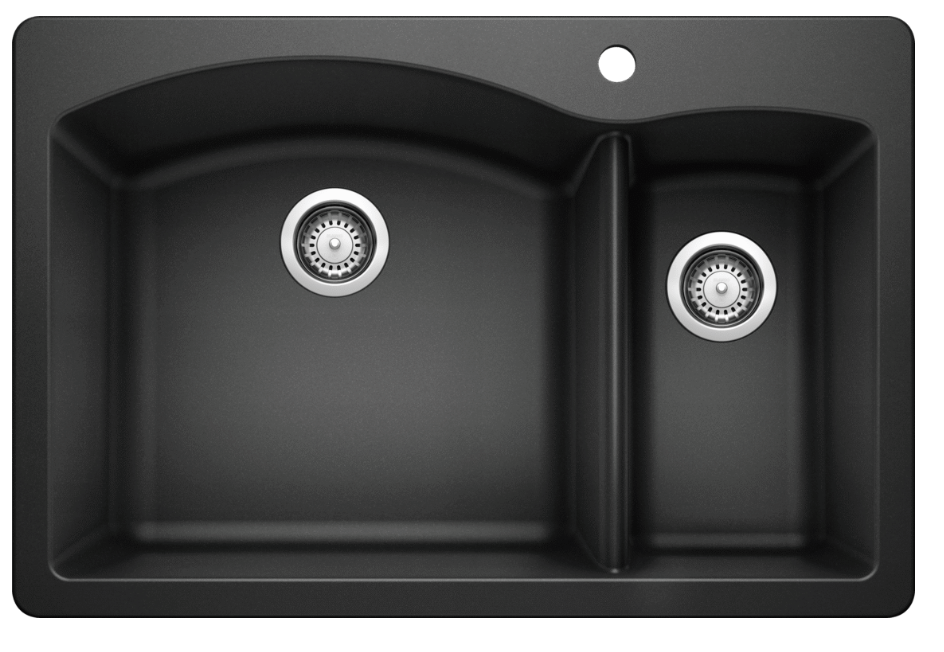
The left basin is large enough to hold a regular size sheet pan
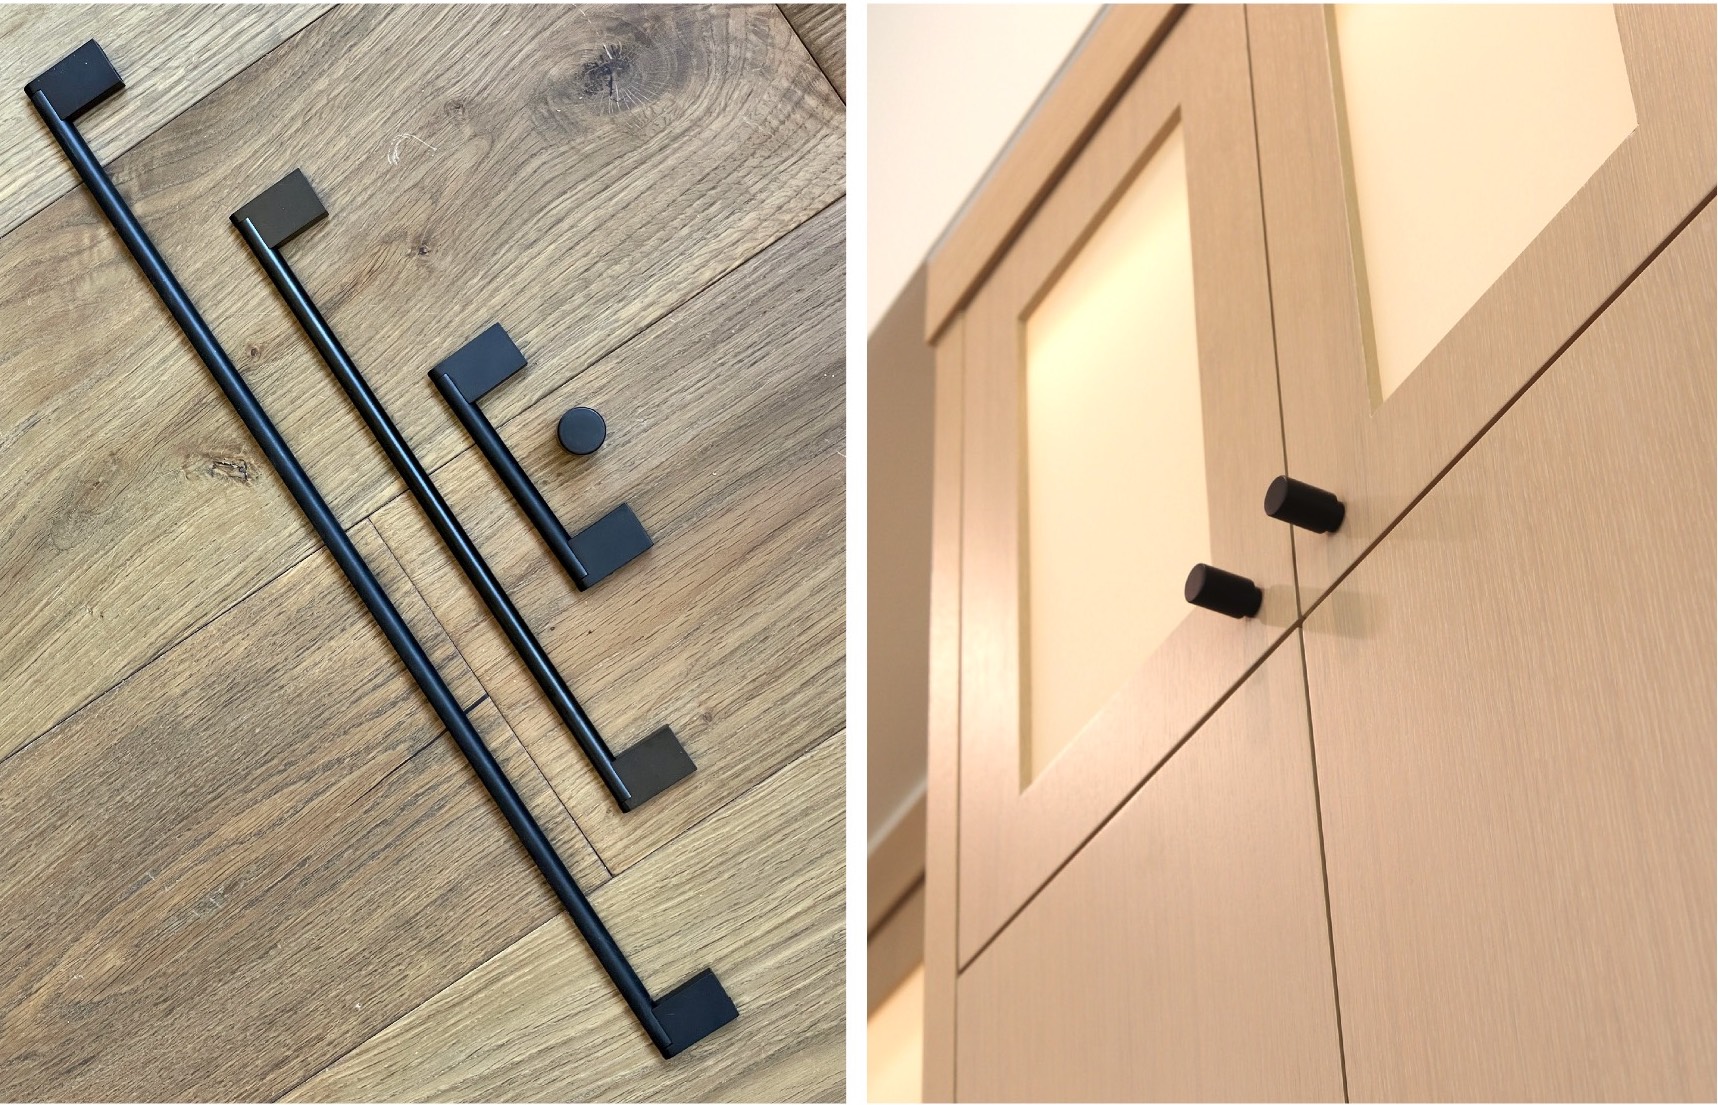
I wanted modern looking pulls in the kitchen that were easy to clean and you wouldn't get your clothes snagged on them. I knew I wanted really long pulls on the large drawers. I opted for these sleek pulls from Top Knobs Princetonian Collection. I got the 18-7/8" for the wide drawers and the 3-3/4" for the smaller pulls. I also had the smaller pulls hung horizontally instead of vertically, which I thought looked more modern. I wanted something with a very small profile for the very upper cabinets and these Schwinn round knobs were just the look I wanted.
We had the cabinetry people build slots under the island for storage of devices like iPads, laptops and such. When you have all the kids home and everyone has a couple of devices that takes up a lot of real estate on the island, so this was a great solution to that. I also had USB-C plugs from Legrand installed on either end for easy charging.
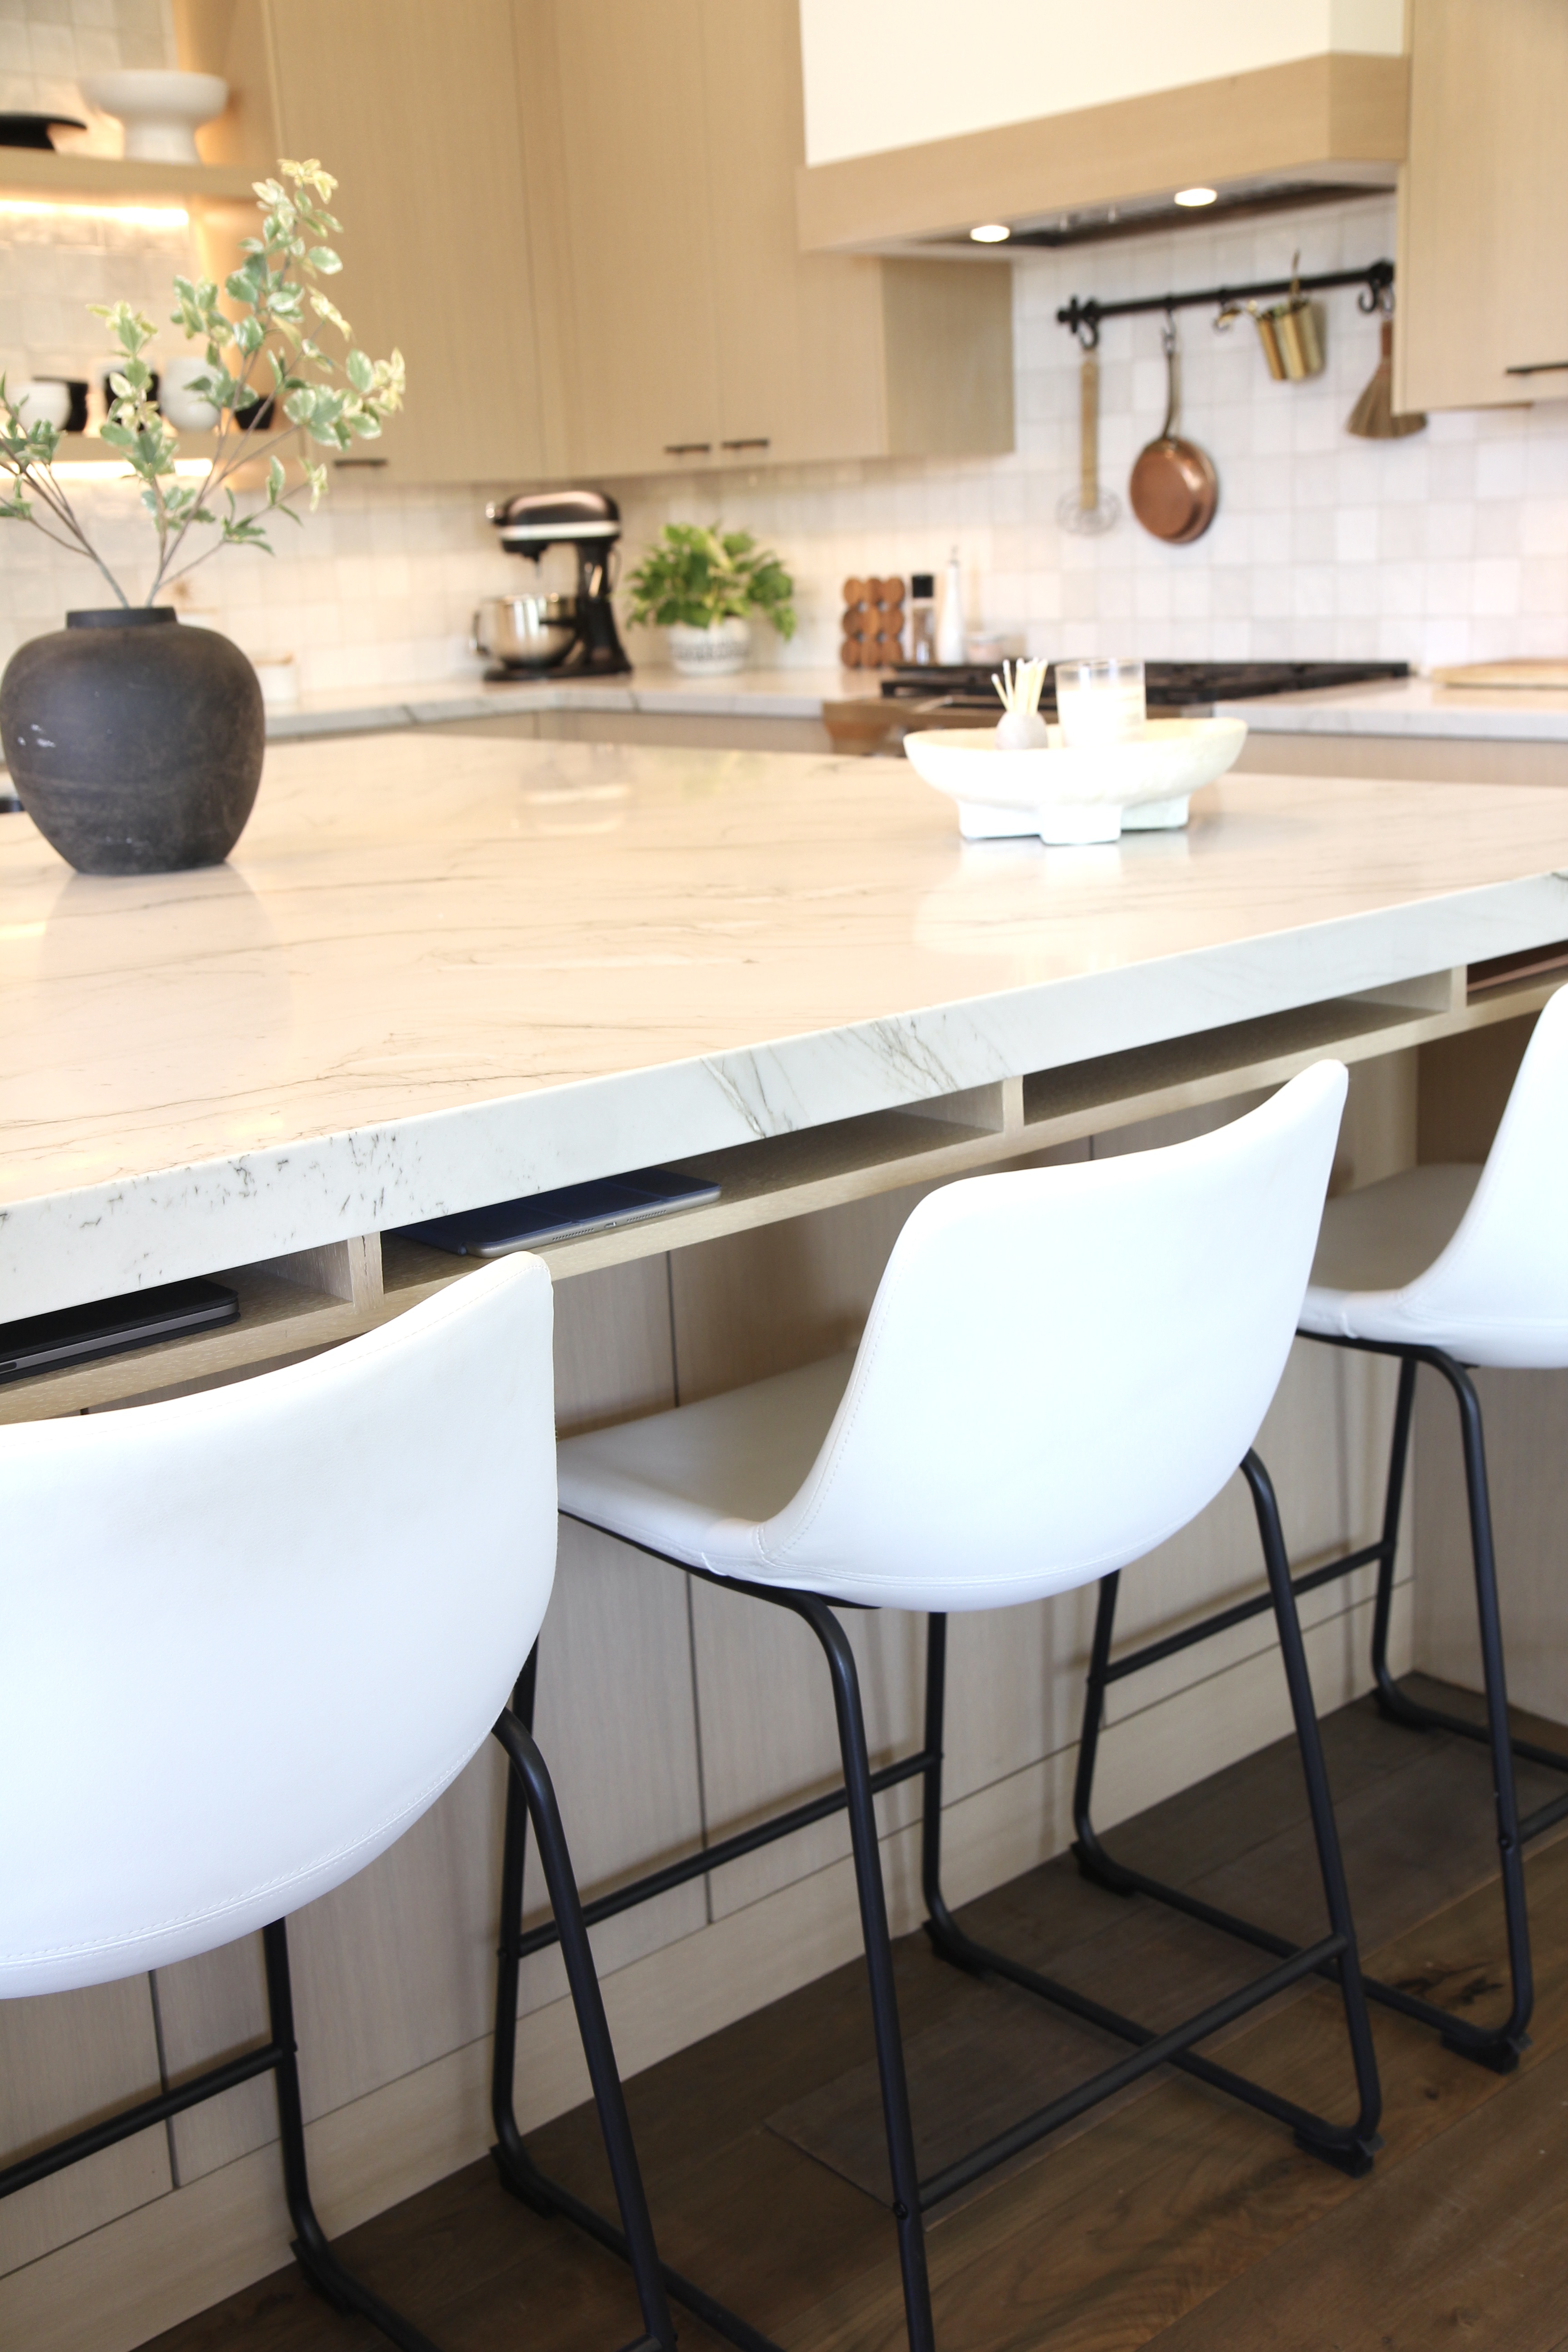
slots for laptops and other devices
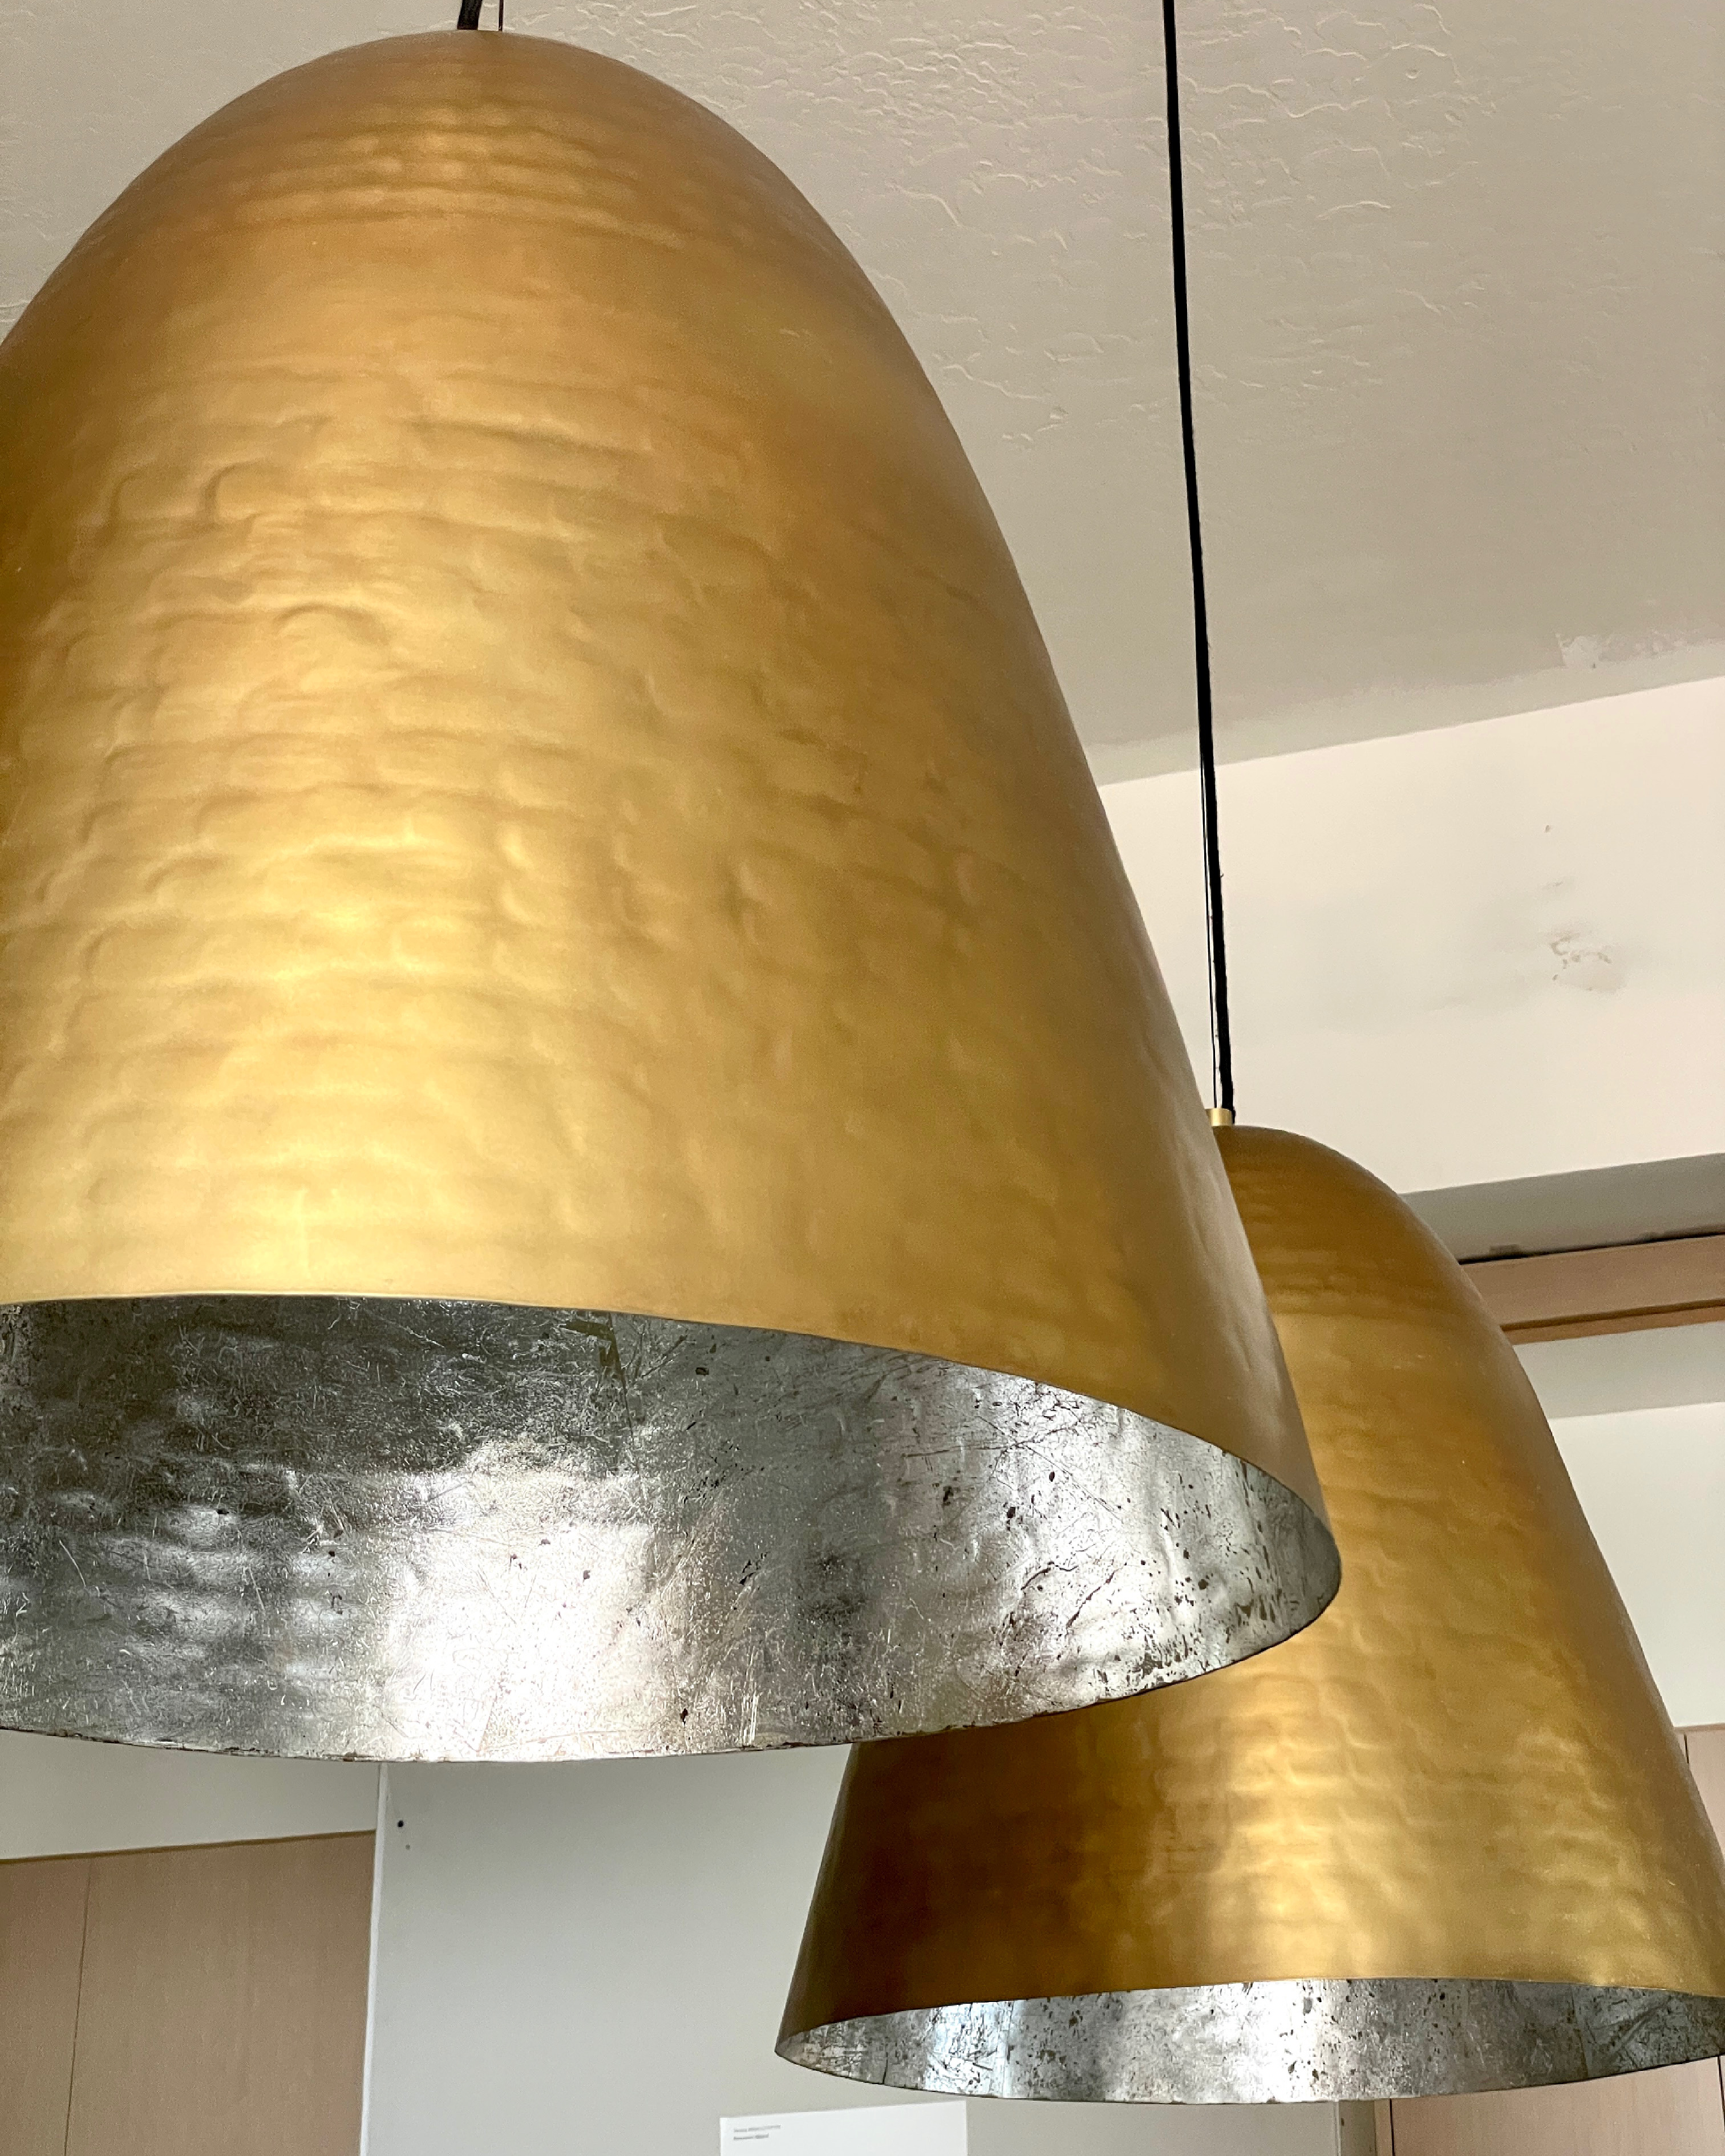
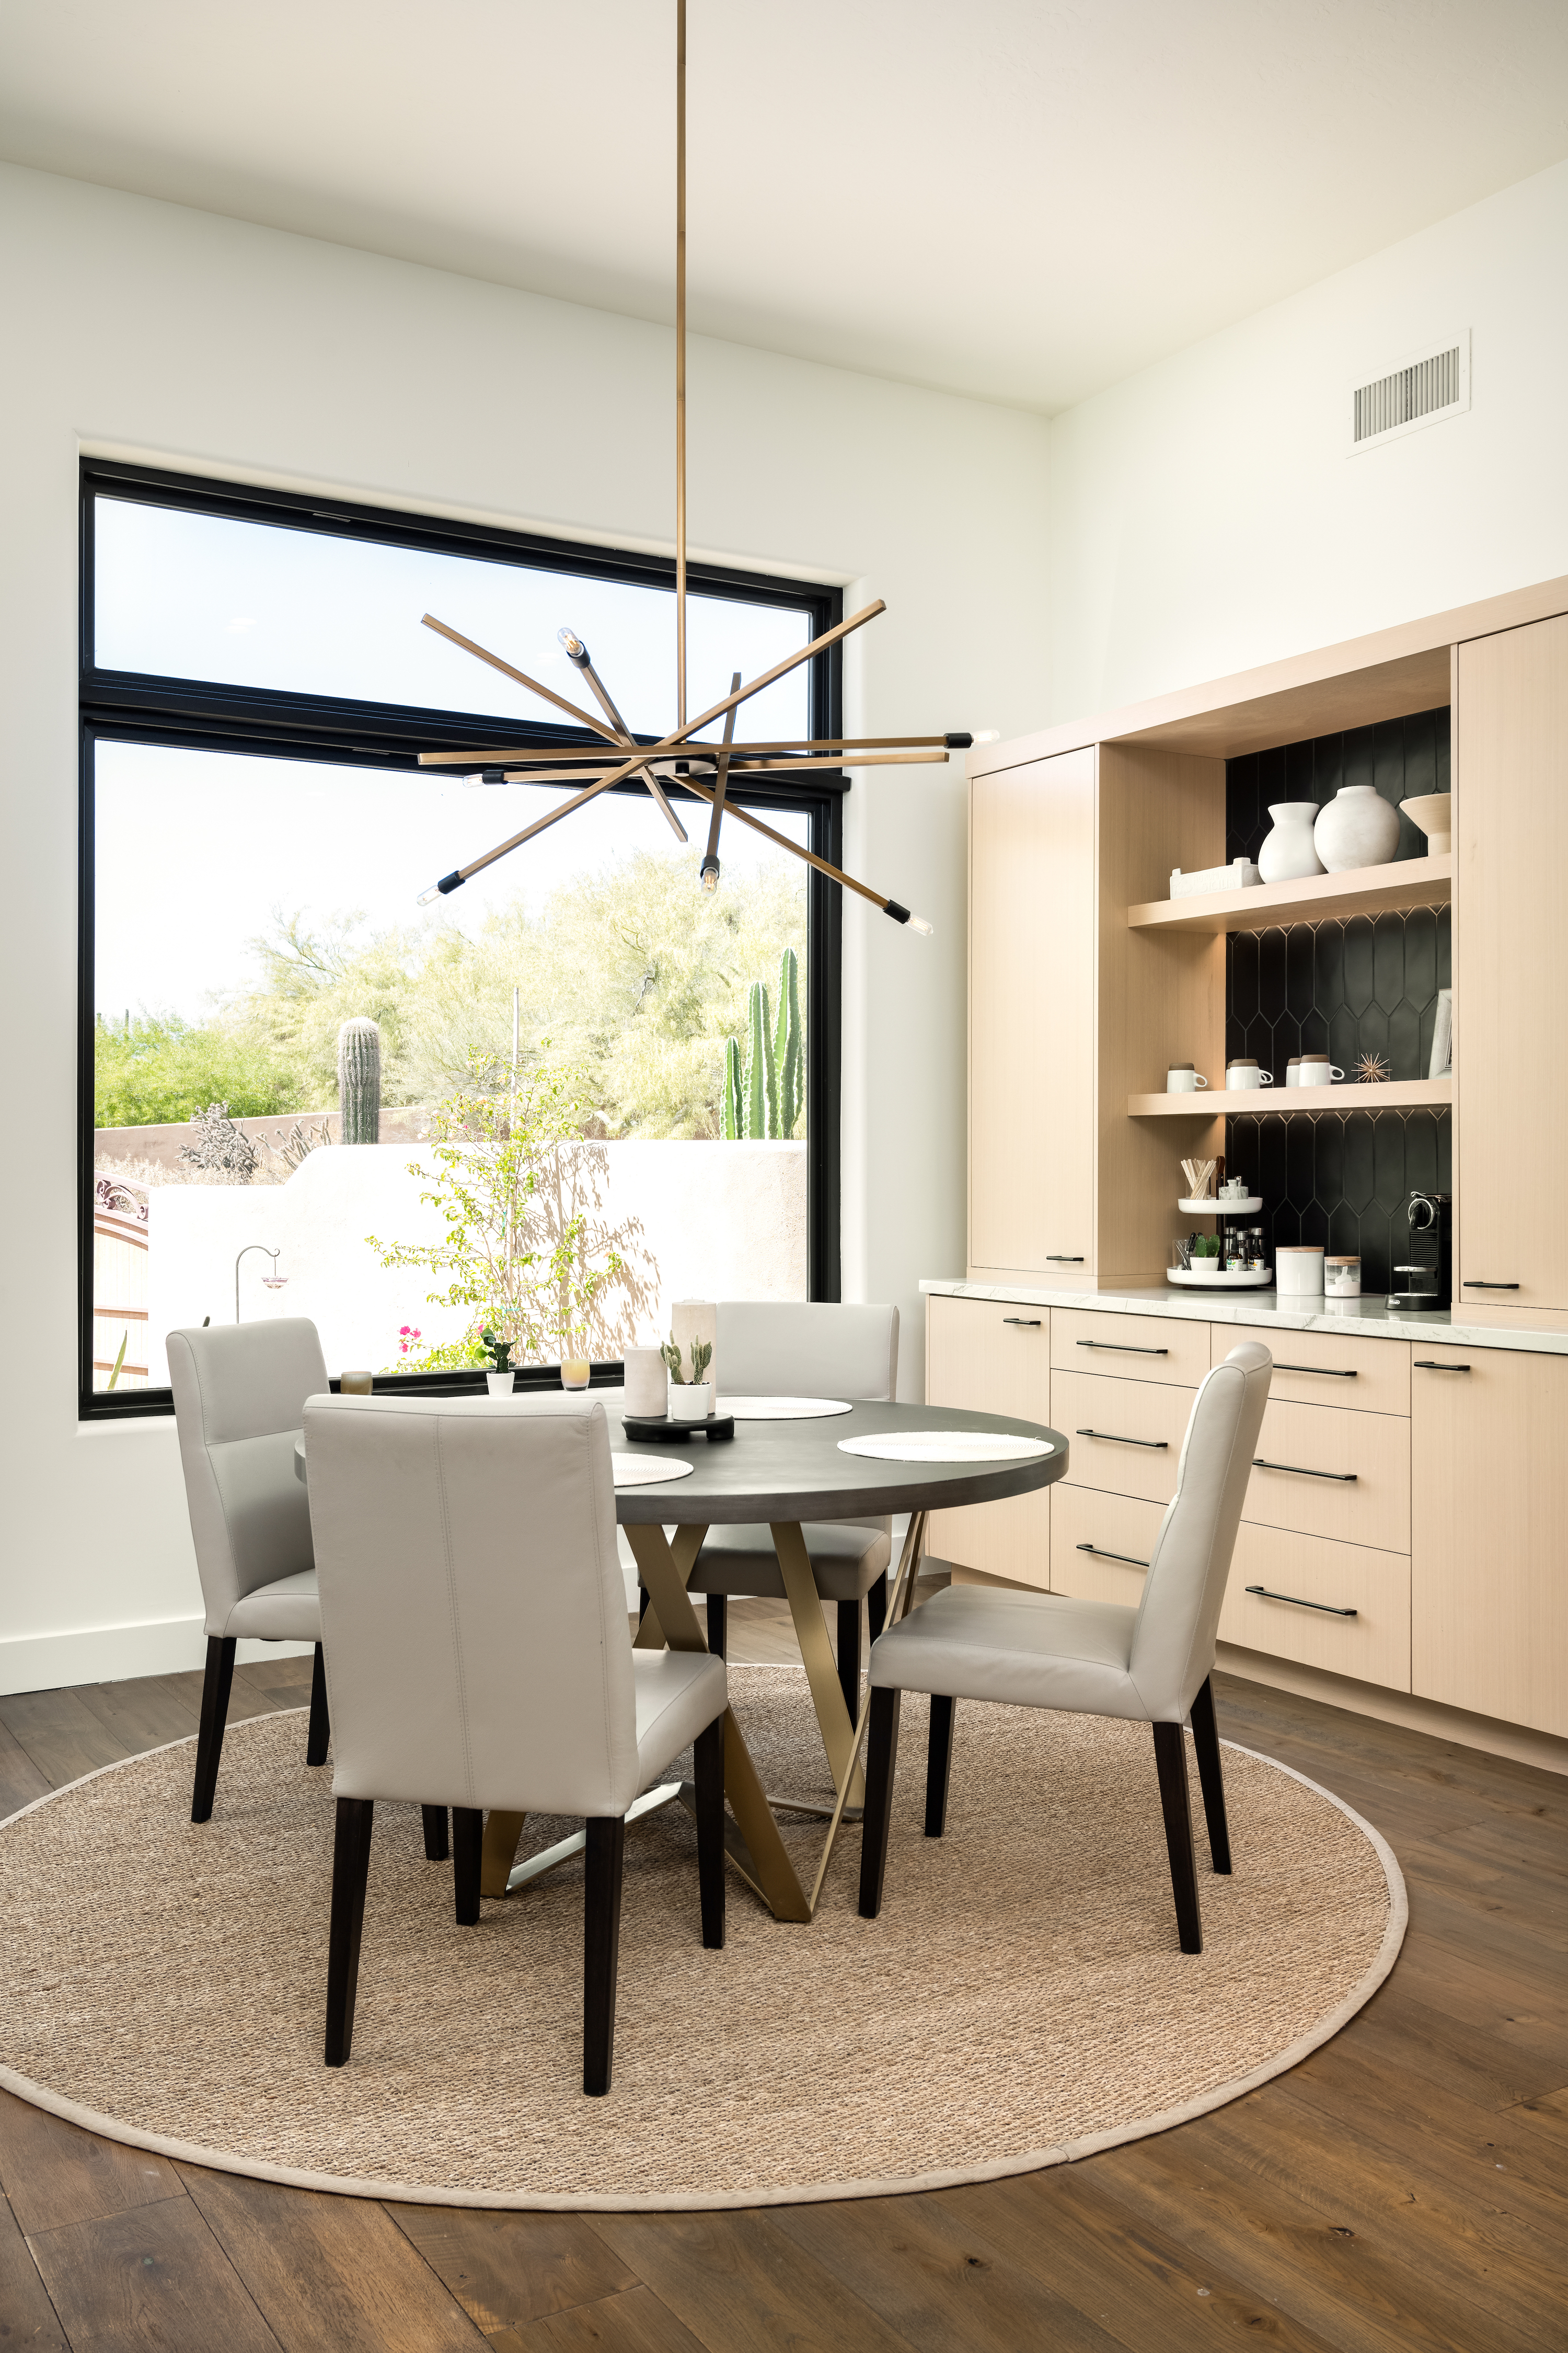
The pendants over the island had to be BIG because it was such a big space, with 12 foot ceilings. These brass pendants are from CB2.
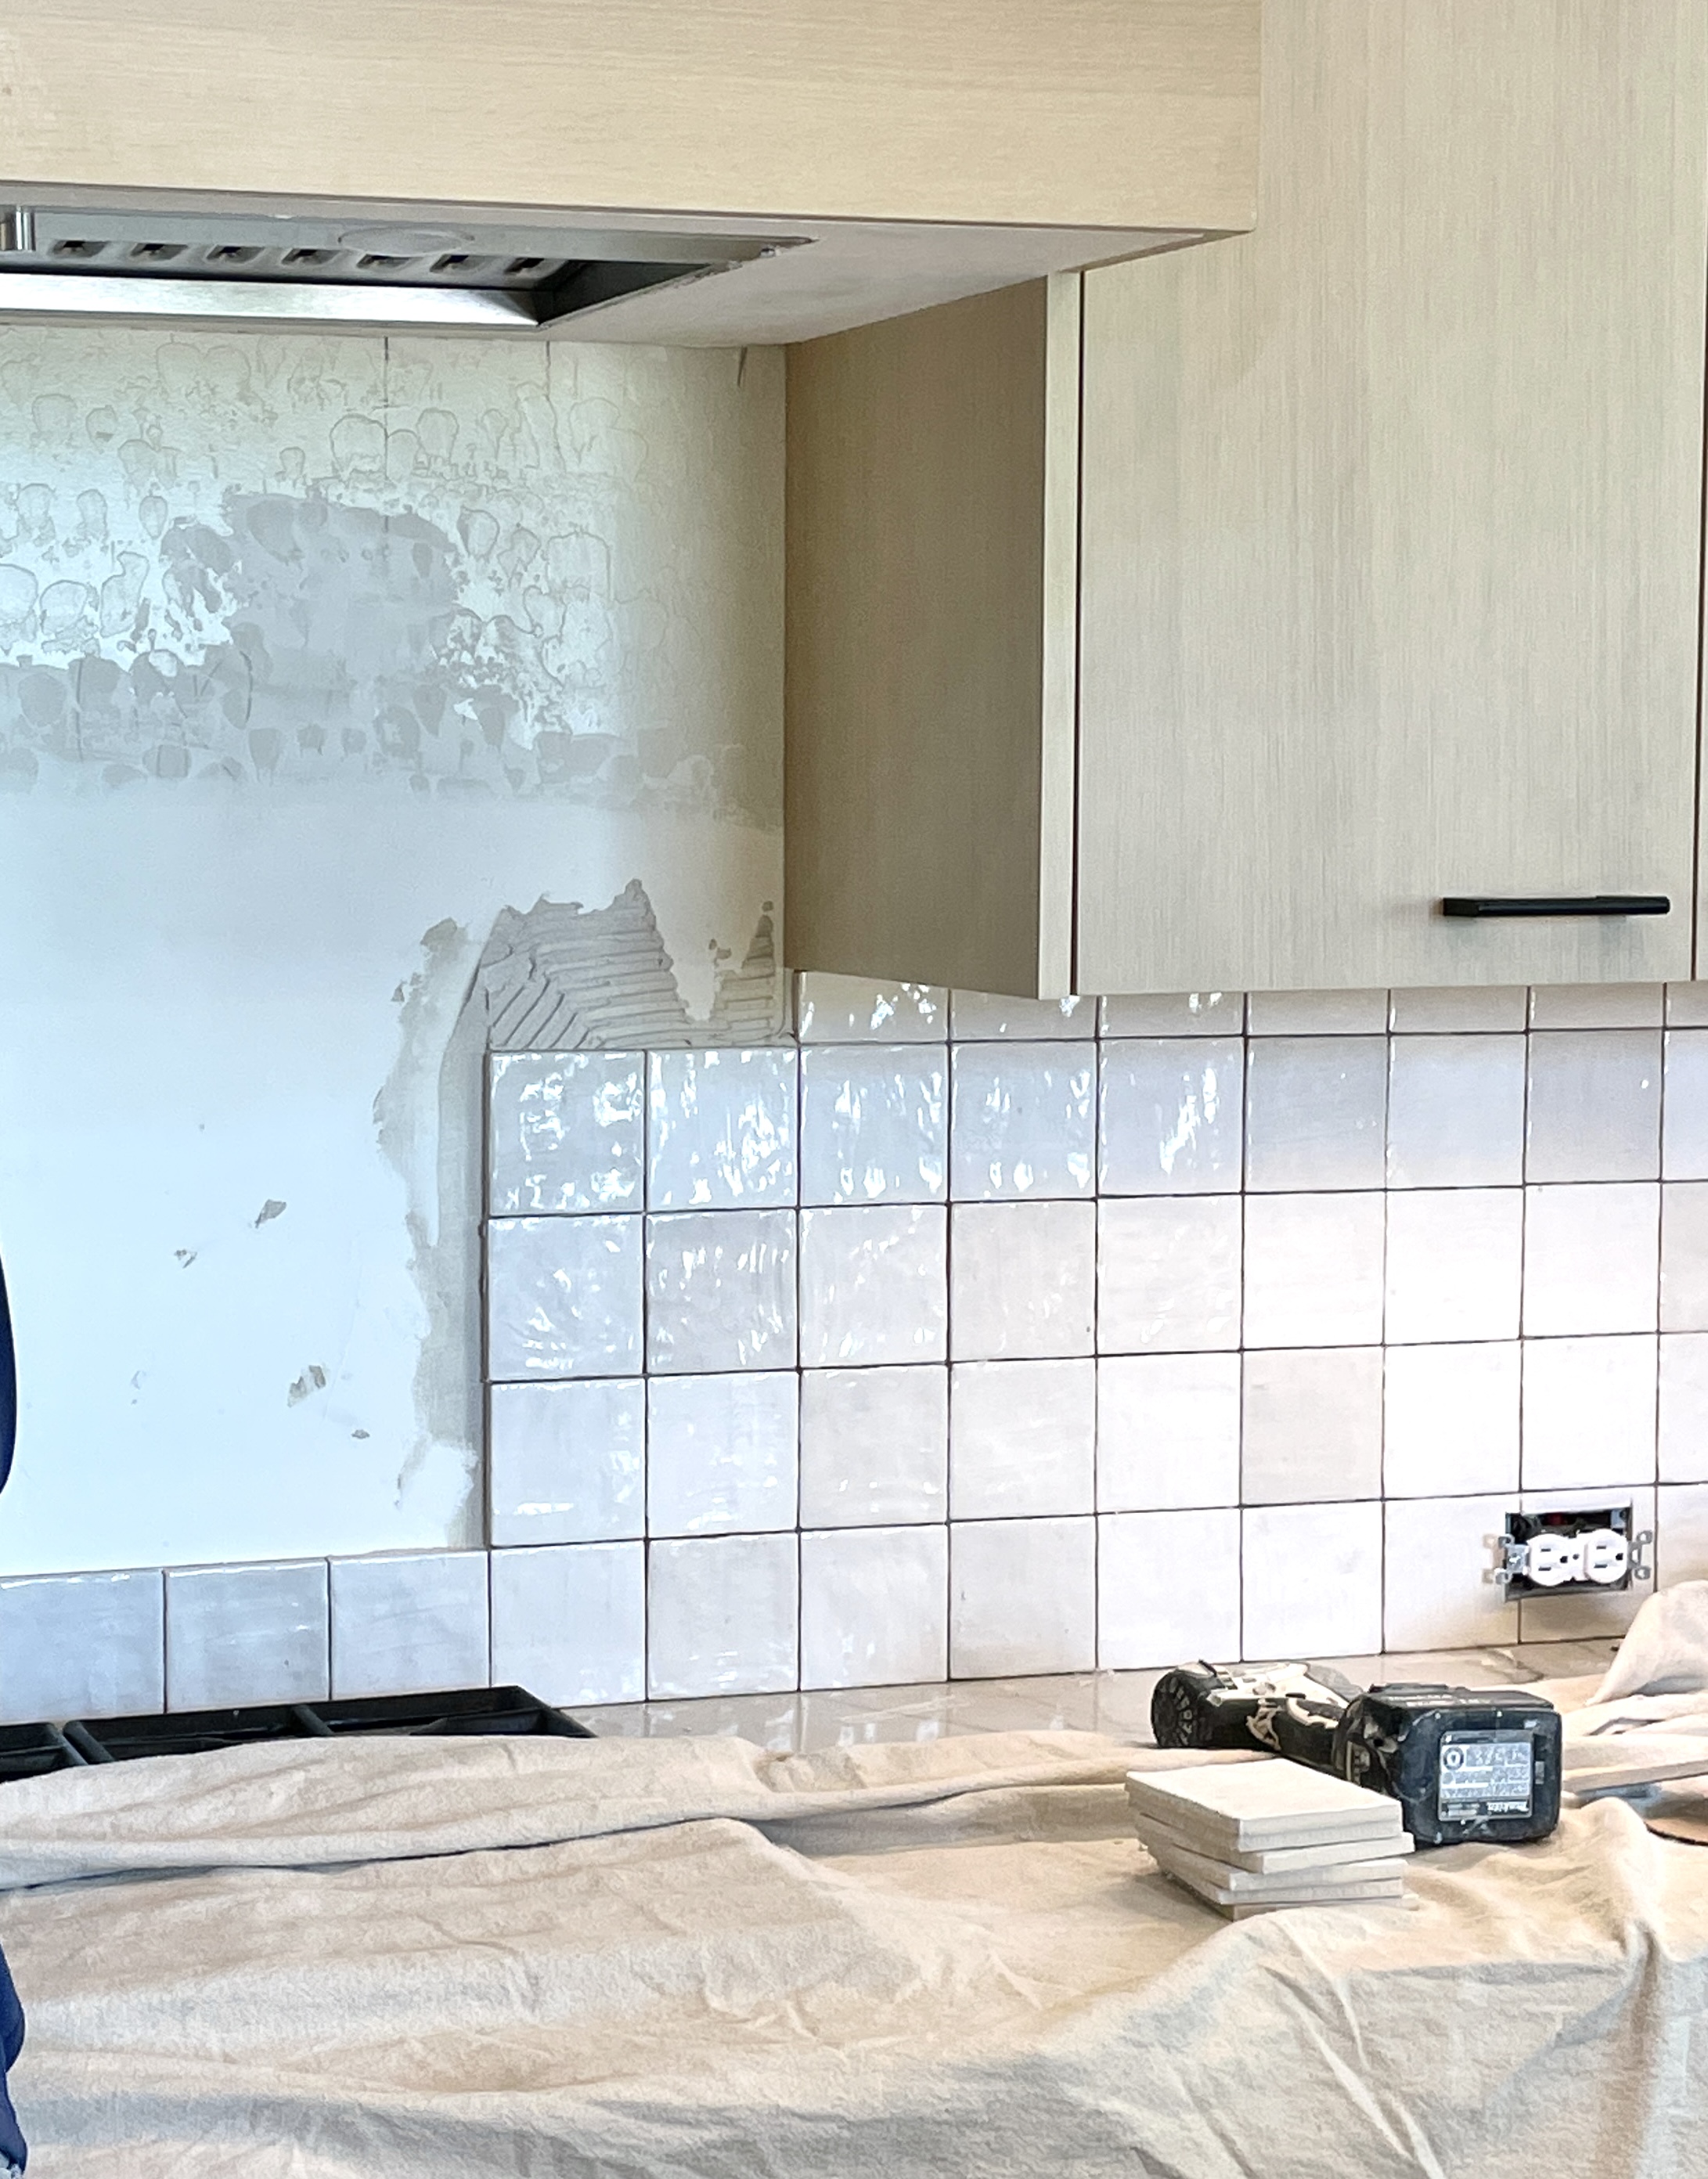
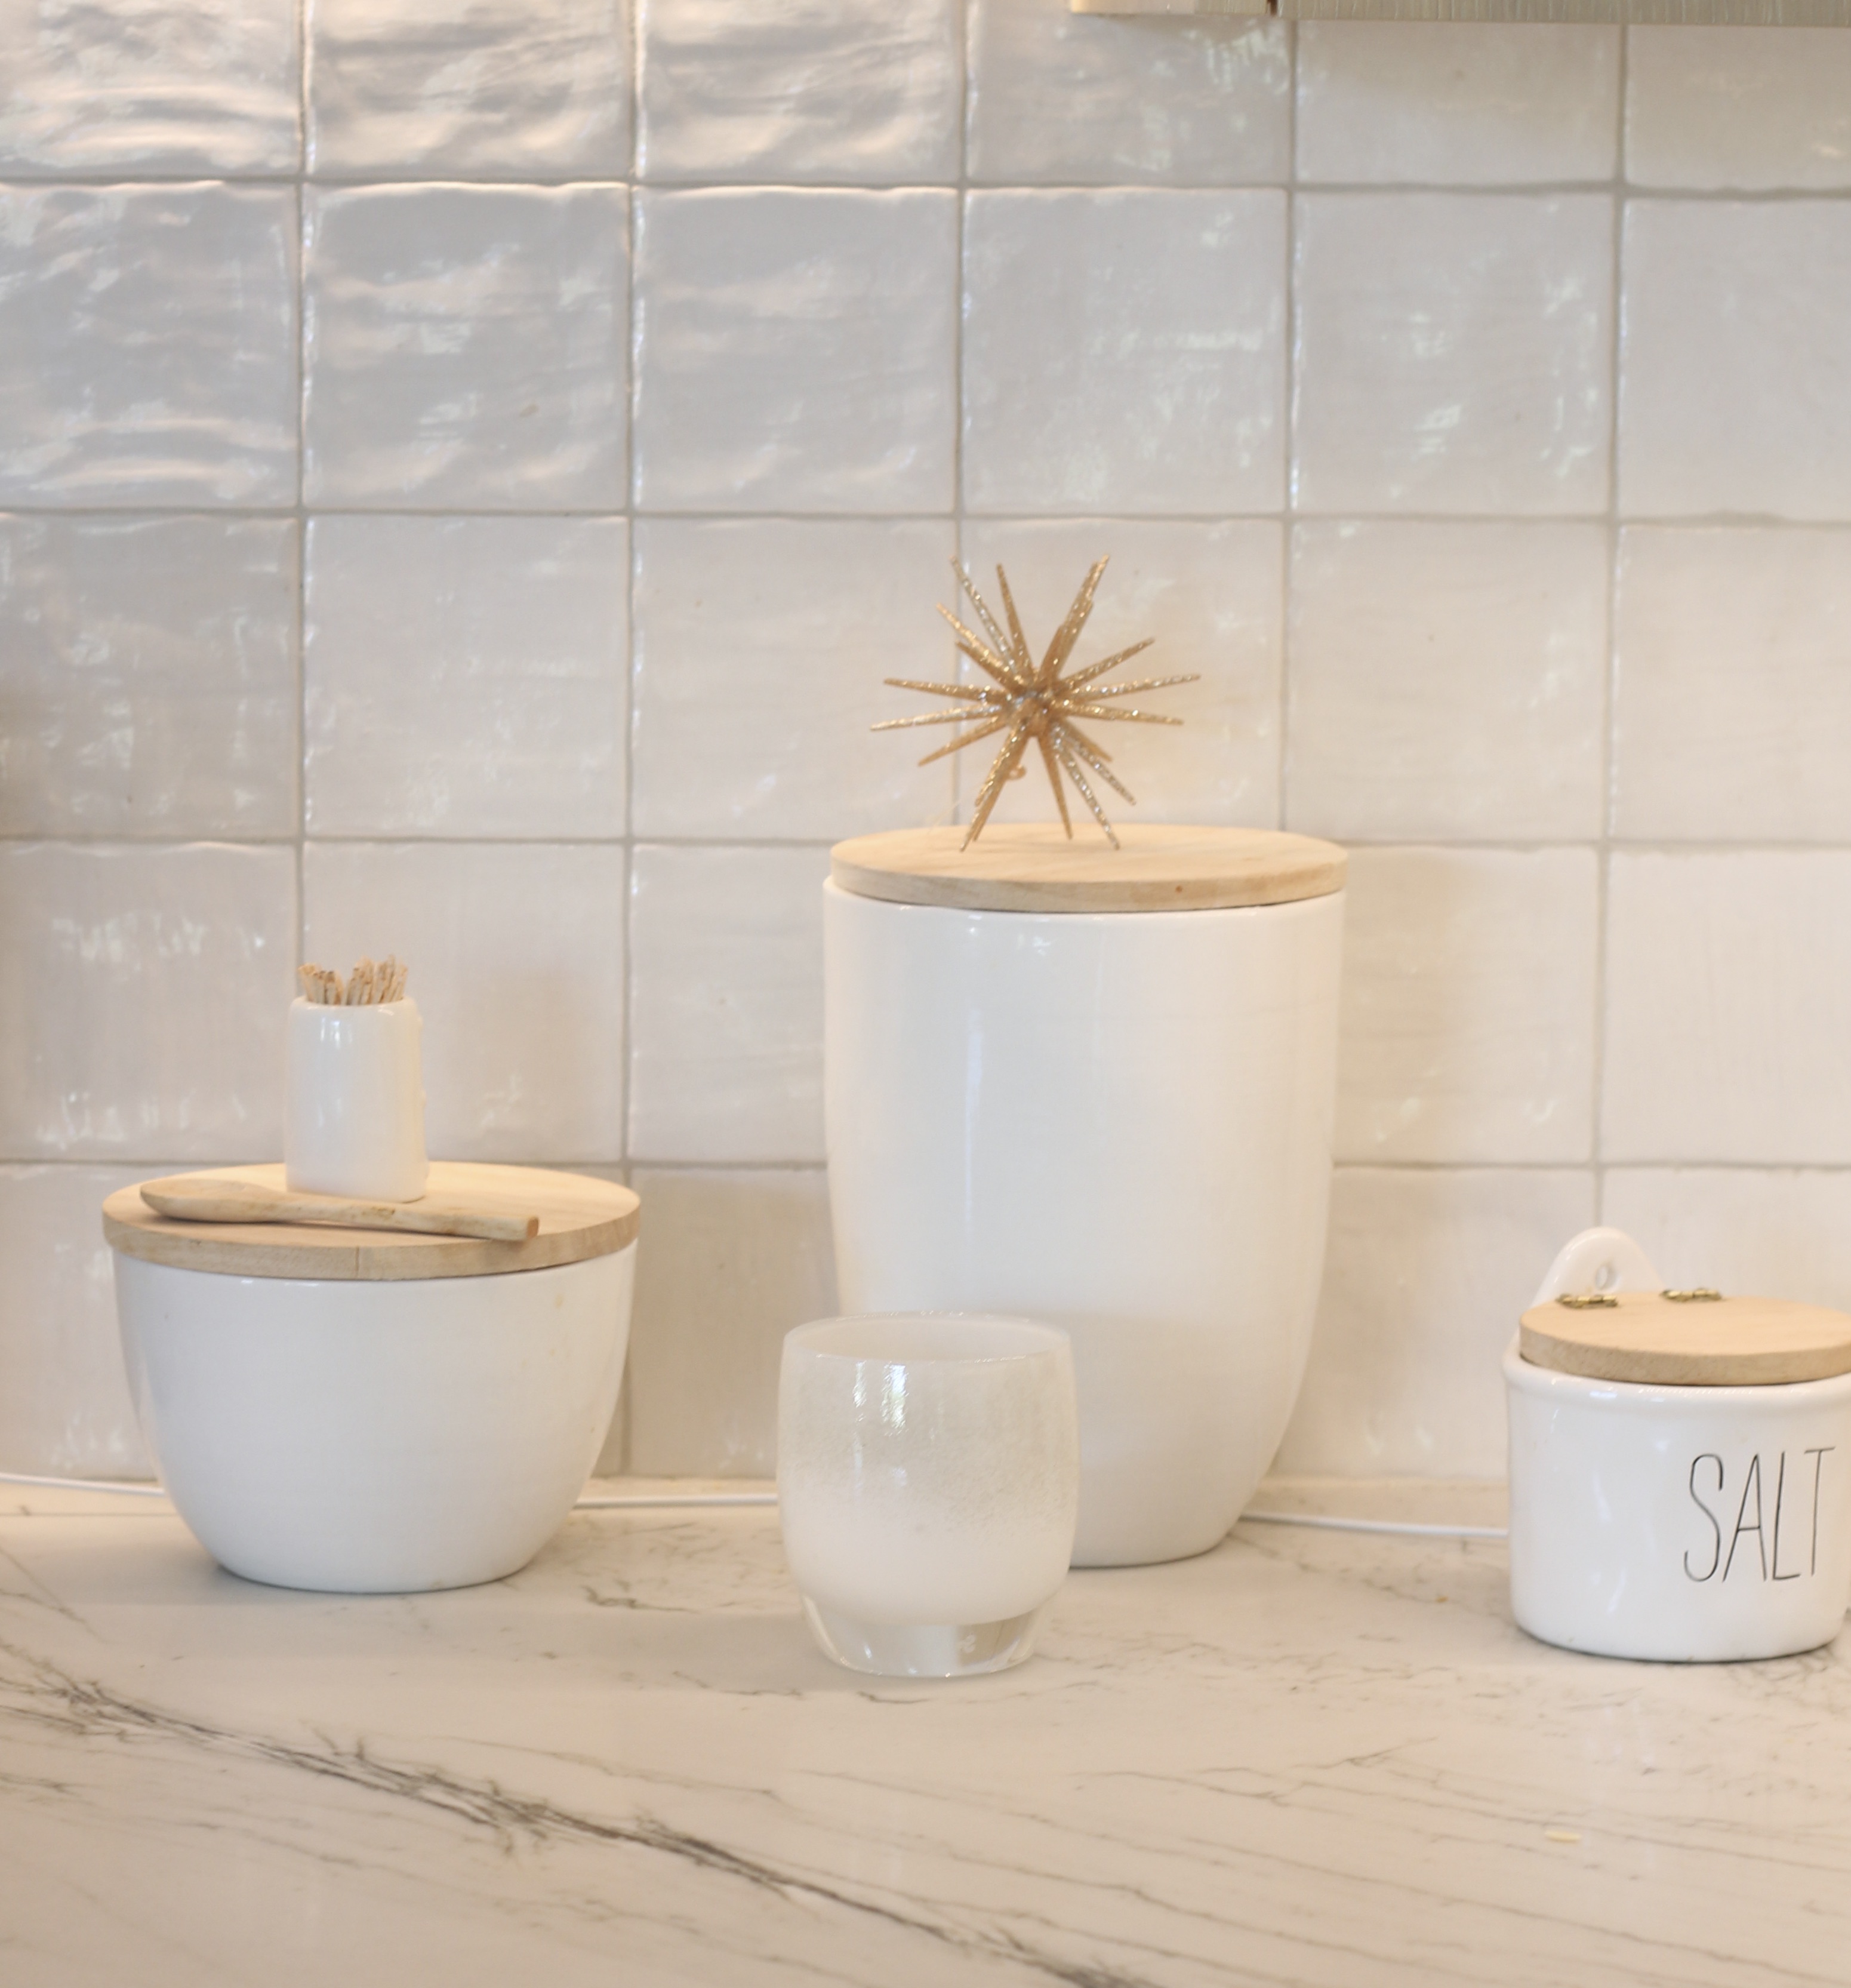
Backsplash Tile: Portmore White Glazed 4" x 4" Ceramic Tile from TileBar.
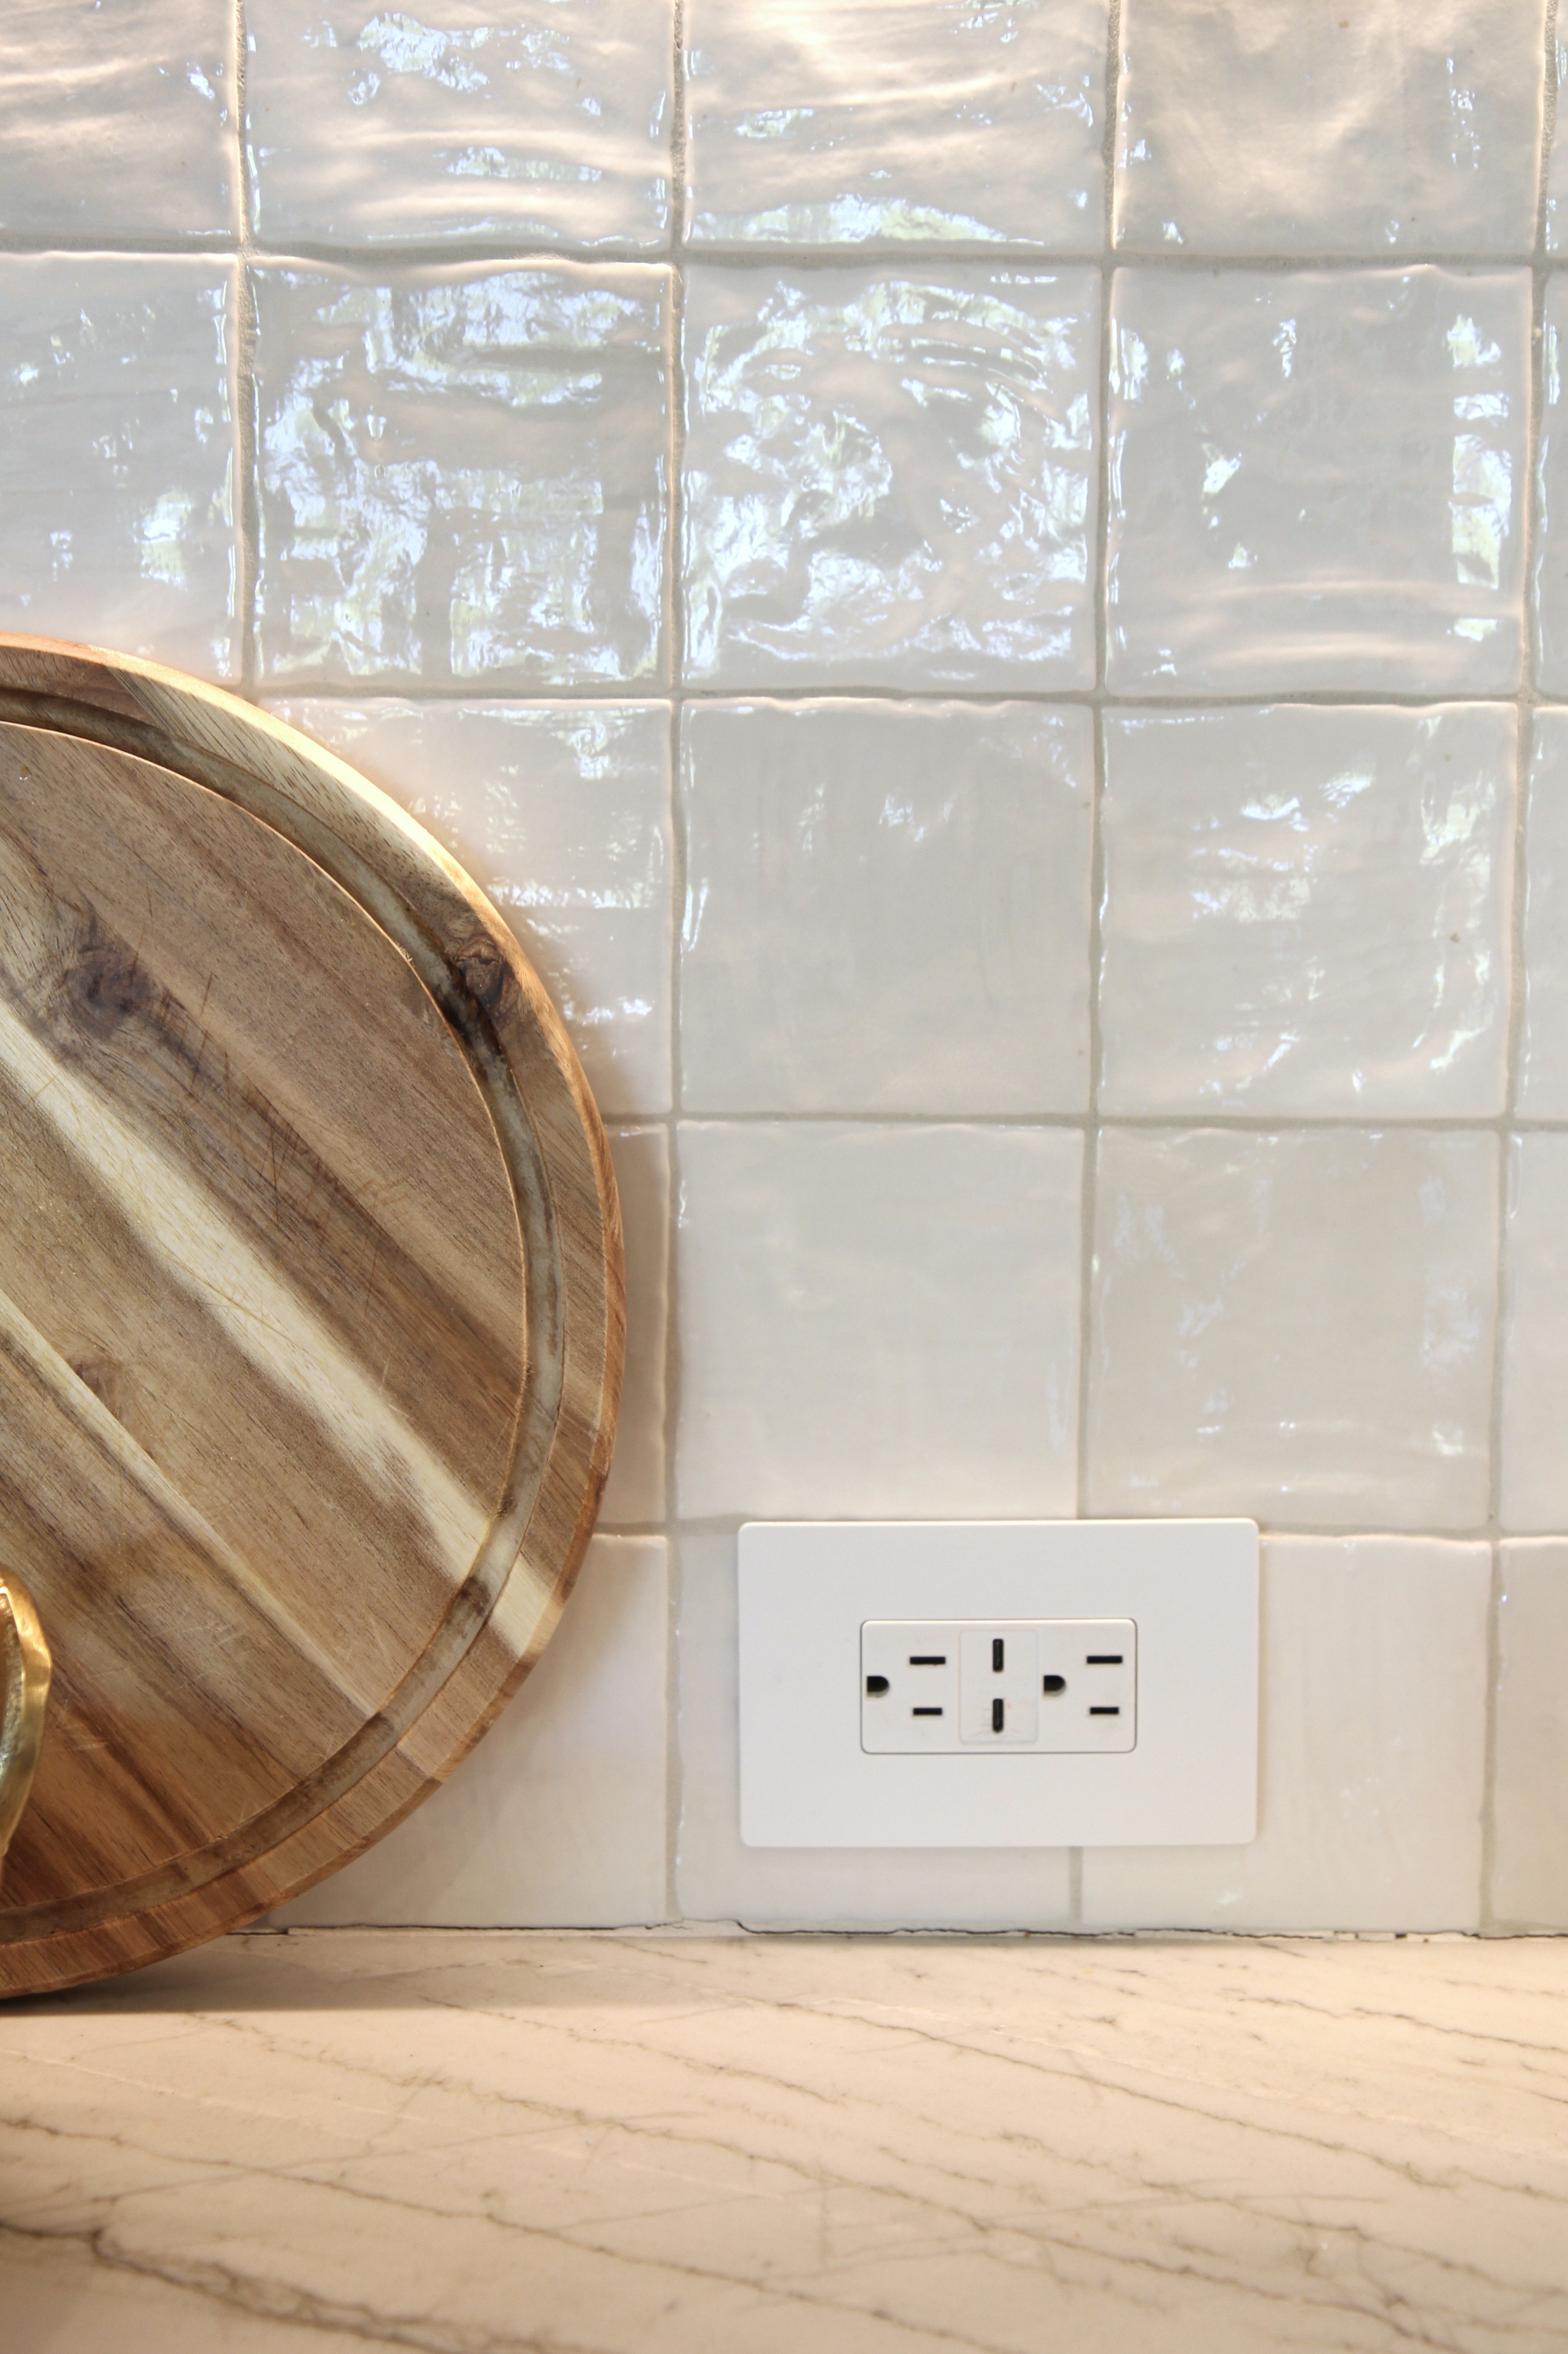 I placed the outlets horizontally and low. This is an outlet from
Legrand with USB C ports built in.

We had all the walls painted in Benjamin Moore's White Dove.
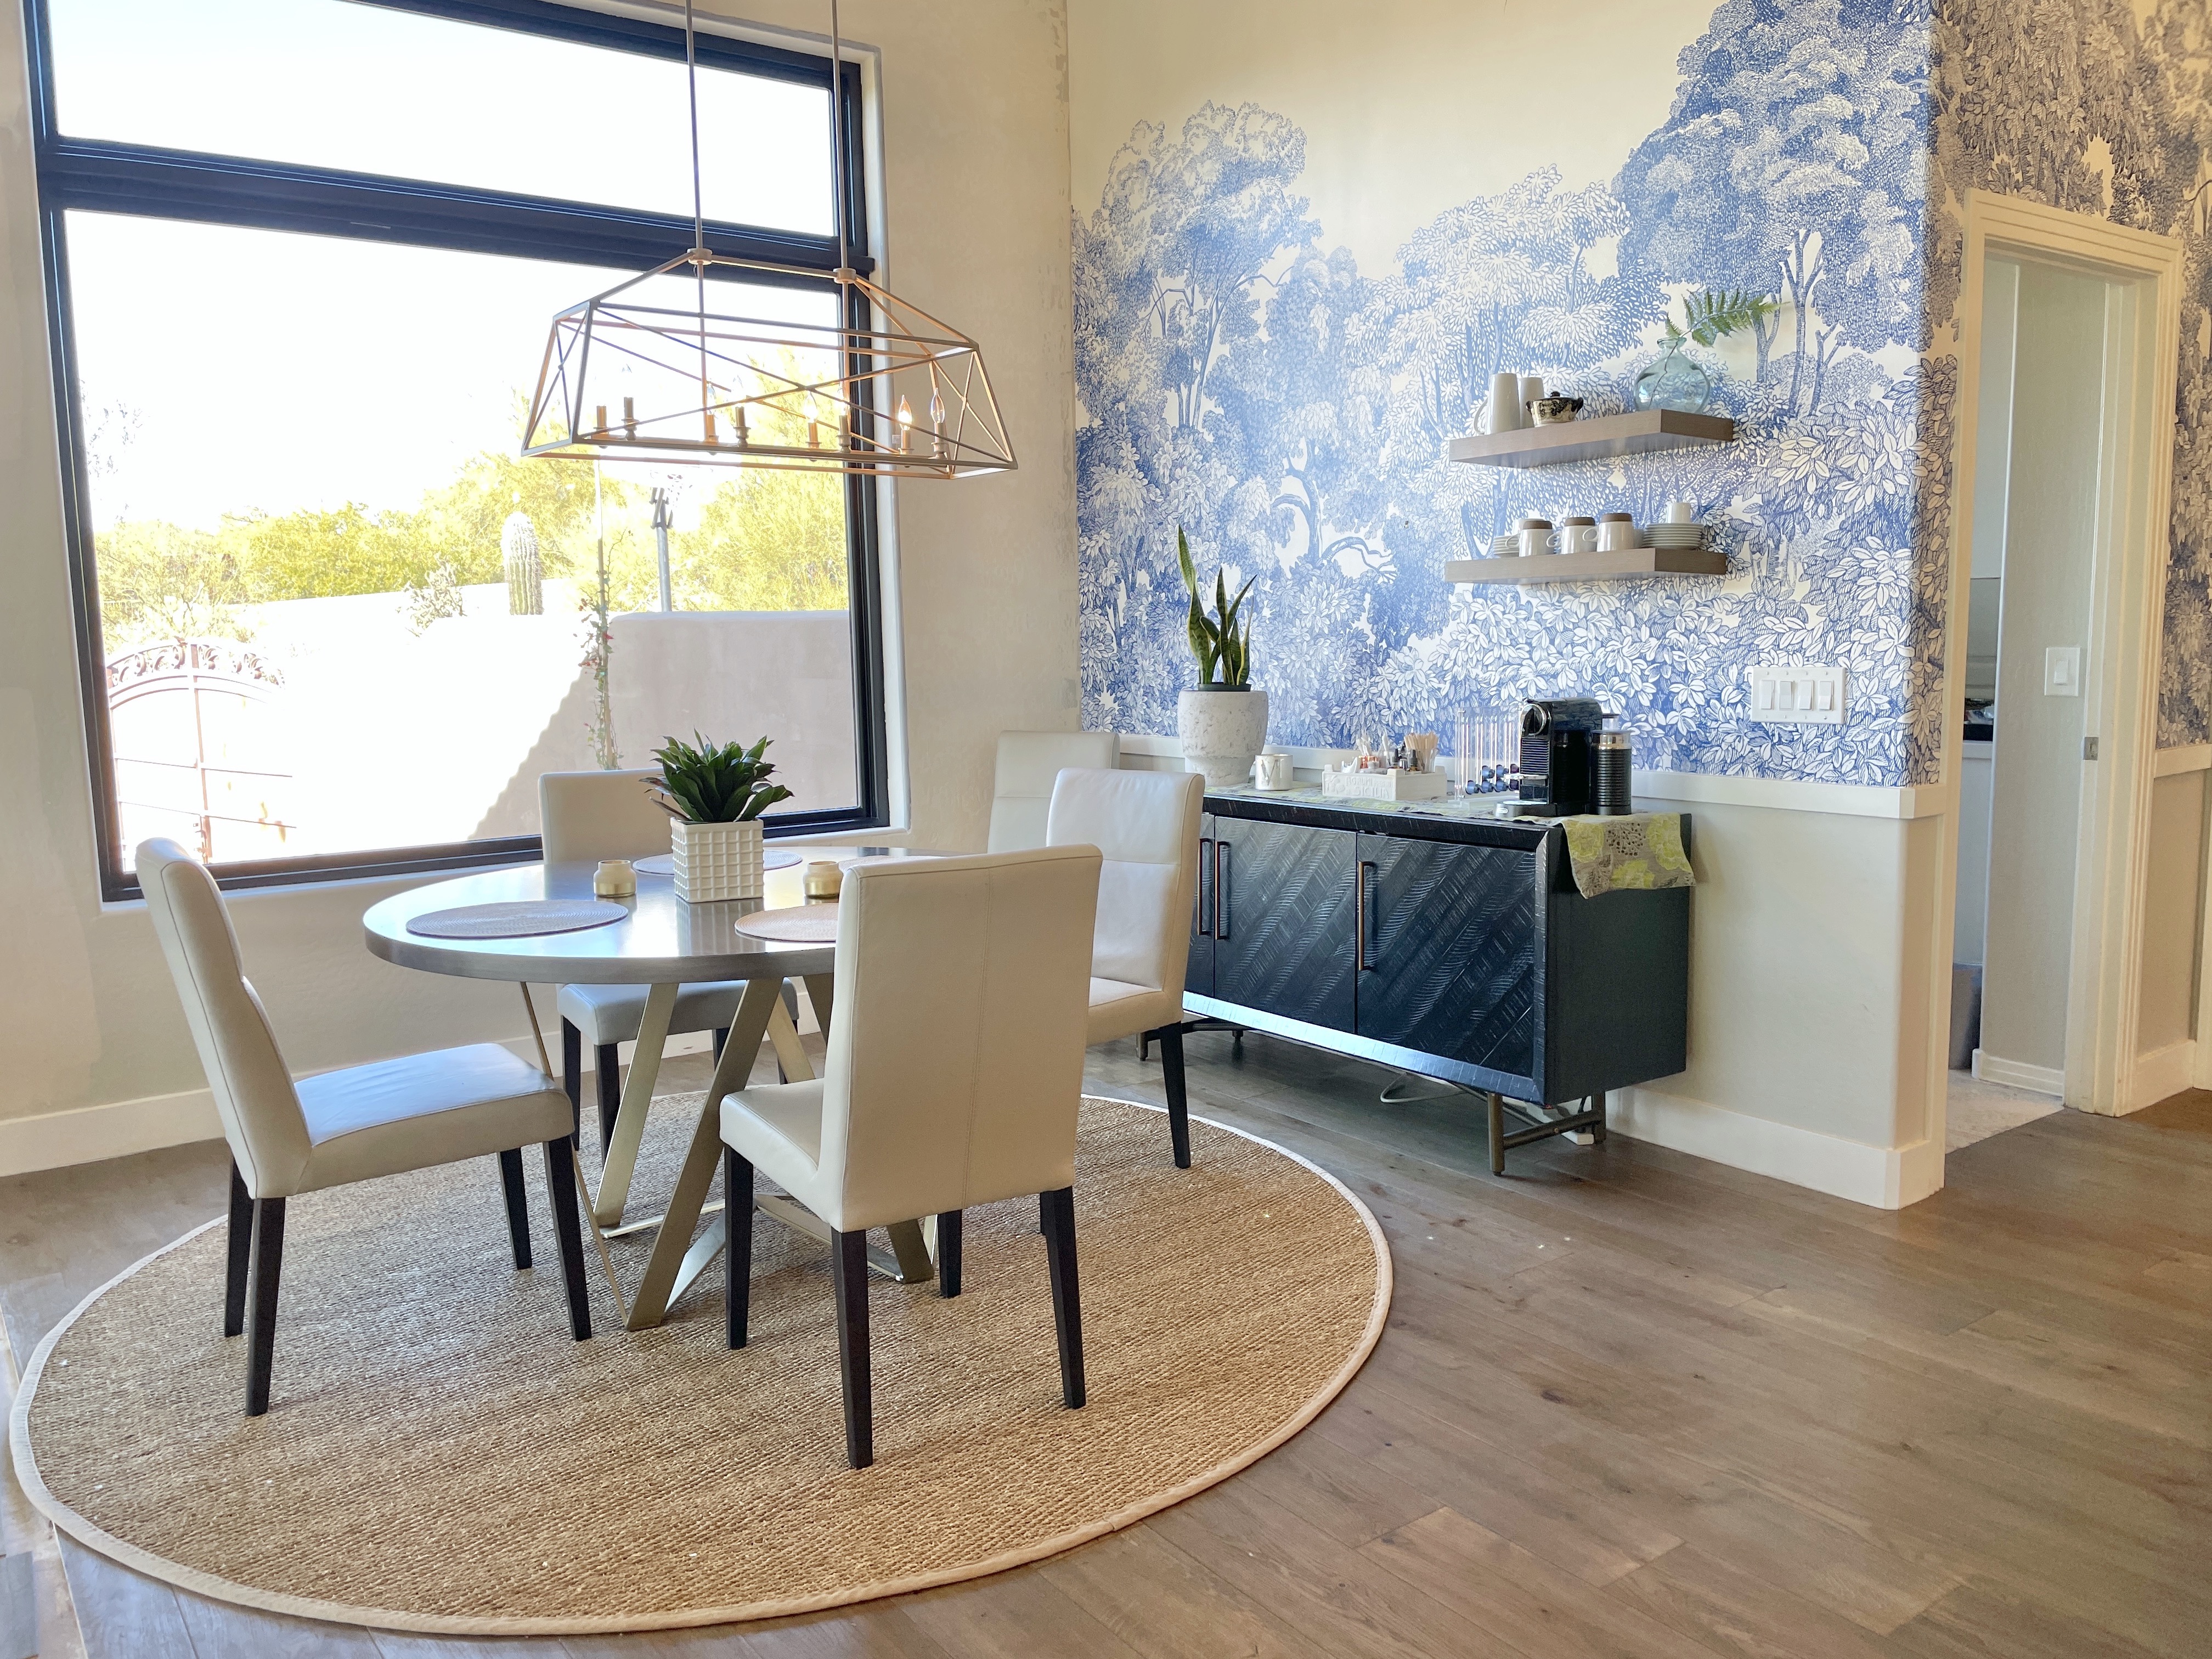
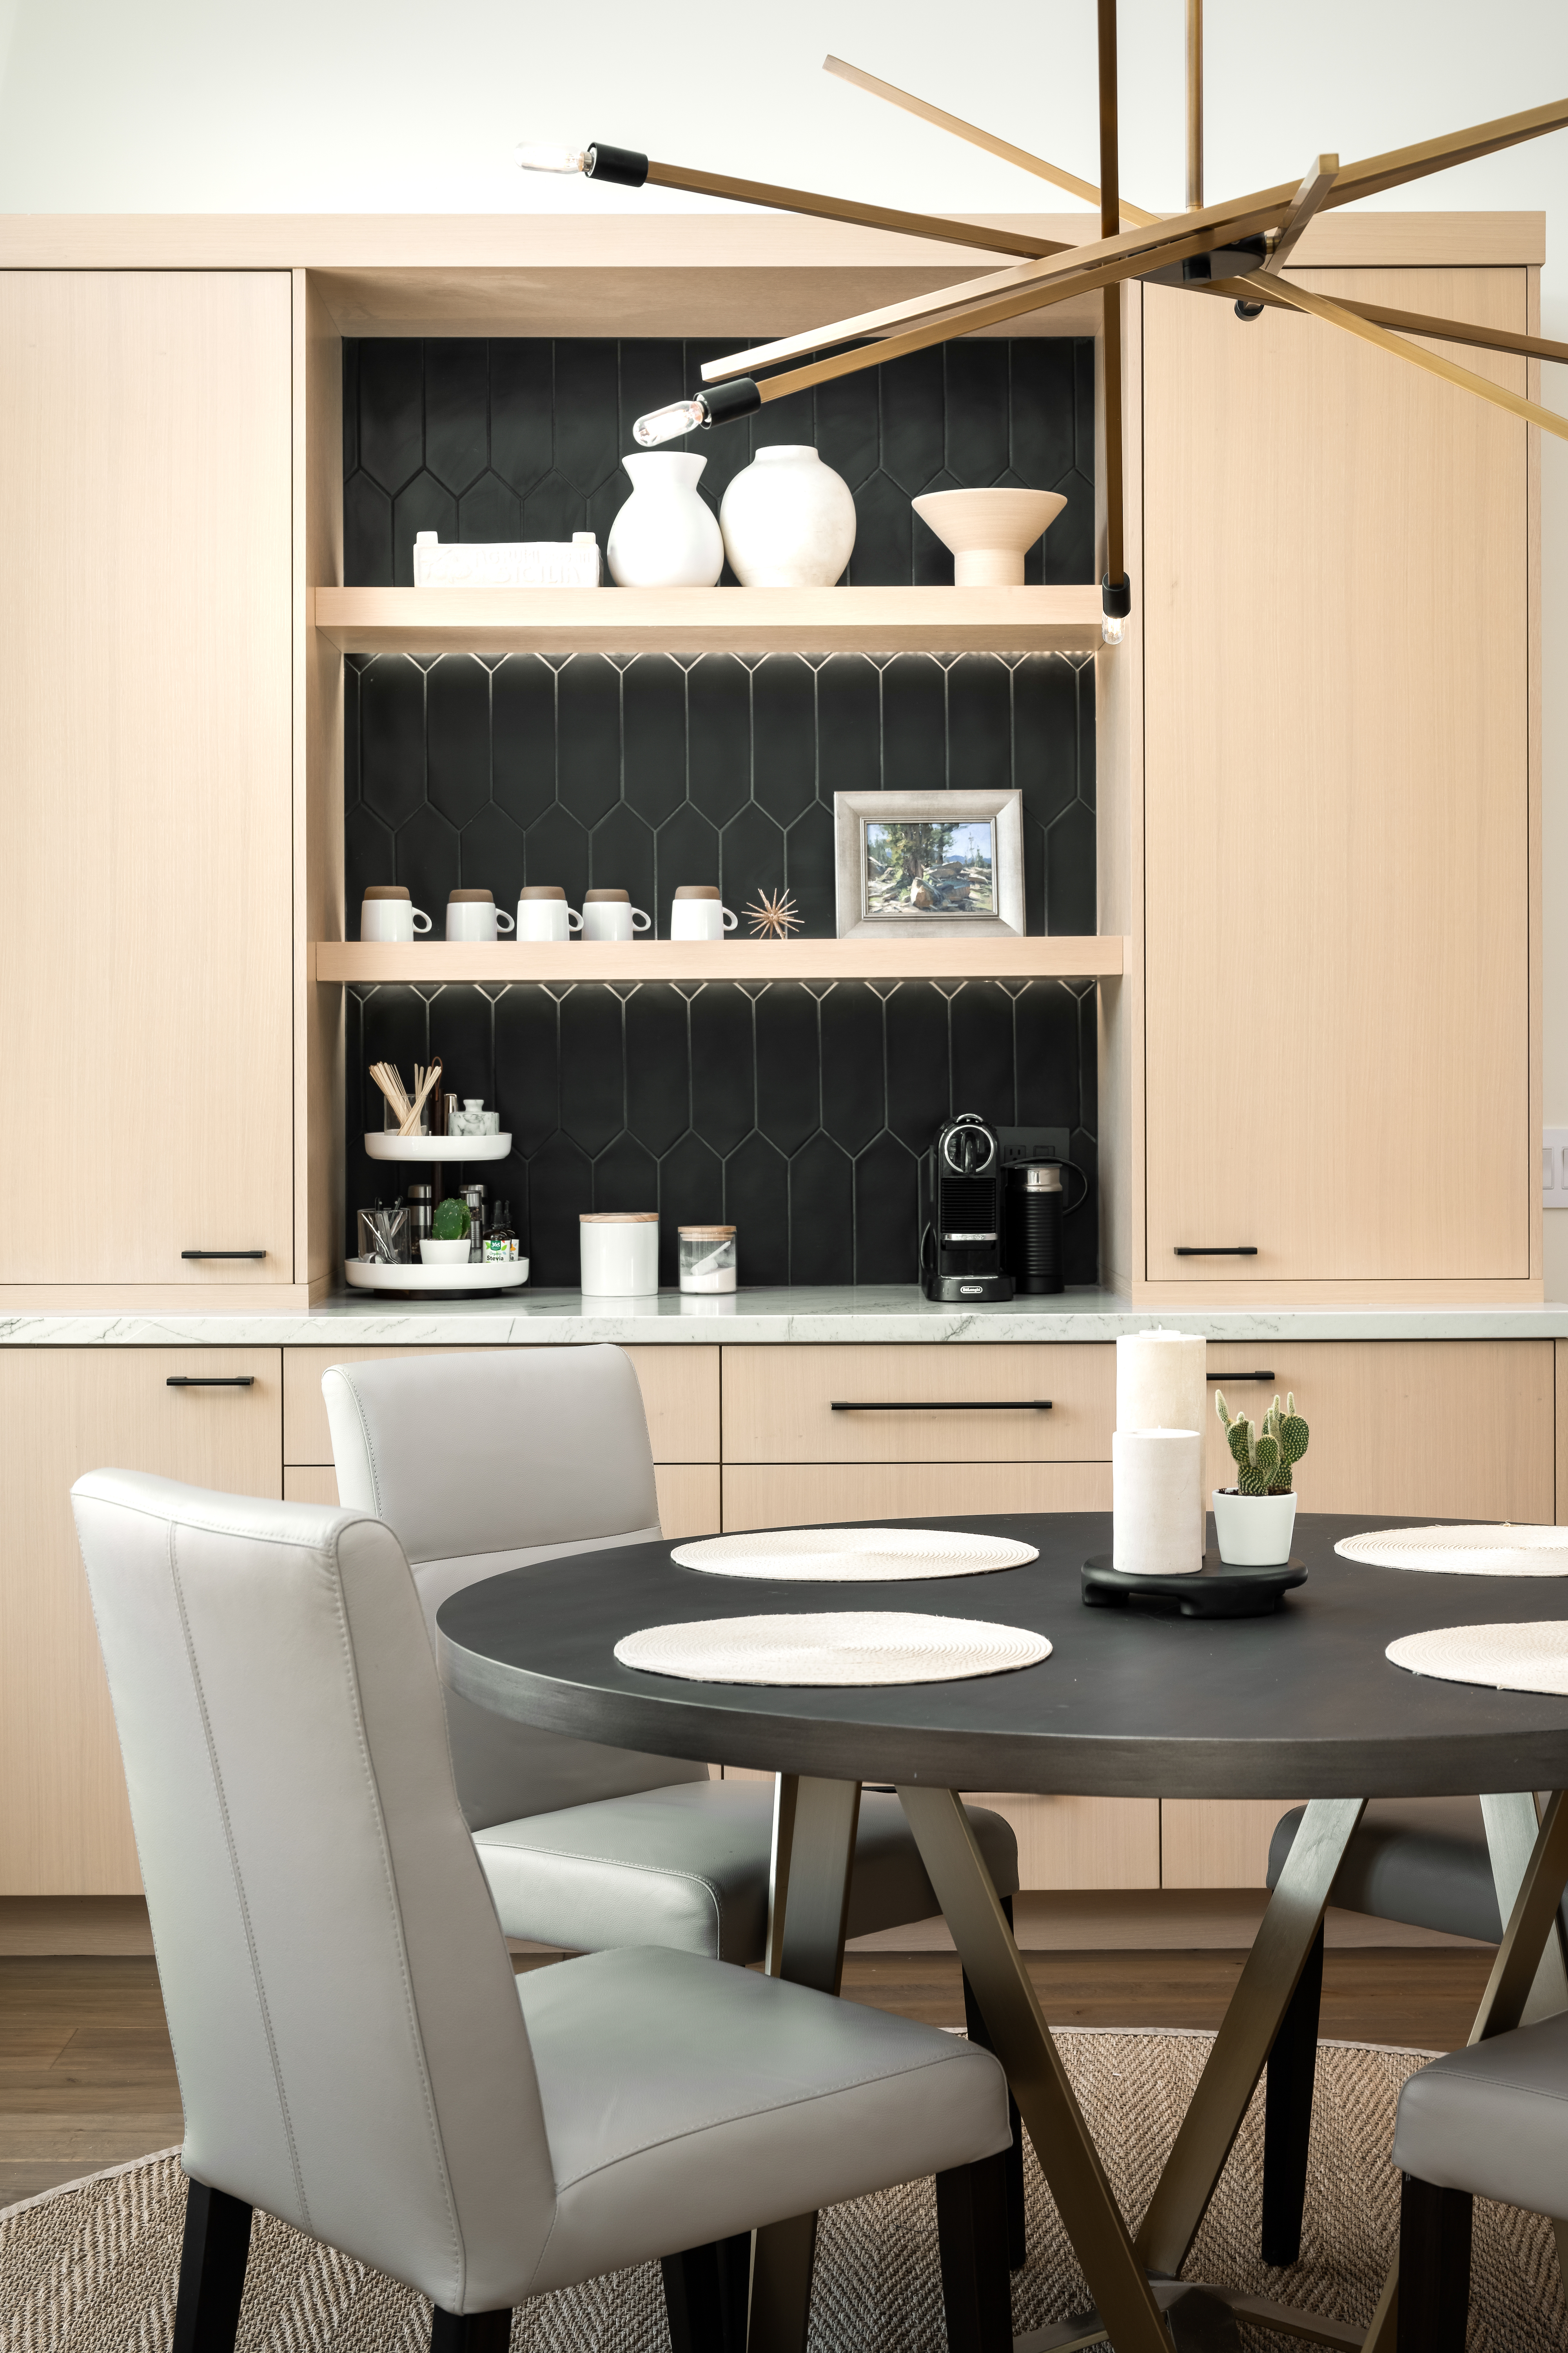
COFFEE BAR:
When we bought the house, there was a big wall with just a mural on it that I thought was a perfect area to extend the kitchen and add a coffee bar. We had the cabinetry company put in cabinets and drawers with some open shelving. It has added a ton of storage and function and I'm so glad we did it. I had appliance rollouts put in the cabinets and it makes it nice to keep your coffee grinder, etc. hidden but easy to roll out and use.
Before:
After:
 photograph courtesy Provisuals Media
Backsplash tile: Alliante 4x12 Black Picket Tile from TileBar.
Light Fixture: Archer by Hinkley
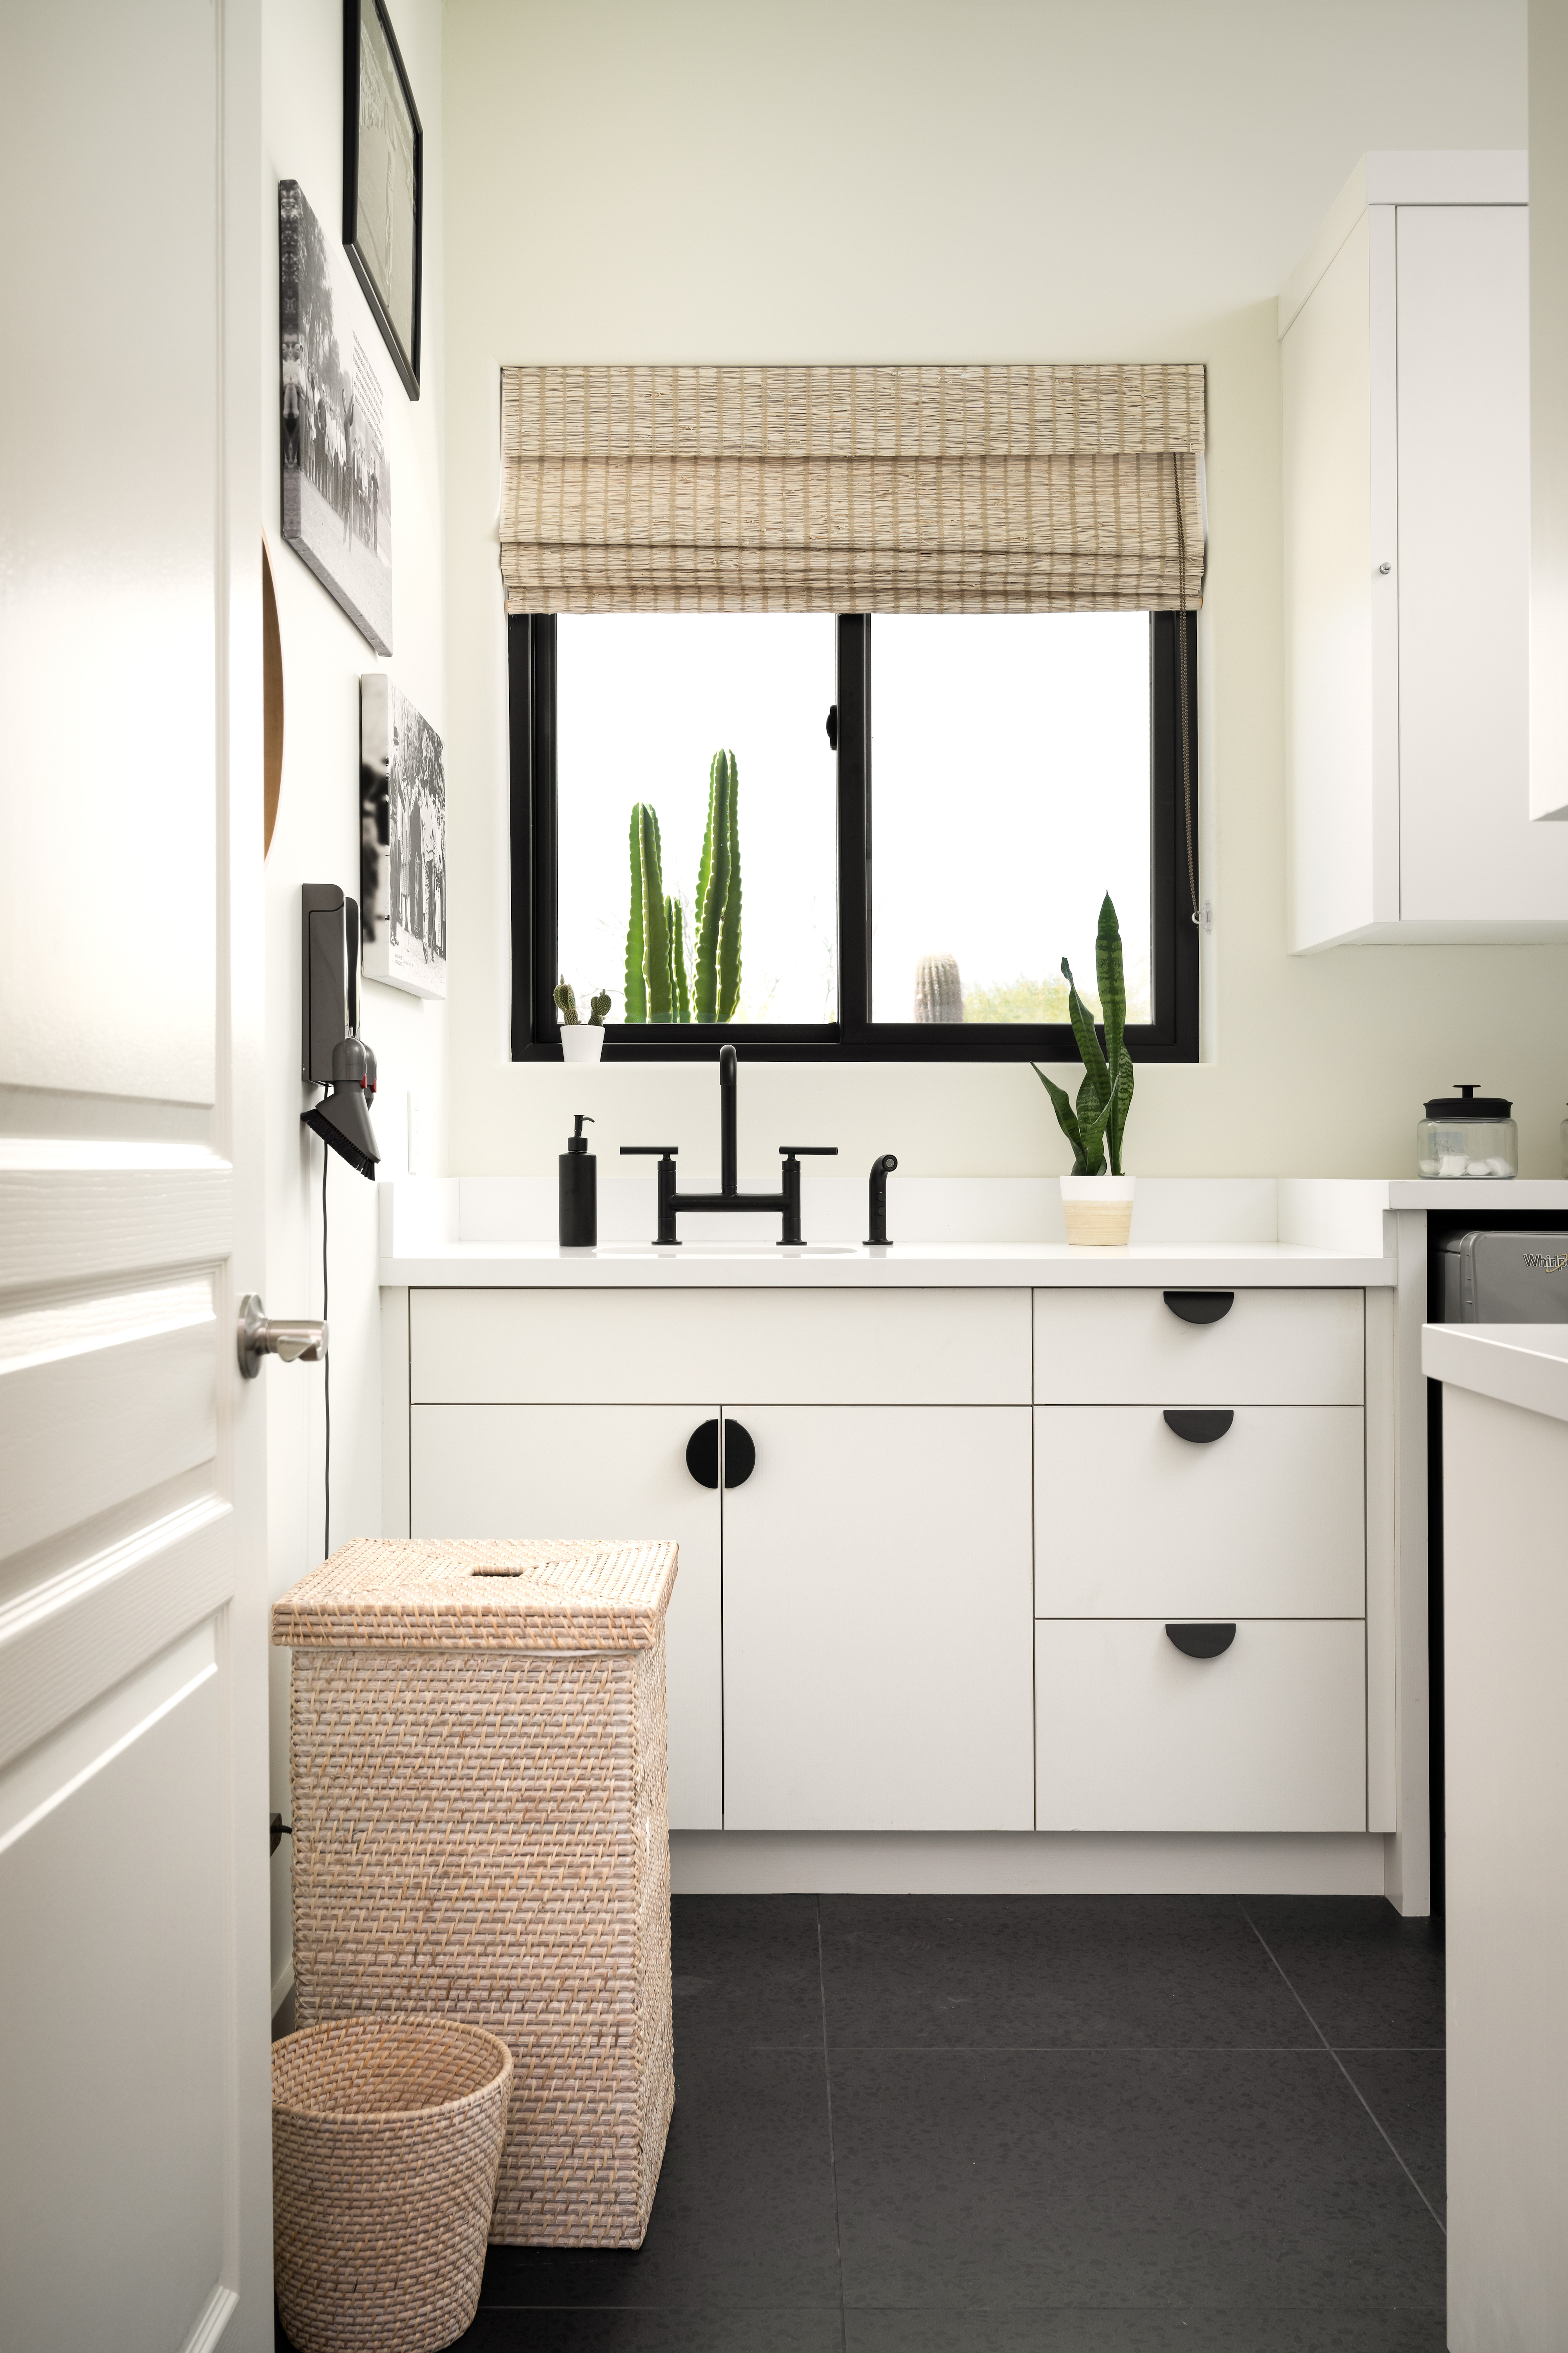
LAUNDRY ROOM:
I love my laundry room remodel SO much! We decided to do the laundry room at the same time because the cabinets in there were in such bad shape and the design didn't work for a short person like me. The washer and dryer were on risers and I wanted them lowered so I could have a working countertop on the top of them and also so I could reach the uppers over them. The uppers on the original laundry were so shallow that I couldn't really reach them.
Before:
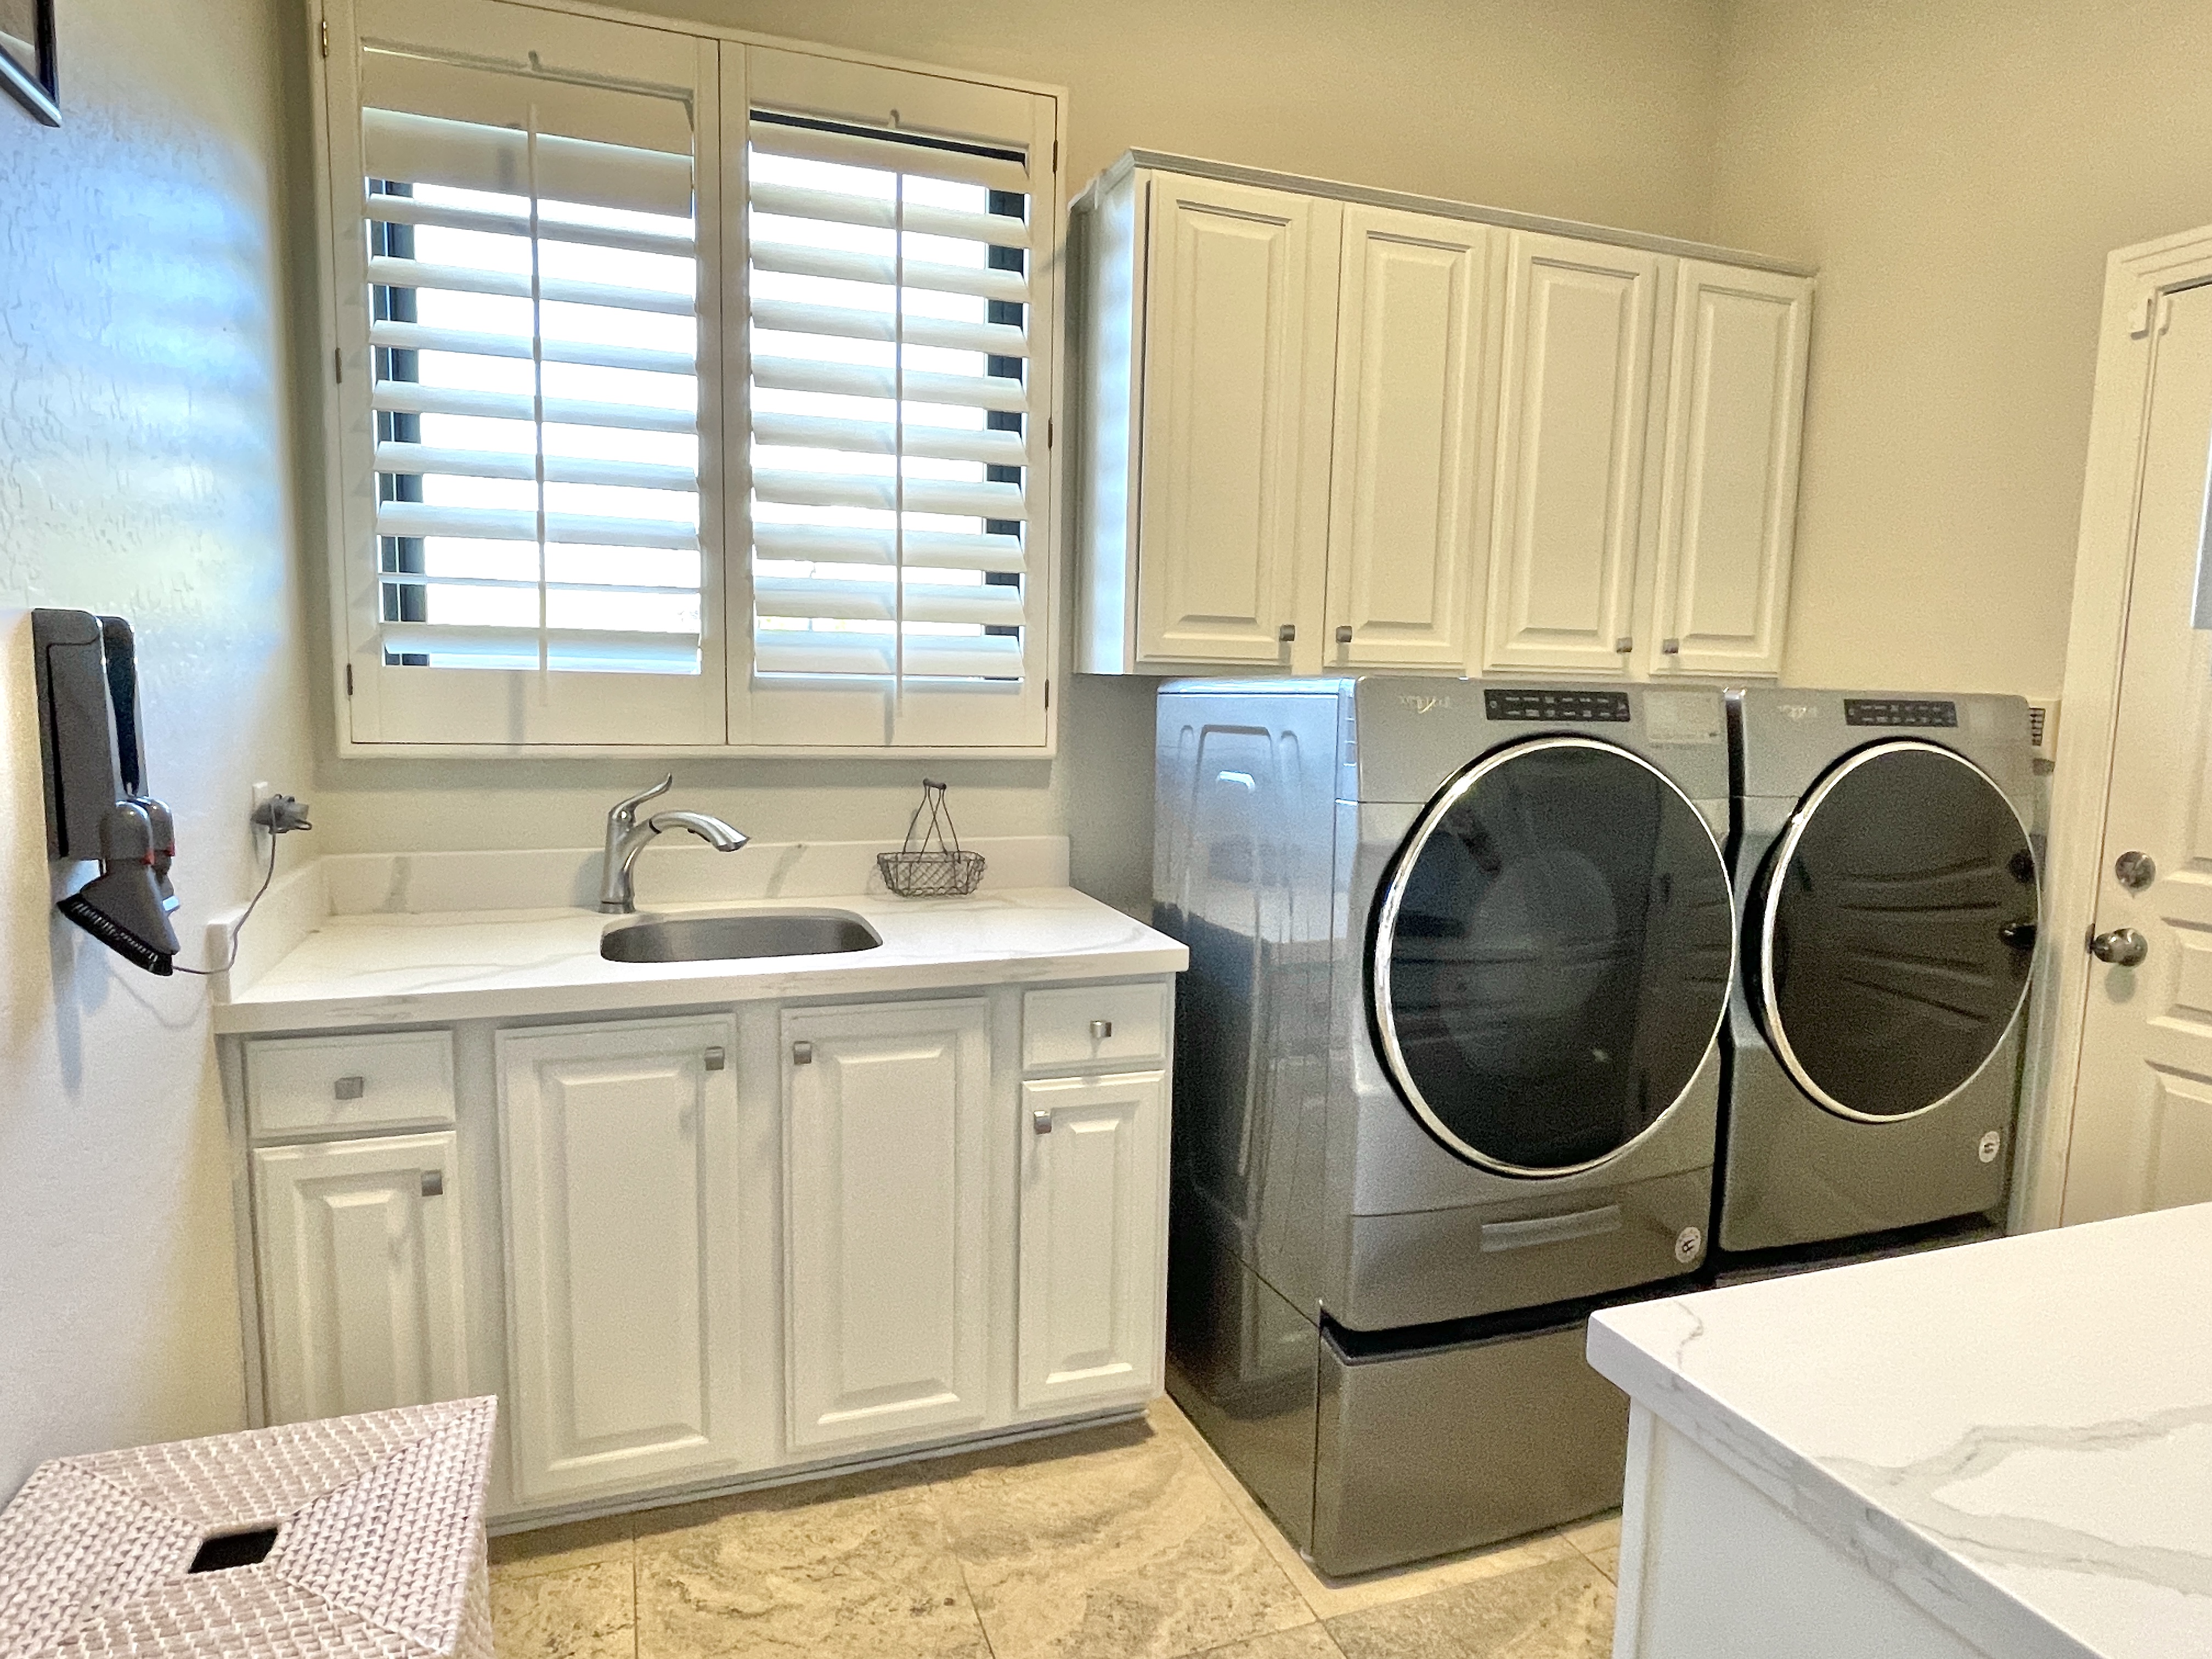
After:
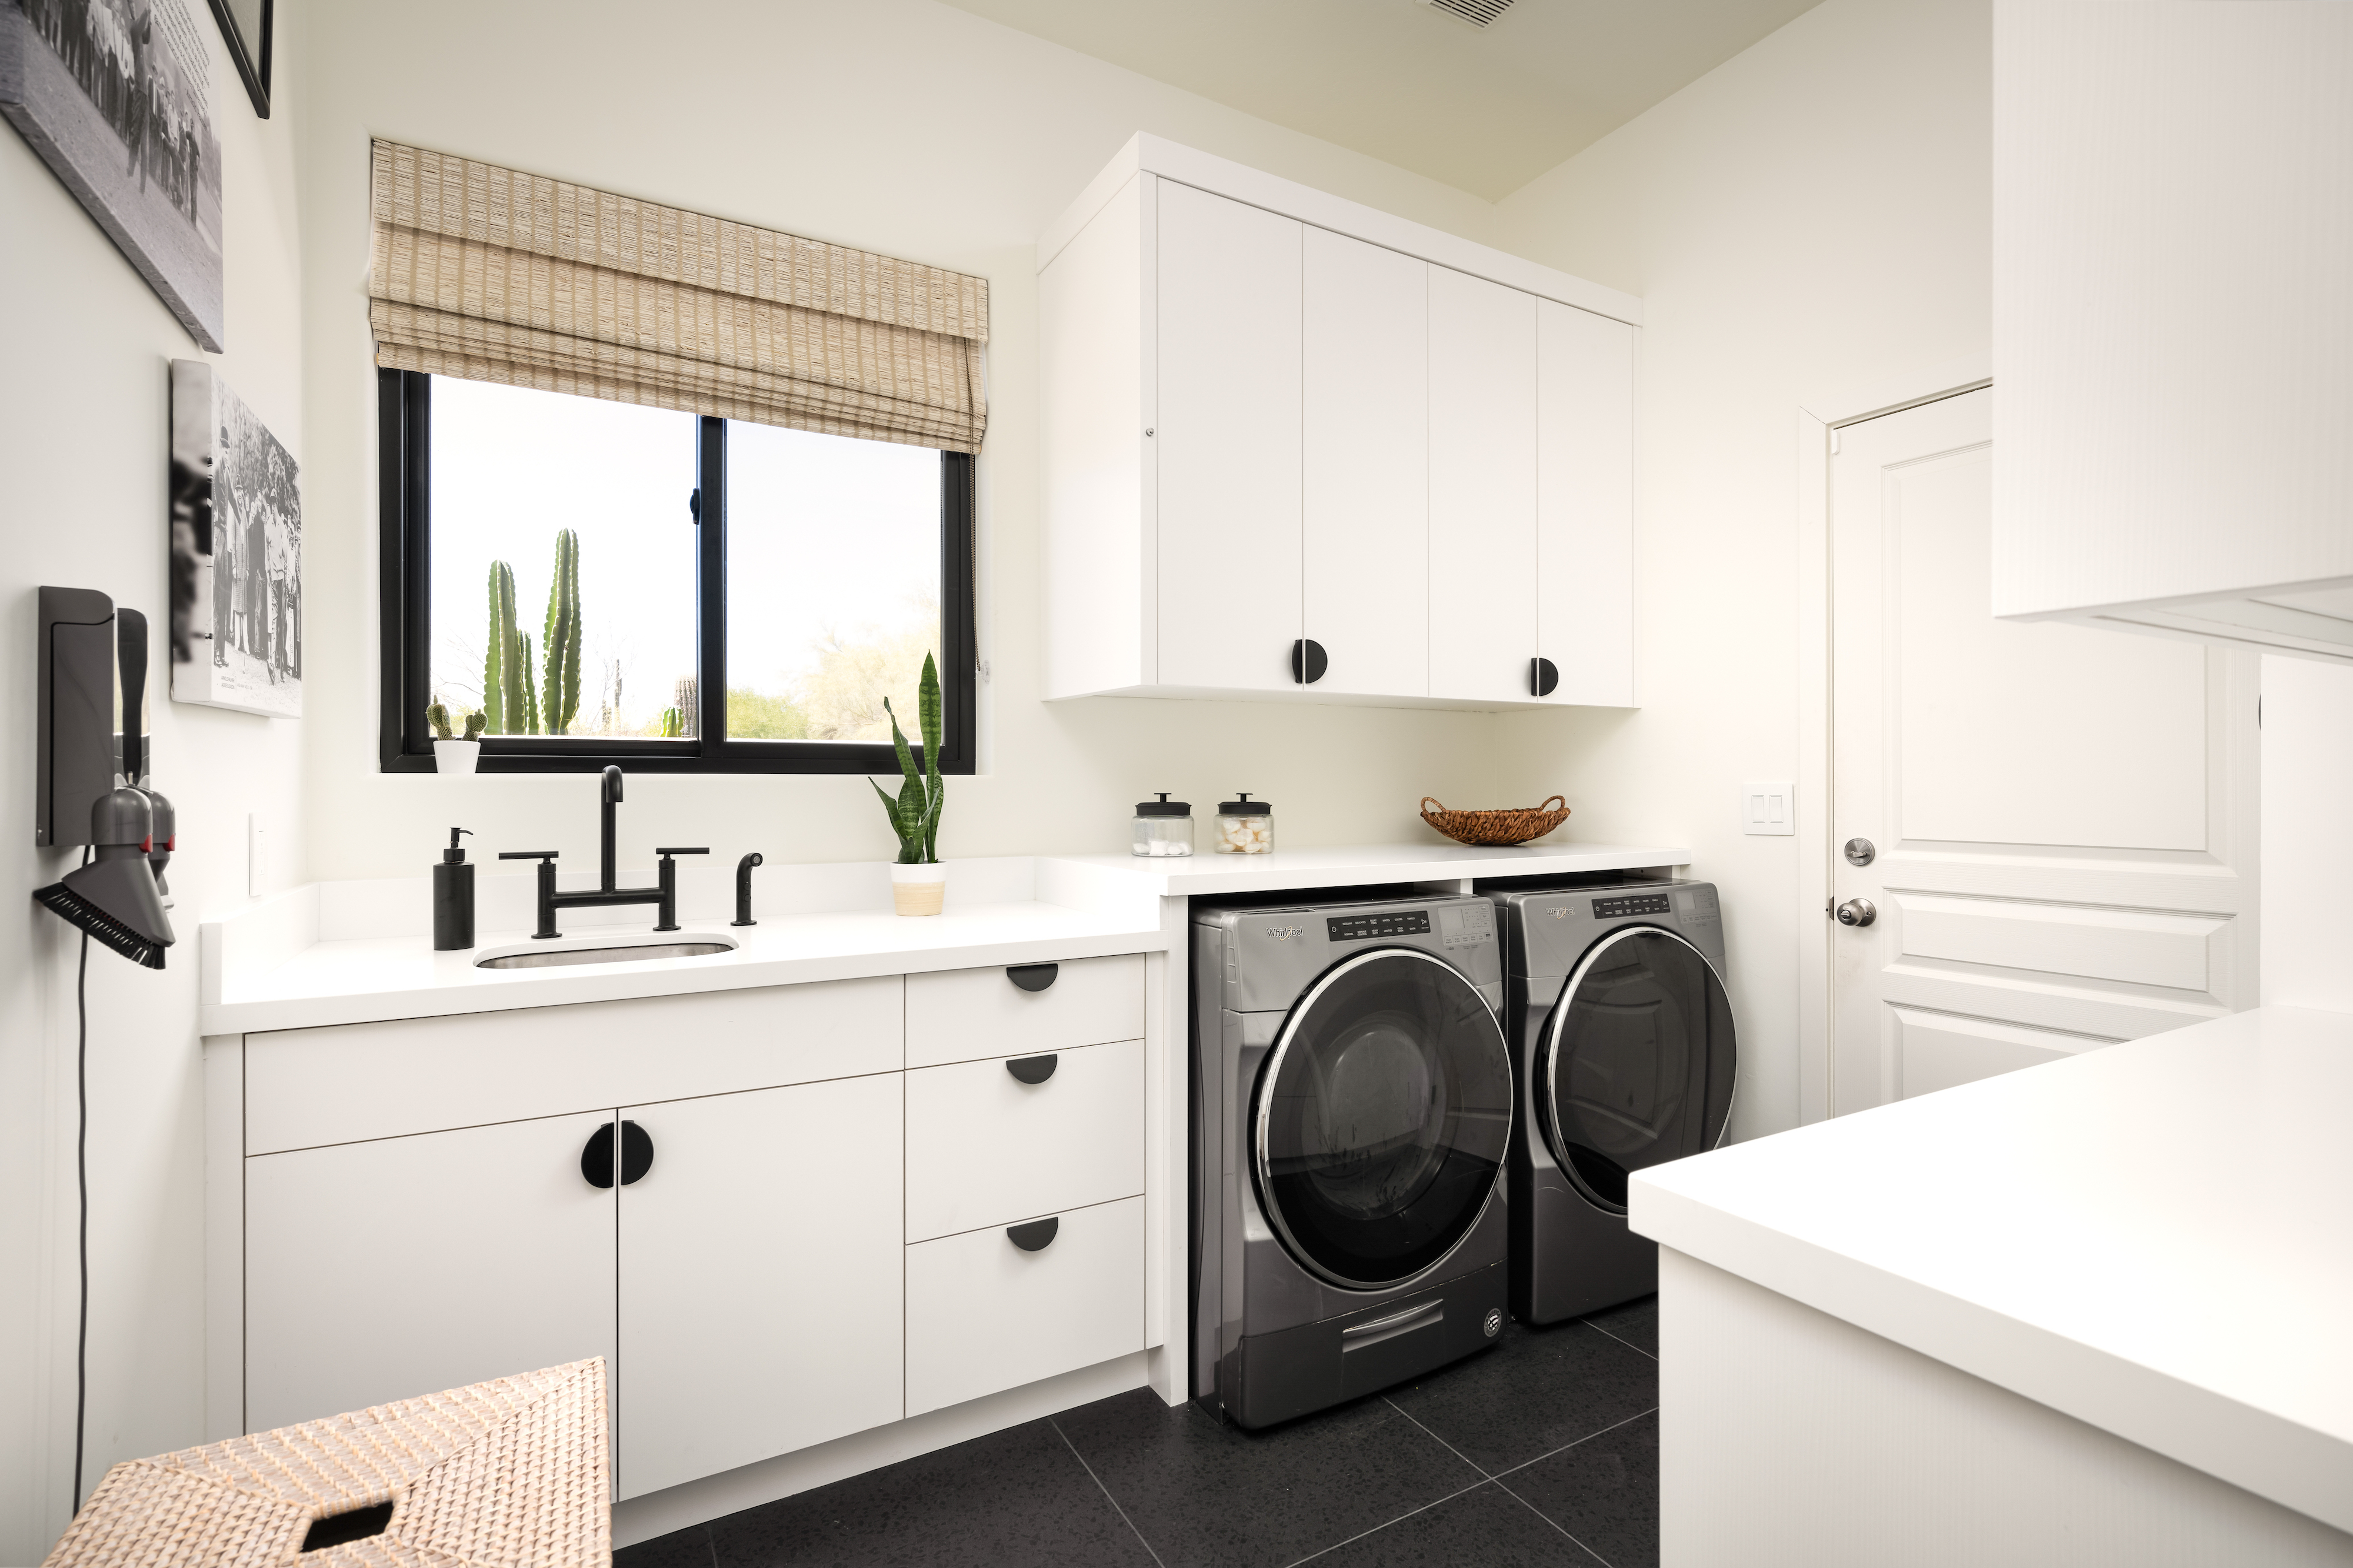
The original travertine floor from the 90s was still in the laundry room and it was pretty bad - no matter how much you mopped it, it never looked clean. I replaced that with a black on black Italian Terrazzo tile that is so pretty.
I looked high and low for a pure white, honed quartz and I finally found one that I love. It is so pure white and simple.
I also removed the dreaded Plantation shutters and put in a very simple wicker Roman shade. I splurged a little on the faucet in there and got a bridge faucet that's beautiful. I love the black and white contrast of the laundry room.
Countertop: Della Terra White Haku Honed Quartz
Faucet: Kohler Purist Bridge Faucet
Hardware: CB2 Bin Pulls
Floor Tile: Black 24x24 Italian Terrazzo Tile
Blind: Levolor Natural Shade in Vanilla Bean
Paint: Benjamin Moore's White Dove.
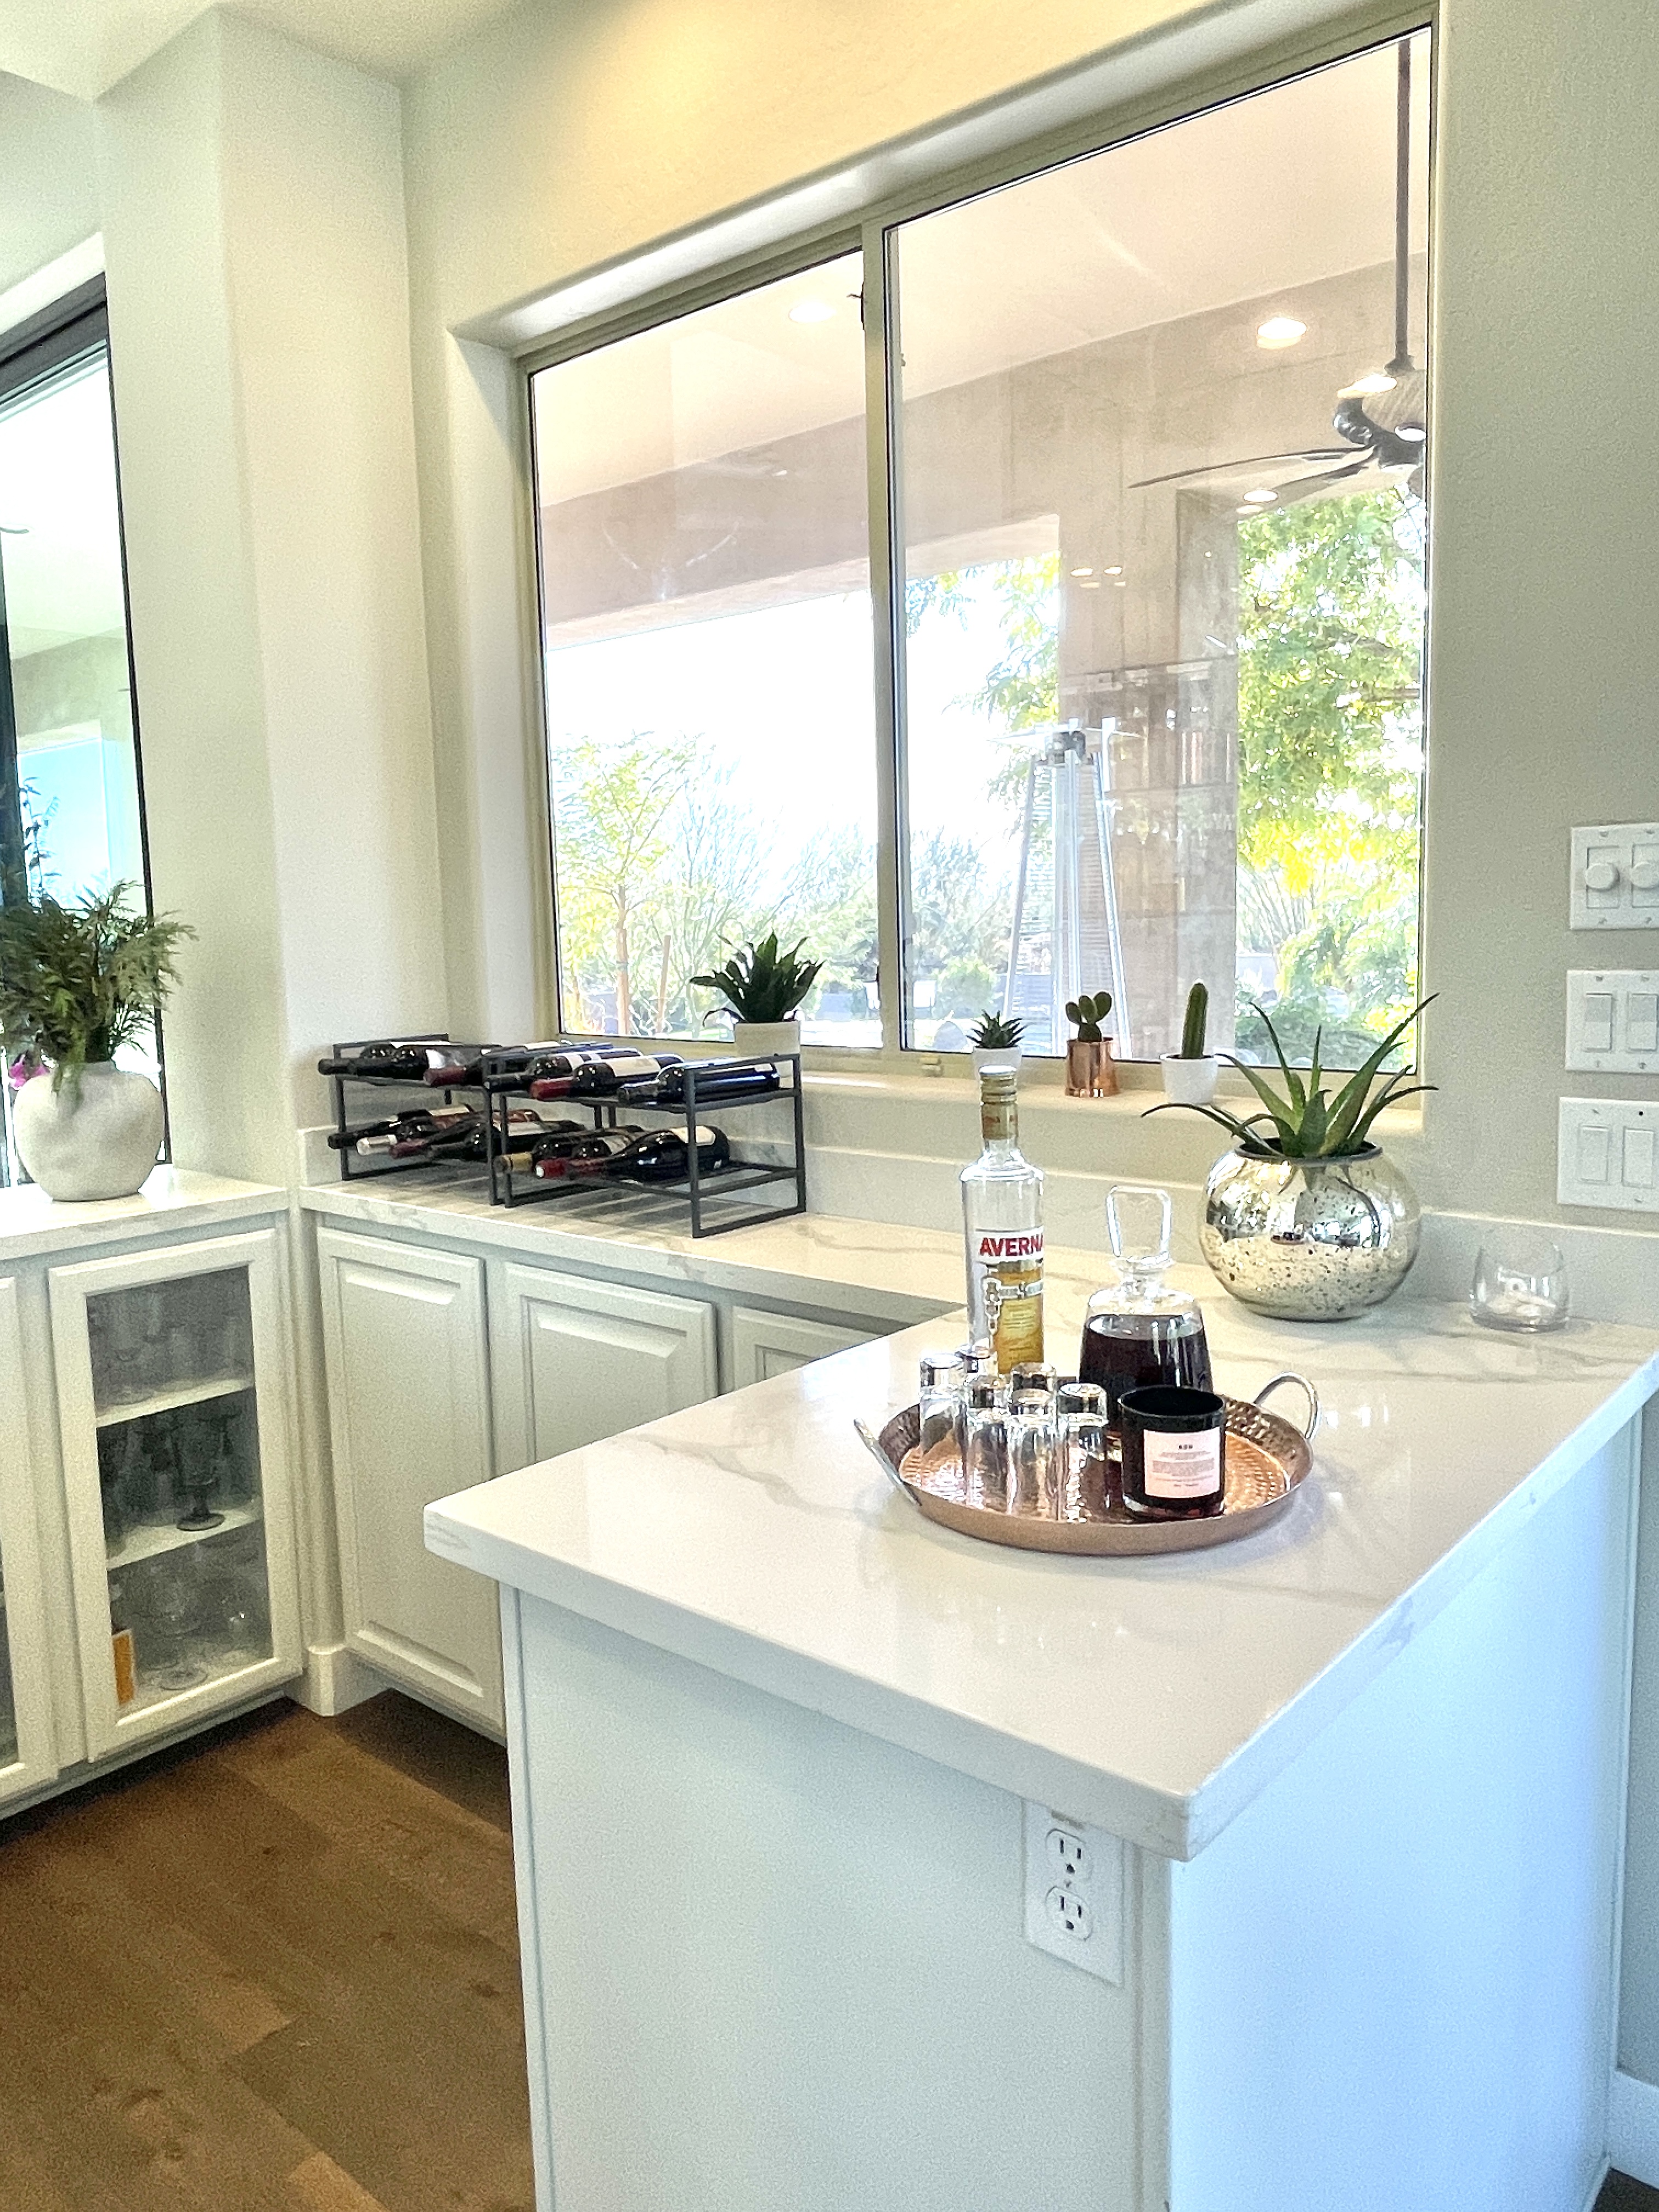
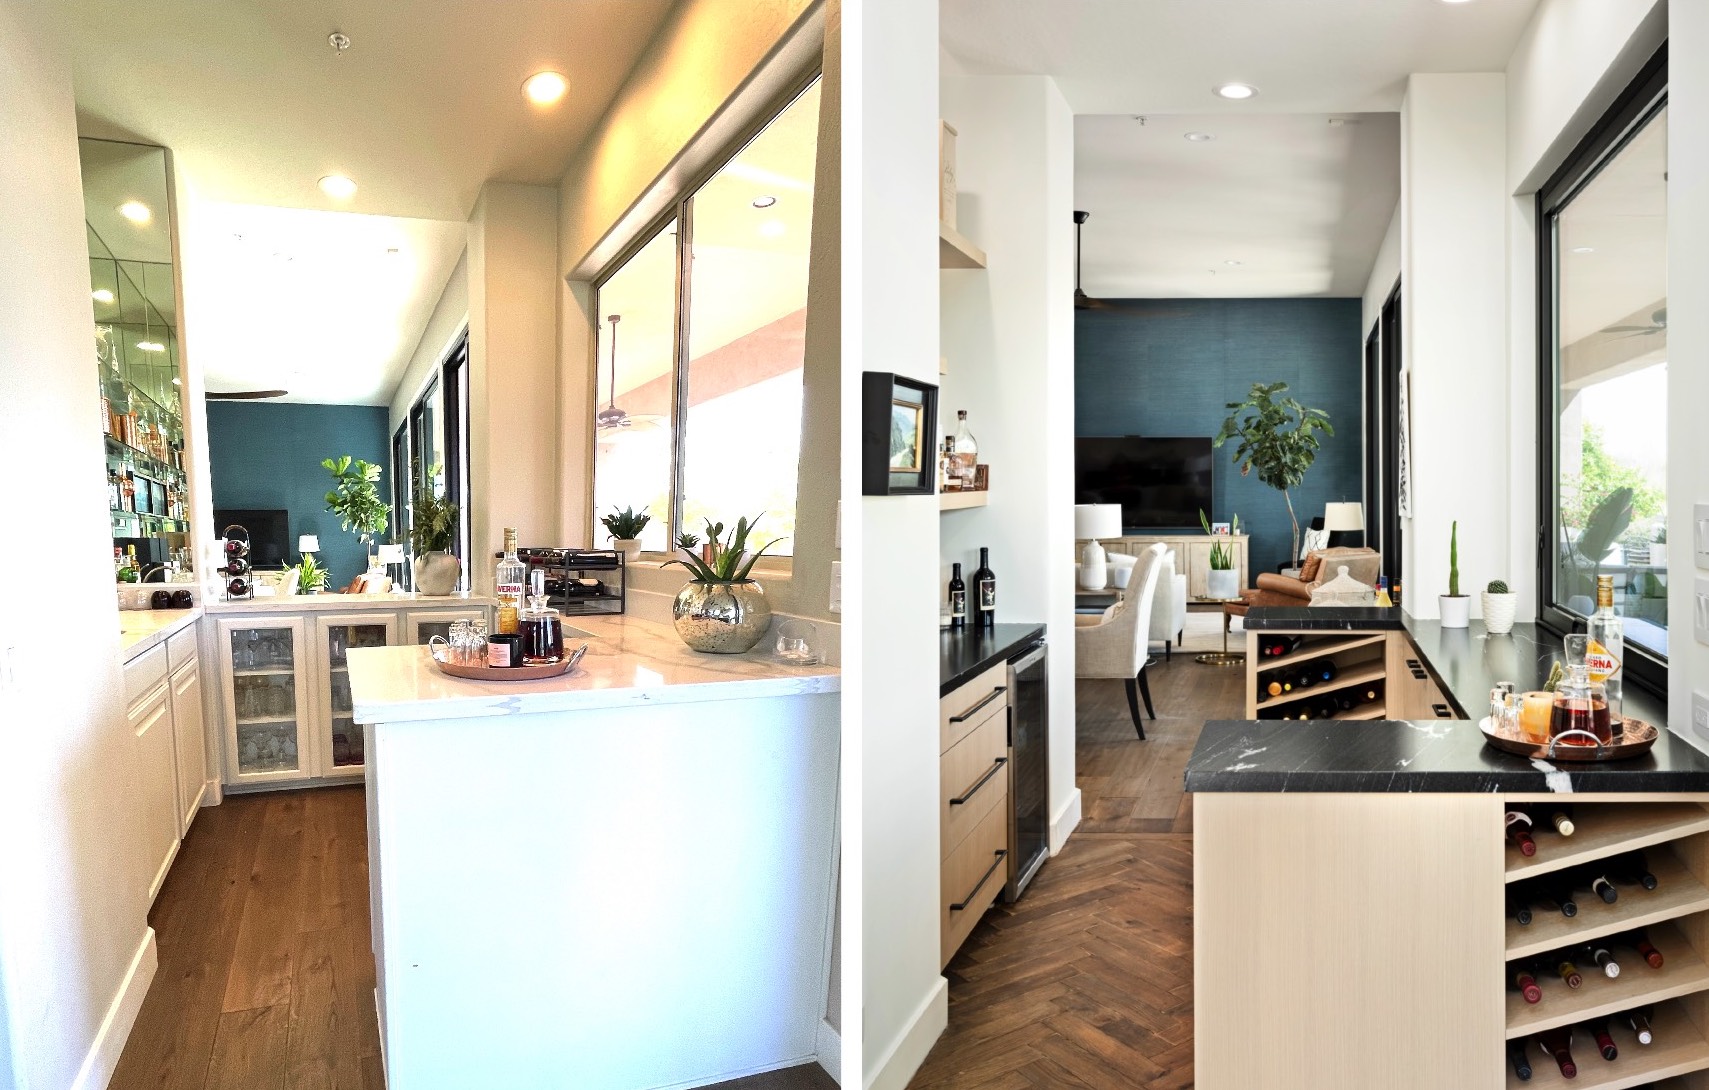
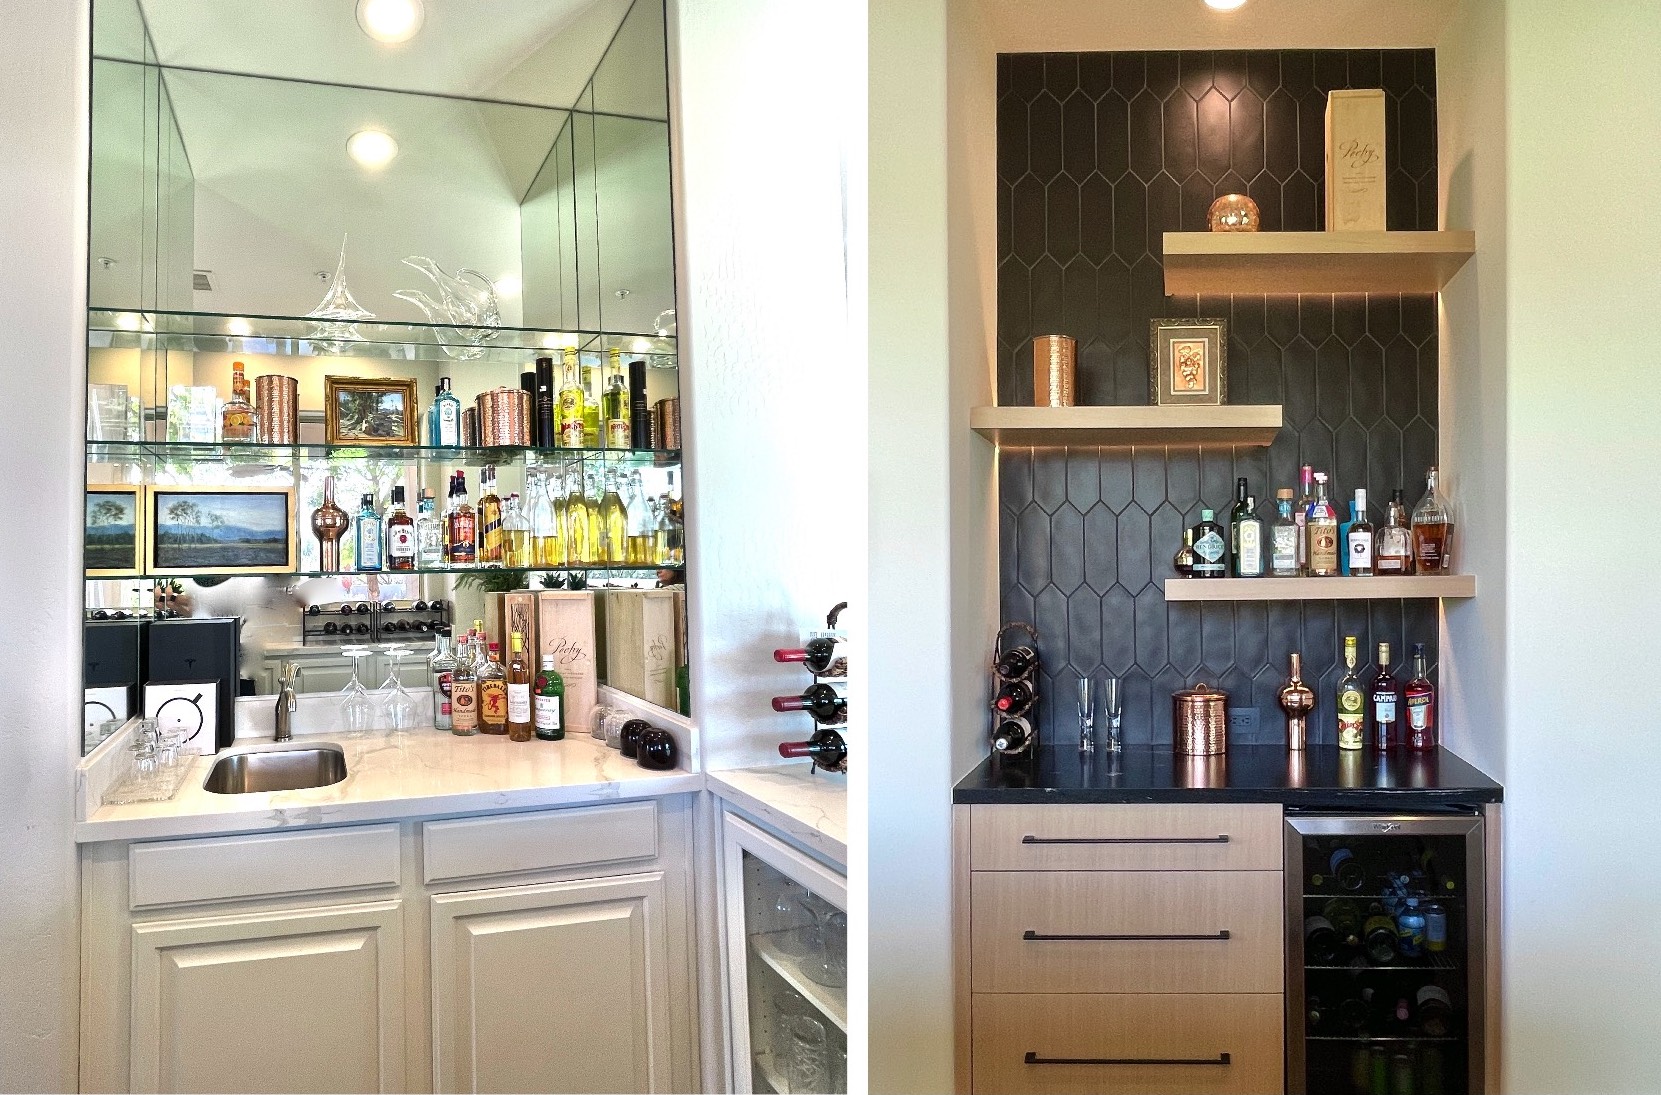
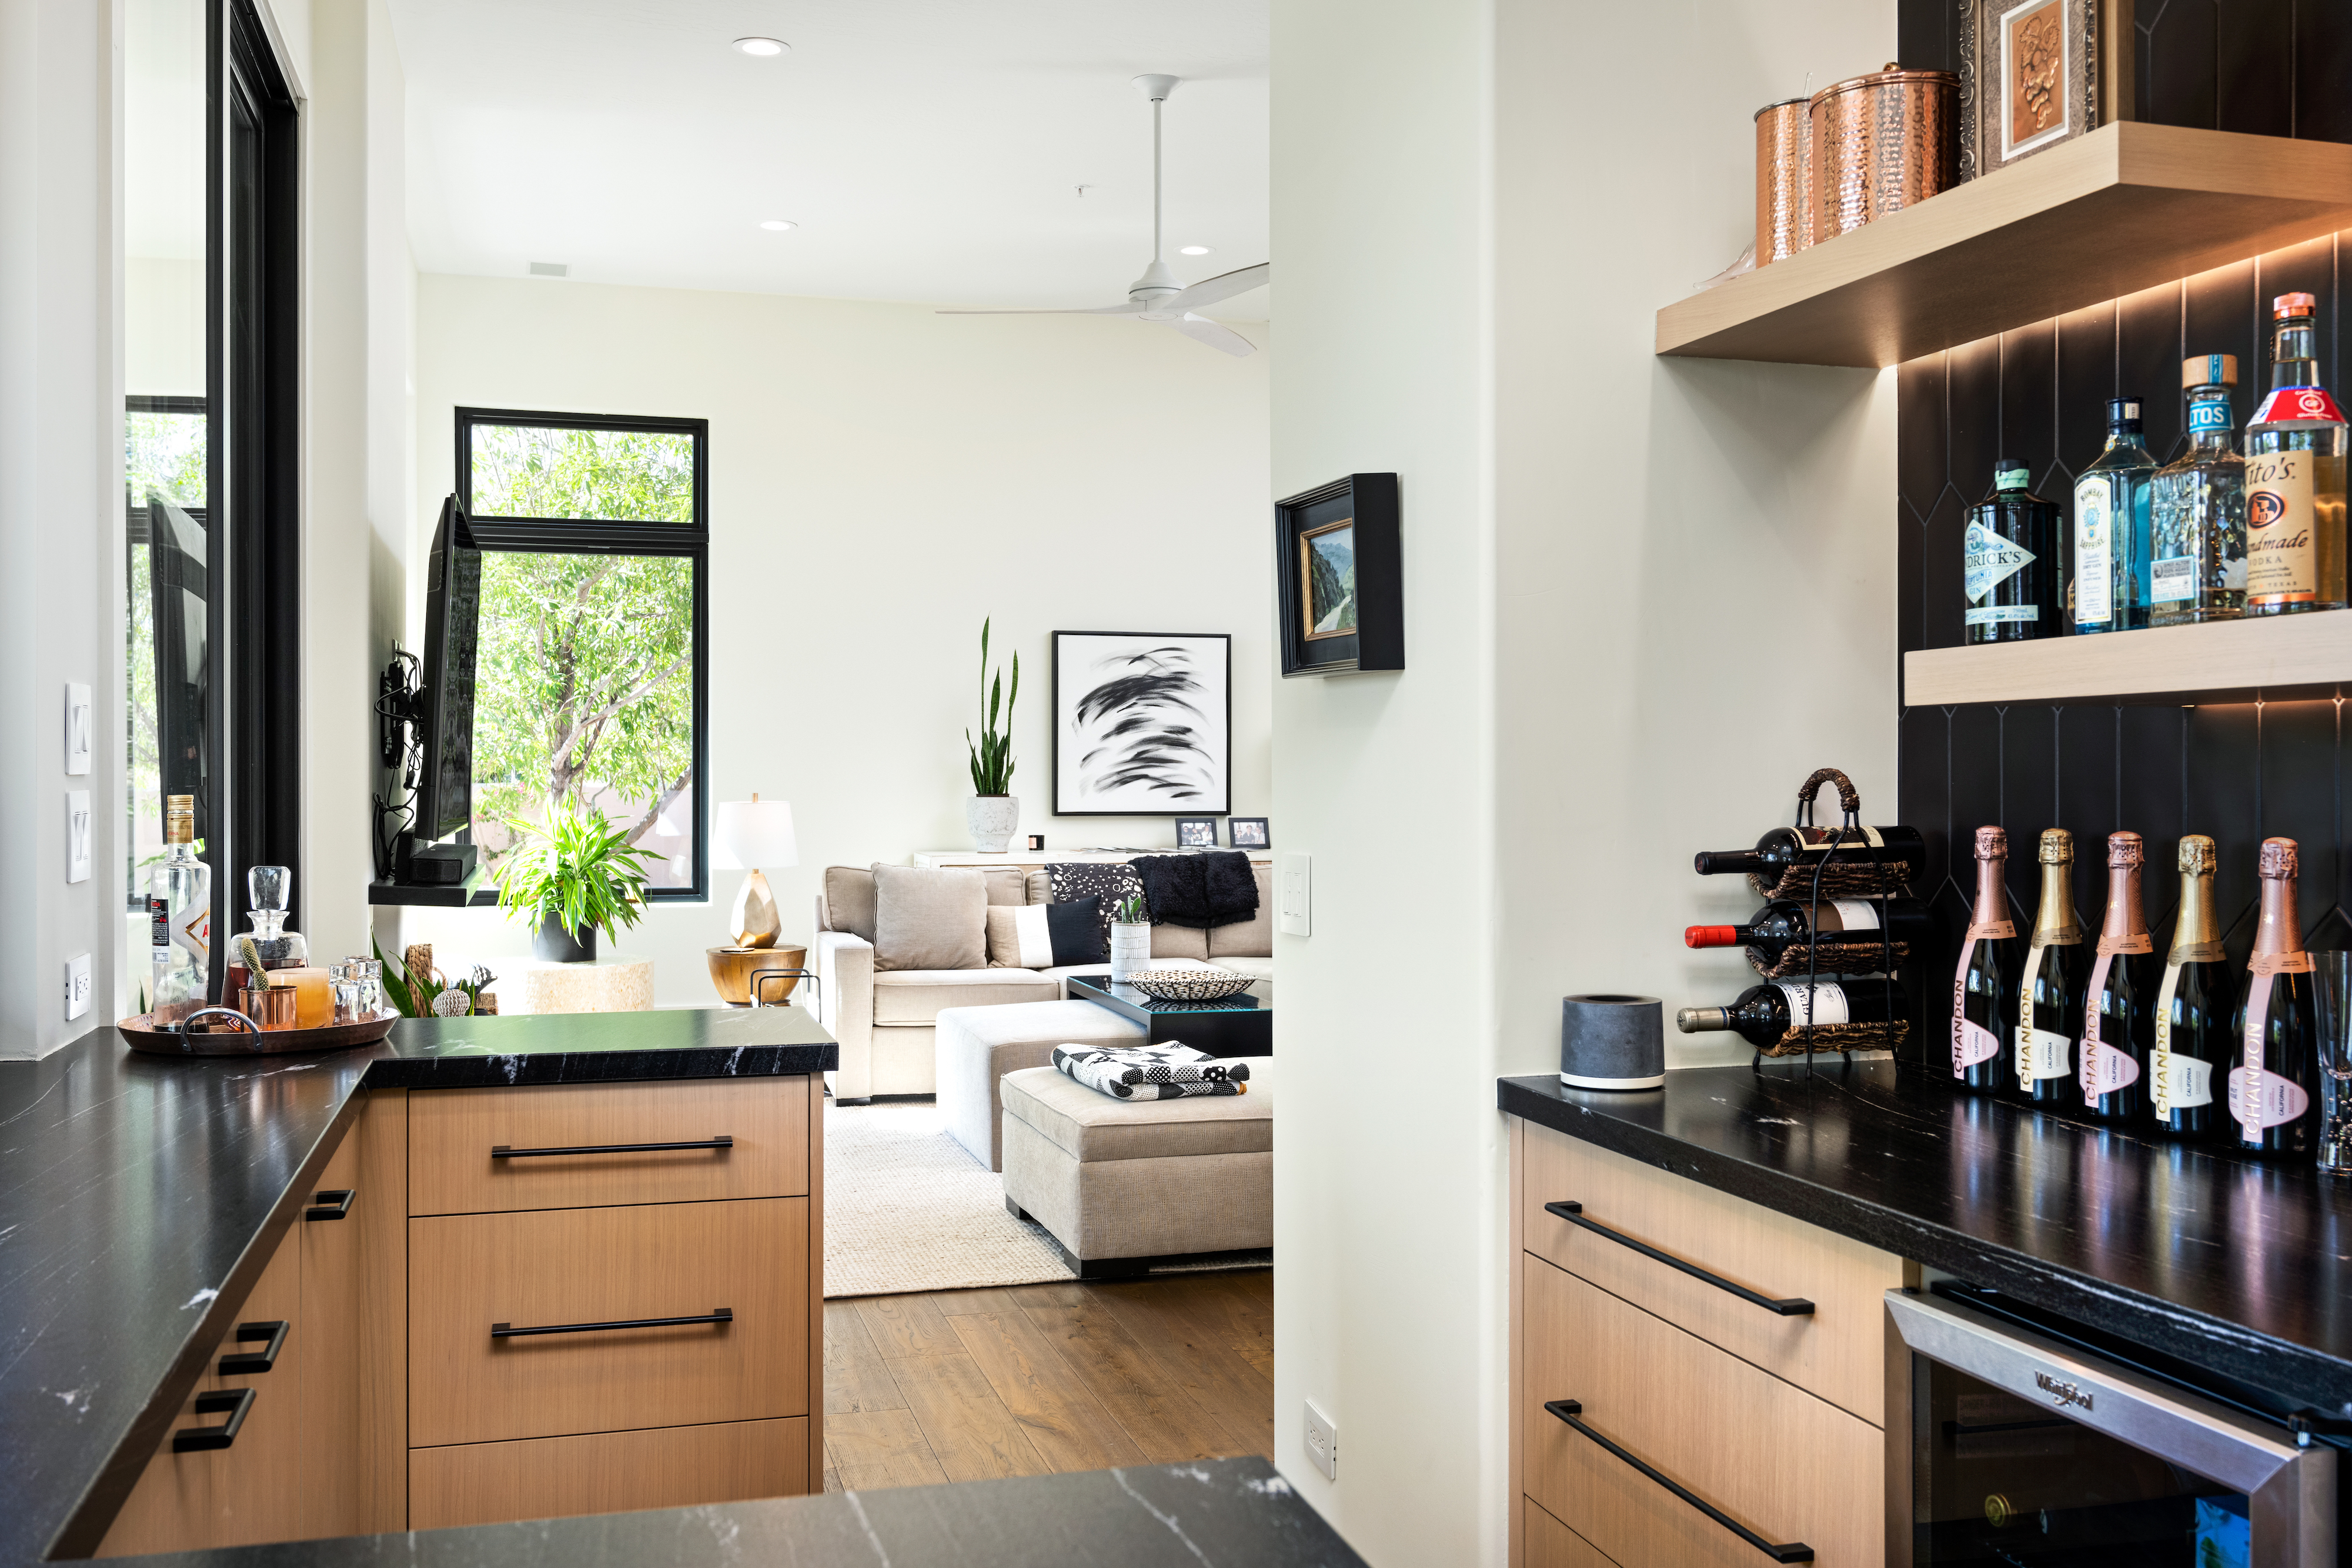
BAR:
The house had a wet bar area that looked out on the back patio, but there were a lot of problems with the design. The counters were bar height - really tall - and the wall came up so high that it really limited your view outside. You couldn't access the main dining room because it was only open on one side. And the entire thing was glass shelves and glass walls.
Before:
After:
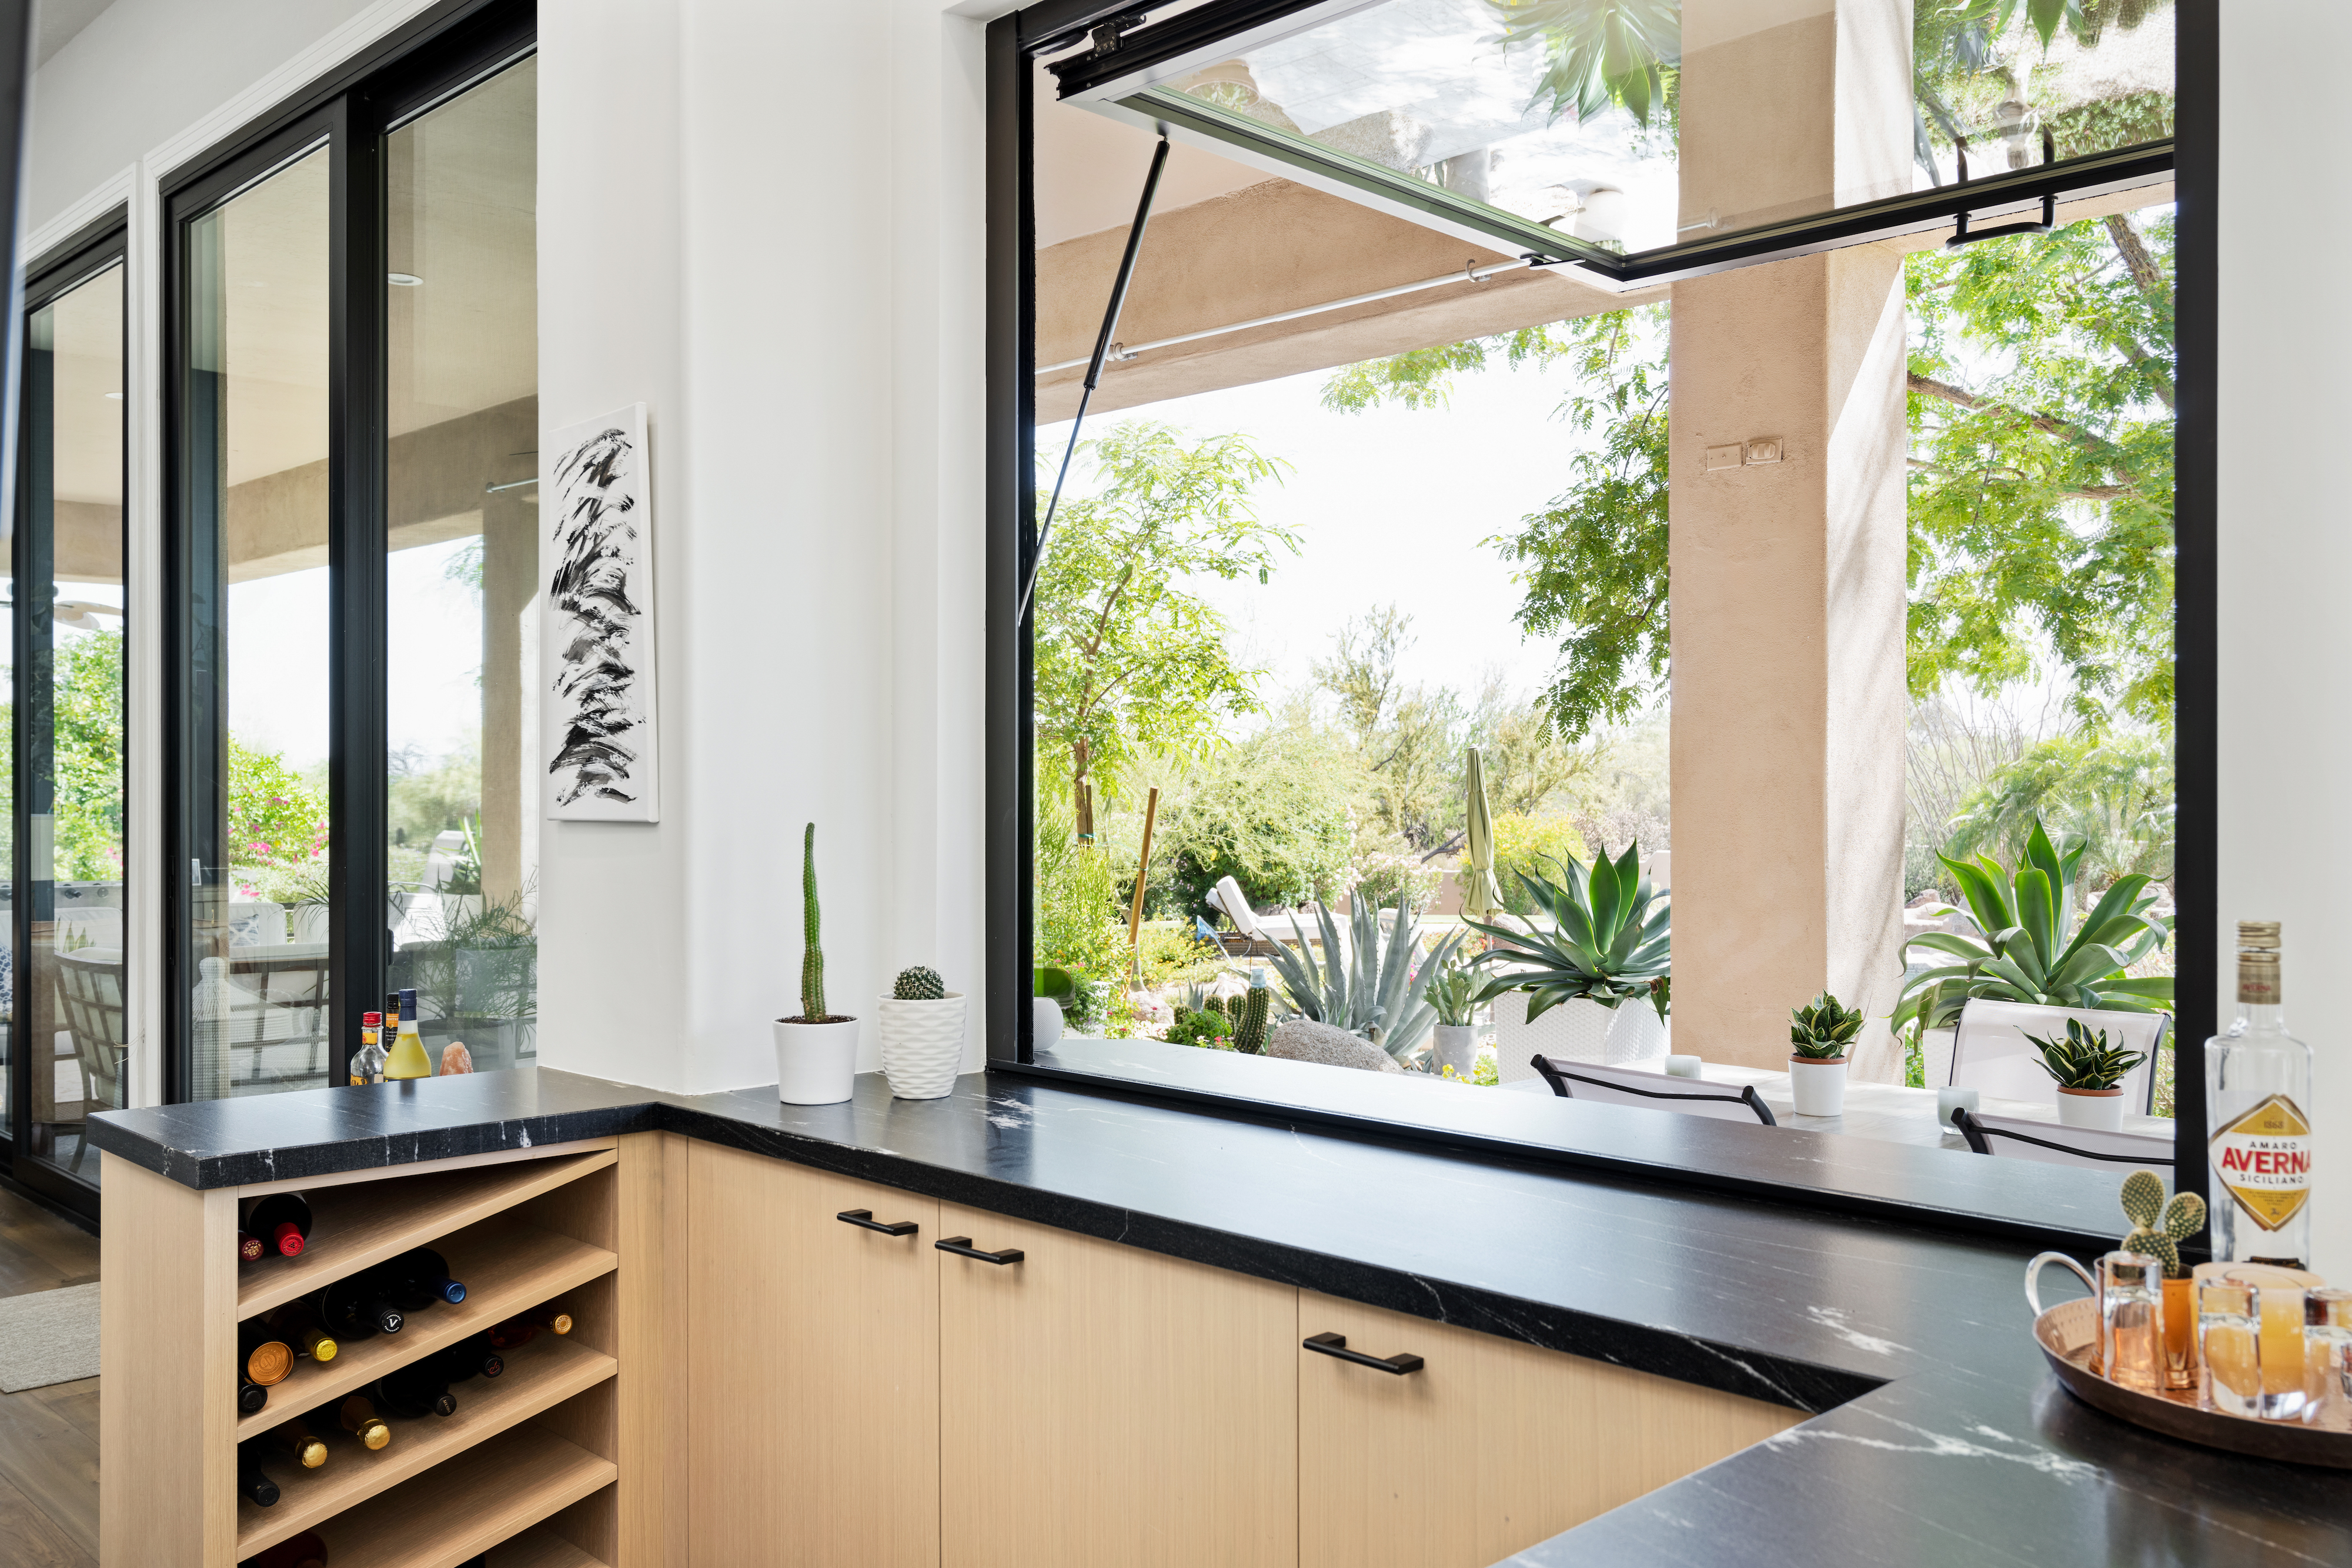
So we removed the sink, lowered the counters to counter height, opened up access to the dining room, replaced the glass with oak shelves and black backsplash tile and lowered the window height a ton. The view opened right up.
Then we put in a push out gas strut window that enables service to the outside patio dinner table. We continued the same cabinets as in the kitchen. I saw a design on Instagram that I really liked for wine racks and our cabinet guys recreated it. We used a leathered granite for the counters, so there wouldn't be light reflecting and continued it outside.
 before after
I love my angled wine racks
before after
BACKSPLASH: Alliante 4x12 Black Picket Tile from TileBar

COUNTERTOP: Leathered Black Andros Granite
]]>