
Speedy Mini Lasagna Stacks with Pesto and Marinara Sauce

How would you like a super fast way to make lasagna? I know I do a lot of pasta making from scratch on this site and I wanted to show you guys a really fast way to make lasagna without having to make or boil noodles and that would cook up much faster than regular lasagna. This is also a much lighter lasagna - it doesn't have any bechamel or ricotta cheese in it, just a little sprinkling of mozzarella on top to finish it off. And it's incredibly delicious. In fact, I think it's maybe my all time favorite lasagna.

Salmon Ravioli

I have some upcoming pasta classes in the next few weeks and it's always fun to demonstrate to students how easy it is to make homemade ravioli. There's so many ways to make ravioli, but my favorite way is to use this mold. I can make ravioli so fast with this thing. All you have to do is to roll out the pasta sheets, press into your mold, place a little filling in each well and lay another sheet on top. Flip the mold over, cut and separate the ravioli. It's fun. The mold enables you to make nice uniform ravioli, which will cook up evenly.

Pasta Pie

Happy 2013! I hope everyone had a nice holiday. We certainly did, with our boys all home and lots of cooking and friends over and a few too many bottles of Prosecco opened. I know a lot of food sites will be giving their readers recipes for juice cleanses and salads and lighter dishes for the new year, but not me! I'm giving you Pasta Pie.
This is a real comfort dish - this pie has a meat crust and is filled with pasta, cheese and tomato sauce. The meat mixture is basically just the same recipe that you would use if you were making meatballs, but you press it into a deep pie pan. The whole thing bakes up in the oven and comes out nice and crispy on top. You cut it into wedges and serve it with a dollop of extra marinara sauce. It's great on a cold winter's night.

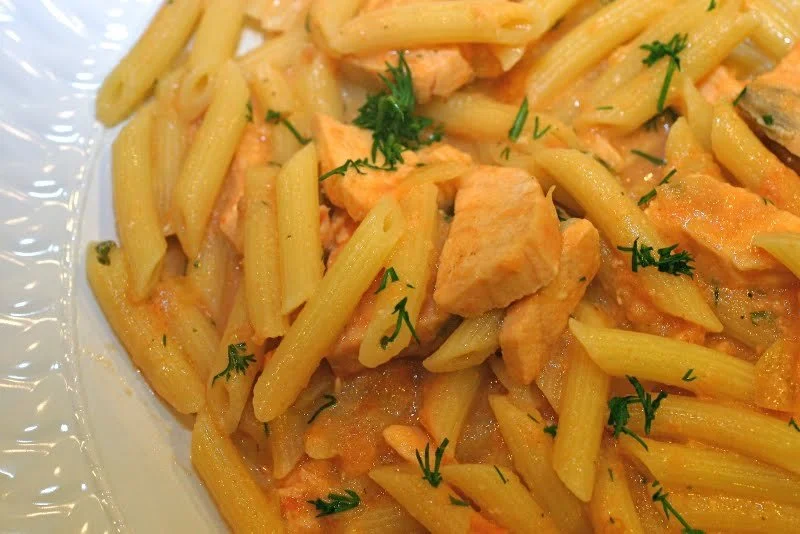
Pasta with Sweet Corn and Gorgonzola

Sometimes it's funny where you end up getting great recipes. On our way back from Italy in the spring, I was flipping through the channels on the TV on the Alitalia flight we were on. There were movies, TV shows, sports, news, etc. They also had cooking segments. I couldn't resist that - I had to see what they were cooking up. This was one of those recipes and when I got home and whipped it up, it was a hit.

From Rome - Bucatini all' Amatriciana

This is the first in a series of recipes I'm going to be doing for you that are inspired from our recent trip to Italy. This has long been an absolute favorite dish of mine to make, but having it in Italy again was just beyond great. This dish, like Cacio e Pepe, is a very common pasta dish that you will find on so many menus in Rome. It's the best of Italian cooking, in my opinon - it has just a handful of great ingredients, is easy to make but totally gutsy in its flavor.

For Valentine's Day - Beet Pasta Ravioli with Goat Cheese, Hazelnuts, Chives

If you're like us and avoid restaurants on Valentine's Day, this is the dish for you. This is killer. The beautiful deep magenta color of the pasta just reminded me of Valentine's Day. The filling of goat cheese, Parmigiano cheese and chives is so luscious and creamy. And I thought some toasted chopped hazelnuts on top would add the perfect texture. The filling is a breeze to make and the pasta dough is just plain fun.

Straw & Hay Pasta

I heard from an awful lot of you after I posted "Making Fresh Pasta" last month. Many of you tried making fresh pasta for the first time and I was so happy about that. I think the video that was in the post showed how easy it was and some of you got out your pasta rollers for the first time.
As promised, here is a recipe that uses both spinach pasta and plain pasta. It's a classic Italian dish called "Straw and Hay". I always love combining two different colored pastas in a dish. It's delicious with the salty prosciutto, sweet peas and cheese.

Cacio e Pepe (Pasta with Cheese and Pepper)

Here is your summer side dish for grilled meats. This simple pasta dish of cheese and cracked black pepper is one of my family's favorites. If you've ever been to Rome, you will see this dish on practically every menu. It is simple and fast to make. Once your water is boiling, it is a 5 minute preparation.

Sun-Dried Tomato No-Cook Sauce

I hope everyone had a nice Easter holiday. I was overwhelmed, once again, by how many people made the Italian Easter Breads. I'm so glad so many of you enjoyed them and that your kids loved them. Thanks for all the e-mails. I baked so many desserts myself this past weekend and each once was special. I made this fantastic cake from Sweetapolita, David Lebovitz's fantastic lime tart and this pretty cheesecake.
I didn't want to post this recipe, but Brian made me do it. This is one of his favorite sauces and he'll ask me from time to time if I've ever put it up on the blog. And the answer has always been "no", because although we love this sauce, it's not much of a recipe and I didn't think it was blog-worthy. Well, I've caved in and here it is.

Honeymoon Ravioli

I have so many recipe files that I've kept over the years, it's amazing to me sometimes. Ever since I was young and really started cooking, I've cut out every little recipe idea that appealed to me. It's fun to go back to those really old files and see what inspired me back then. Sometimes I find something that I absolutely forgot about, like this recipe.
When Brian and I were on our honeymoon (25 years ago) we really didn't have any money. But we splurged one evening and went to an Italian restaurant, where Brian ordered this ravioli with five cheeses. He raved so much about it that when I got home, I contacted Bon Appetit and asked them to get the recipe. I was sent the recipe, hammered out on an old typewriter on a piece of paper. I made the ravioli and then filed the recipe away and totally forgot about it - until I came across it recently and thought it would be nice to make this ravioli again for him. The restaurant is long gone, but it's a timeless recipe.

Corzetti, Italian Pasta Discs

I love to make hand crafted pasta and corzetti are such fun to make. They are pasta discs that are stamped with a design, which helps to hold a sauce. They are a regional pasta to Liguria in Italy. In medieval times, they were stamped with the Genovese family crests. To make them by hand, you must have a corzetti stamp.

Linguini with Roasted Pepper Sauce and Pine Nuts


My New Favorite Dish - Spaghetti with Roasted Tomatoes, Garlic, Pancetta

This is my new favorite dish. It has to be, because I've made it every single week since I saw the recipe.
It's a luscious dish of pasta topped with tomatoes which are roasted with bread crumbs and stuffed with slivers of garlic. Fresh herbs and crispy bits of pancetta top it off. The flavors are perfect together. To eat the dish, you just crush your tomato on top of your pasta and it makes this incredible sauce.

Pasta with Roasted Beets, Beet Greens and Pine Nuts
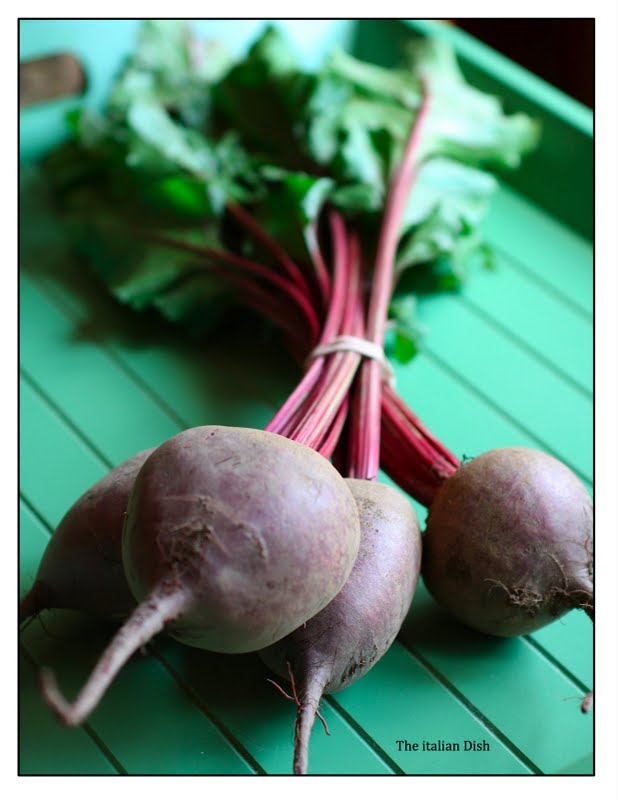 When confronted with these beauties at the local farmers market, what would you do with them?
Growing up, I never liked beets. I think that's true of a lot of people because we were used to bad canned beets. The best way to enjoy beets is to buy them fresh, roast them simply in the oven, peel them and serve them with just a little olive oil and sea salt. When I started reading Sunday Suppers at Lucques by Suzanne Goin, it inspired me to cook beets this way and I've loved them ever since.