Follow/Be a Fan

Follow

Honeymoon Ravioli

Nutella Bread for Dessert or for Breakfast!


Learn to Make Fresh Pasta (with a video!)

Easy Italian Pulled Pork

I love to sew - come on over and see what I'm making!

Make Homemade Limoncello


Harvest Grape Bread

Tips for Homemade Marinara Sauce

Breakfast Fruit Walkaway is a family favorite

A Delicious Vegetarian Dish: Pasta alla Norma

Love knitting? Come read my knitting blog, Italian Dish Knits.

Chocolate Zucchini Cake

Eating Our Way Through the Amalfi Coast

Make Whipped Cream Firm

My Favorite Chocolate Cake Recipe

SUBSCRIBE for free and never miss a post:


or Use Key Words to Search this Site

Eggplant Lasagna

Lemon Cake from Capri

Cacio e Pepe

Learn to Make Arancini


Learn How to Make Artisan Bread with no Kneading for Pennies


 Thanks, Mom!


Strawberry Cheesecake Parfaits Require No Baking

Make Pie Dough in 60 Seconds!

Make Your Own Vanilla Extract


Spicy Bucatini all'Amatriciana - a Roman Classic

My Mom's Pork Chops

Chocolate Panna Cotta


My Five Inexpensive Kitchen Essentials

Beet Ravioli with Goat Cheese

Entries in Daring Bakers (8)

Saturday
Sep272008

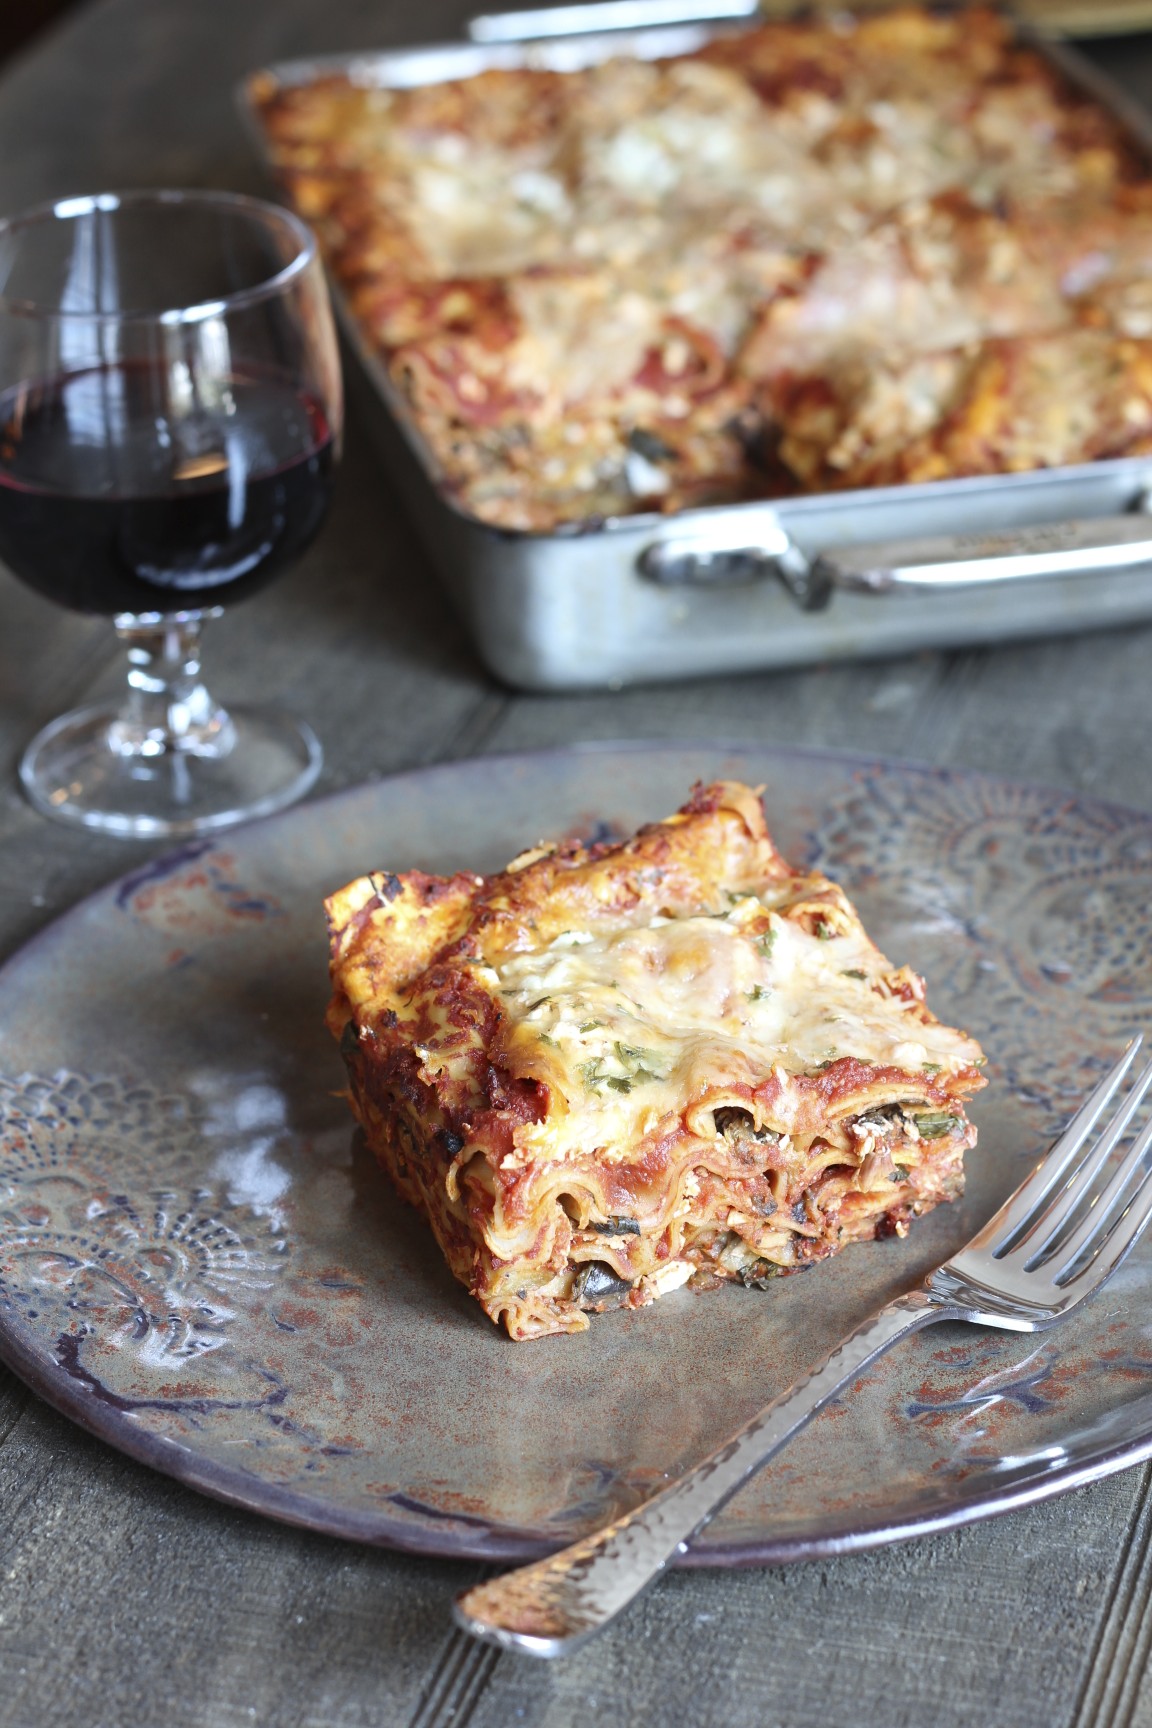
Daring Bakers: Lavash Crackers with Peperonata Topping

It's Daring Baker's time again!  The challenge this month was from Shelly from Musings From the Fishbowl and Natalie of Gluten a Go Go.  The Challenge: make Lavash crackers and create a vegan and gluten free topping or dip.  The Lavash crackers are from Peter Reinhart's "The Bread Baker's Apprentice".

I was excited about this challenge because Lavash crackers are basically identical to Italian Croccantini crackers. These crackers are crisp and light and the perfect vehicle for any kind of spread or topping. This peperonata topping is one of my favorite things. You can use it for so many things - even over pasta, if you want!

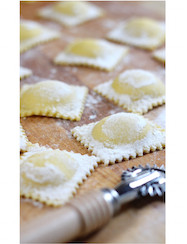
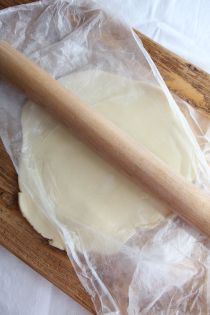
The crackers were interesting to make. The recipe calls for rolling out the dough with a rolling pin until it's super thin. Well, I thought why do all that work with a rolling pin when I can just zip it through my pasta rollers? I rolled out the dough very thin and then I just cut the dough with a pizza cutter into the sizes I wanted and placed the dough on a Silpat in a baking pan. They crisped up really nice, although there were a lot of bubbles. But it didn't matter. The crackers were really delicious and crisp. And making the crackers fresh - what a difference that makes!

Lavash Crackers with Peperonata Topping


to print recipe only, click here

Ingredients:

  • 1.5 cups unbleached bread flour
  • 1/2 tsp. salt
  • 1/2 tsp. instant yeast (Rapid Rise kind of yeast)
  • 1 Tbsp. sugar
  • 1 Tbsp. vegetable oil
  • 1/2 cup + 2 Tbsp. water, room temperature
  • Kosher Salt and pepper for topping

Instructions:

In a mixing bowl, stir together the flour, salt, yeast, sugar, oil and just enough water to bring everything together into a ball. You may not need the full amount of water, but be prepared to use it all if needed.

Sprinkle some flour on the counter and transfer the dough to the counter. Knead for about 10 minutes, or until the dough is nice and firm, satiny to the touch, not tacky and supple enough to stretch when pulled. Lightly oil a bowl and transfer the dough to the bowl, rolling it around to coat it with oil. Cover with plastic wrap. Let sit at room temperature for 90 minutes, or until the dough doubles in size. (You can also refrigerate the dough and bring to room temperature the next day, let it rise and continue on with the recipe).

Roll out the dough with a rolling pin into a paper thin sheet about 15 x 12 inches. You may have to stop from time to time so that the gluten can relax. Cover it with a towel while it relaxes. When it is the desired thinness, let the dough relax for 5 minutes. (Or alternatively, roll out the dough in pasta rollers like I did). Line a sheet pan with a Silpat or baking parchment. Carefully lift the sheet of dough and lay it on the parchment. (Or cut the dough with a pizza cutter into strips).

Preheat the oven to 350 degrees with the oven rack in the middle. Mist the top of the dough with water and sprinkle with kosher salt and pepper. If you rolled out the dough into one large sheet with a rolling pin and you want to precut the cracker, use a pizza cutter and cut diamonds or rectangles in the dough. You do not need to separate the pieces, as they will snap apart after baking.

Bake for 15 to 20 minutes or until the crackers begin to brown across the top.

Remove the pan from the oven and let them cool in the pan for about 10 minutes. You can then snap them apart.

for the Peperonata Topping

Ingredients:

  • 2 yellow bell peppers
  • 2 red bell peppers
  • 1/4 cup olive oil
  • 2 garlic cloves, minced
  • 2 Tbsp. salt packed capers*
  • 1 Tbsp. tomato paste
  • 1/2 onion, diced
  • 1/2 tsp. dried red chile flakes
  • 1/2 tsp salt
  • 2 Tbsp. red wine vinegar
  • chopped parsley, about 1/4 cup 

Instructions:

Put the oven on broil. Cut tops off peppers, cut peppers in half and remove seeds. Lay a piece of foil on a baking sheet and lay peppers (including the tops) on sheet, skin side up. Broil until skin blackens. Place peppers in paper bag and let steam. Remove and let cool. Skins should slip off.  Chop peppers into small pieces.

Heat the olive oil in a large skillet. Cook the garlic gently for a couple of minutes. Rinse the salt off the capers and dry capers. Add the capers to the garlic and fry for about one minute over medium heat. Stir in the tomato paste and cook for a couple of minutes and then add onion, chile flakes and salt and cook, stirring, for about 5 minutes.

Add the vinegar to the pan and deglaze, scraping up any brown bits from the bottom of the pan and then stir in the chopped peppers. Adjust seasoning for more salt or vinegar. Add parsley. Remove topping to a bowl and let cool. Do not refrigerate. Let sit at room temperature until ready to use.

*tip: Don't use vinegar packed capers, only salt packed! They are far superior. Just give them a rinse before you use them. They are so delicious.

Wednesday
Aug272008

Daring Bakers - Chocolate Eclairs


It's time for the Daring Baker's Challenge! I recently joined this incredible group of food bloggers who challenge themselves to create the same recipe every month. It's a group that was formed by Lis of La Mia Cucina and Ivonne of Cream Puffs in Venice. This group has grown to over a thousand members! We all make the same recipe each month, which is kept a secret, and then at the end of the month, on the same day, we all post our creations. It's interesting to see the differences in all the dishes, even though they are the same recipe.


This month's hosts are Tony Tahhan and Meetka of What's For Lunch, Honey? in Germany. They have chosen the recipe of Chocolate Eclairs from the book by the world renowned pastry chef, Pierre Herme called "Chocolate Desserts", written by Dorie Greenspan. I was relieved to see this as the baking challenge because for eclairs you need to make pâte a choux dough, which I have made many times before, using Julia Child's recipe. I was interested to see how Pierre Herme's recipe would differ. It was a little different with the ingredients, but the technique was exactly the same. Pate a choux dough is very easy to make. Don't be afraid to try it! I usually make the dough into round cream puffs , bake, split in half and fill with ice cream and drizzle chocolate sauce all over. Easy. This recipe is much more complicated to make the eclairs with the filling and the glaze, but the dough is still very easy.

Chocolate Éclairs by Pierre Hermé


Recipe from "Chocolate Desserts" by Pierre Hermé
(makes 20-24 Éclairs)

• Choux Pastry Dough (see below for recipe), fresh and still warm

Instructions:

1) Preheat your oven to 375 degrees F (190 degrees C). Divide the oven into thirds by positioning the racks in the upper and lower half of the oven. Line two baking sheets with waxed or parchment paper.

2) Fill a large pastry bag fitted with a 2/3 (2cm) plain tip nozzle with the warm cream puff dough.


Pipe the dough onto the baking sheets in long, 4 to 41/2 inches (about 11 cm) chubby fingers.
Leave about 2 inches (5 cm) space in between each dough strip to allow them room to puff.
The dough should give you enough to pipe 20-24 éclairs.


3) Slide both the baking sheets into the oven and bake for 7 minutes. After the 7 minutes, slip the handle of a wooden spoon into the door to keep in ajar. When the éclairs have been in the oven for a total of 12 minutes, rotate the sheets top to bottom and front to back. Continue baking for a further 8 minutes or until the éclairs are puffed, golden and firm. The total baking time should be approximately 20 minutes.

Notes:
1) The éclairs can be kept in a cool, dry place for several hours before filling.

Assembling the éclairs:

• Chocolate glaze (see below for recipe)
• Chocolate pastry cream (see below for recipe)

1) Slice the éclairs horizontally, using a serrated knife and a gently sawing motion. Set aside the bottoms and place the tops on a rack over a piece of parchment paper.

2) The glaze should be barely warm to the touch (between 95 – 104 degrees F or 35 – 40 degrees C, as measured on an instant read thermometer). Spread the glaze over the tops of the éclairs using a metal icing spatula. Allow the tops to set and in the meantime fill the bottoms with the pastry cream.

3) Pipe or spoon the pastry cream into the bottoms of the éclairs. Make sure you fill the bottoms with enough cream to mound above the pastry. Place the glazed tops onto the pastry cream and wriggle gently to settle them.

Notes:
1) If you have chilled your chocolate glaze, reheat by placing it in a bowl over simmering water, stirring it gently with a wooden spoon. Do not stir too vigorously as you do not want to create bubbles.

2) The éclairs should be served as soon as they have been filled.

for the Pierre Hermé’s Cream Puff Dough

Ingredients:
• ½ cup (125g) whole milk
• ½ cup (125g) water
• 1 stick (4 ounces; 115g) unsalted butter, cut into 8 pieces
• ¼ teaspoon sugar
• ¼ teaspoon salt
• 1 cup (140g) all-purpose flour
• 5 large eggs, at room temperature


Instructions:

1) In a heavy bottomed medium saucepan, bring the milk, water, butter, sugar and salt to the boil.

2) Once the mixture is at a rolling boil, add all of the flour at once, reduce the heat to medium and start to stir the mixture vigorously with a wooden spoon. The dough comes together very quickly. Do not worry if a slight crust forms at the bottom of the pan, it’s supposed to. You need to carry on stirring for a further 2-3 minutes to dry the dough. After this time the dough will be very soft and smooth.

3) Transfer the dough into a bowl of a mixer fitted with the paddle attachment, or using your handmixer or if you still have the energy, continue by hand. Add the eggs one at a time, beating after each egg has been added to incorporate it into the dough.
You will notice that after you have added the first egg, the dough will separate, once again do not worry. As you keep working the dough, it will come back all together again by the time you have added the third egg. In the end the dough should be thick and shiny and when lifted it should fall back into the bowl in a ribbon.

4) The dough should be still warm. It is now ready to be used for the éclairs as directed above.

Notes:
1) Once the dough is made you need to shape it immediately.

2) You can pipe the dough and the freeze it. Simply pipe the dough onto parchment-lined baking sheets and slide the sheets into the freezer. Once the dough is completely frozen, transfer the piped shapes into freezer bags. They can be kept in the freezer for up to a month.

for the Chocolate Pastry Cream

Ingredients:
• 2 cups (500g) whole milk
• 4 large egg yolks
• 6 tbsp (75g) sugar
• 3 tablespoons cornstarch, sifted
• 7 oz (200g) bittersweet chocolate, preferably Velrhona Guanaja, melted
• 2½ tbsp (1¼ oz: 40g) unsalted butter, at room temperature


Instructions:

1) In a small saucepan, bring the milk to a boil. In the meantime, combine the yolks, sugar and cornstarch together and whisk in a heavy‐bottomed saucepan.

2) Once the milk has reached a boil, temper the yolks by whisking a couple spoonfuls of the hot milk into the yolk mixture.Continue whisking and slowly pour the rest of the milk into the tempered yolk mixture.

3) Strain the mixture back into the saucepan to remove any egg that may have scrambled. Place the pan over medium heat and whisk vigorously (without stop) until the mixture returns to a boil. Keep whisking vigorously for 1 to 2 more minutes (still over medium heat).Stir in the melted chocolate and then remove the pan from the heat.

4) Scrape the pastry cream into a small bowl and set it in an ice‐water bath to stop the cooking process. Make sure to continue stirring the mixture at this point so that it remains smooth.

5) Once the cream has reached a temperature of 140 F remove from the ice‐water bath and stir in the butter in three or four installments. Return the cream to the ice‐water bath to continue cooling, stirring occasionally, until it has completely cooled. The cream is now ready to use or store in the fridge.

Notes:
1) The pastry cream can be made 2‐3 days in advance and stored in the refrigerator.

2) In order to avoid a skin forming on the pastry cream, cover with plastic wrap pressed onto the cream.

3) Tempering the eggs raises the temperature of the eggs slowly so that they do not scramble.

for the Chocolate Glaze


(makes 1 cup or 300g)
Ingredients:


• 1/3 cup (80g) heavy cream
• 3½ oz (100g) bittersweet chocolate, finely chopped
• 4 tsp (20 g) unsalted butter, cut into 4 pieces, at room temperature
• 7 tbsp (110 g) Chocolate Sauce (recipe below), warm or at room temperature

Instructions:

1)In a small saucepan, bring the heavy cream to a boil. Remove from the heat and slowly begin to add the chocolate, stirring with a wooden spoon or spatula.

2) Stirring gently, stir in the butter, piece by piece followed by the chocolate sauce.

Notes:
1) If the chocolate glaze is too cool (i.e. not liquid enough) you may heat it briefly
 in the microwave or over a double boiler. A double boiler is basically a bowl sitting over (not touching) simmering water.

2) It is best to glaze the eclairs after the glaze is made, but if you are pressed for time, you can make the glaze a couple days ahead of time, store it in the fridge and bring it up to the proper temperature (95 to 104 F) when ready to glaze.

for the Chocolate Sauce
(makes 1½ cups or 525 g)

Ingredients:

• 4½ oz (130 g) bittersweet chocolate, finely chopped
• 1 cup (250 g) water
• ½ cup (125 g) crème fraîche, or heavy cream
• 1/3 cup (70 g) sugar

Instructions:

1) Place all the ingredients into a heavy‐bottomed saucepan and bring to a boil, making sure to stir constantly. Then reduce the heat to low and continue stirring with a wooden spoon until the sauce thickens.

2) It may take 10‐15 minutes for the sauce to thicken, but you will know when it is done when it coats the back of your spoon.

Notes:
1) You can make this sauce ahead of time and store it in the refrigerator for two weeks. Reheat the sauce in a microwave oven or a double boiler before using.
2) This sauce is also great for cakes, ice-cream and tarts.


Page 1 2 3