
Grilled Zucchini with Burrata, Cherry Tomato and Toasted Pine Nuts
There's still a lot of zucchini being picked right now and here's another way to use them. This dish is super simple and you can whip it together in no time. Grilling the zucchini is the only real cooking you have to do in this dish and the rest is just assembling the ingredients.


Pasta with 'Nduja, Kale and Toasted Breadcrumbs
Do you know about 'nduja? If not, keep reading because this special Italian spread has become very popular and with good reason - it makes so many dishes even better.

Jam Pastries

These fruit pastries can be a nice little dessert after a meal or a great partner with coffee in the morning. I've been having fun making and sharing these and decided they might be nice for people to make during the holidays. They are so pretty, especially with raspberry jam. I've made blackberry and blueberry, too, and they are just as delicious. The dough is a snap to make in your food processor - it takes just a couple of minutes.

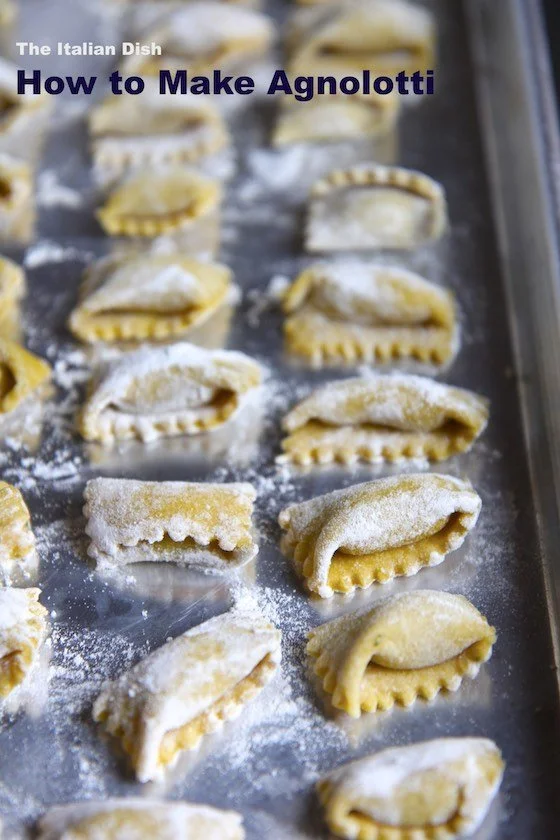
Homemade Garganelli Pasta

If you are familiar with my recipe for Pie Dough in 60 Seconds, then you will be happy to know that you can do the same thing with pasta dough. I make this dough in a food processor and it takes about 60 seconds. I'm going to give you step by step photos to show you how to make a pasta shape called garganelli and even a little video to make it easy (scroll to bottom of post for video). All you need are two ingredients - flour and eggs. You could make it today!
Swiss Chard Agnolotti with Brown Butter

I'm going to be doing a whole series of pasta recipes this fall and winter. It's so fun to make homemade pasta and I hope if you've never tried before that maybe you will give it a go this year. This recipe is for agnolotti, a stuffed pasta that is easy and fast to make. I'm giving you step by step photos plus a little video to give you the confidence to try.
This agnolotti is made with a swiss chard and cheese filling. This filling isn't hard to make at all - the chard is simply chopped a little and then cooked down over the stove in a bit of water. If you have a food processor, you can process the filling in a snap.


Classic Blackberry Crisp

It's summertime and everyone should know how to make a classic fruit crisp dessert. They are easy to make and you can make them with so many different fruits. I'm making this one with blackberries, but you can add blueberries and raspberries for nice mixed berry crisp. And leftovers are great the next day or even as a sweet treat for breakfast with your coffee.


Parmesan Garlic Cheese Straws

Why have I never written about these before in a post? These are a family favorite as an appetizer and are a snap to make. They are also - bonus - something you can make when you need an appetizer and have nothing available. Because if you always keep frozen puff pastry sheets in your freezer (you should) and you always have a hard grating cheese in your fridge (I bet you do), you can totally make these in about an hour and a half from start to finish. You can also make these ahead of time and stick them in the fridge before baking. They hold all day in the fridge until you're ready to pop them in the oven.

Bunny Fold Napkin for Easter

The last time I hosted Easter at my house, I made these cute little bunnies out of napkins and put one at each place setting. Especially if you have children in your home, you may want to try these this Easter. They are simple to do and you get better after each one! Thinner napkins work a little better, if you have a choice.
Also, this is the time to start thinking of making Italian Easter Bread. If you have never made this delicious bread, give it a go this year. It is slightly sweet and a real treat. If you are looking for additional Easter recipes, you can try my Pesto Stuffed Eggs, which are so pretty at Easter. You can also try these pretty Edible Easter Egg Nests, which I have made and placed on the table for dinner. Enjoy!

Pasta alla Gricia (Pasta with Cheese & Pancetta)

There are a handful of classic Roman pasta dishes that you will find in almost every good trattoria in Rome: Cacio e Pepe, Bucatini all' Amatriciana and Pasta alla Gricia. These dishes are what I like the best - simple to make and with just a few ingredients that you already have in your pantry and can make at the last minute. No fancy recipes here - these recipes are all about technique. This delicious pasta has just four ingredients, but it's essential to prepare it properly.

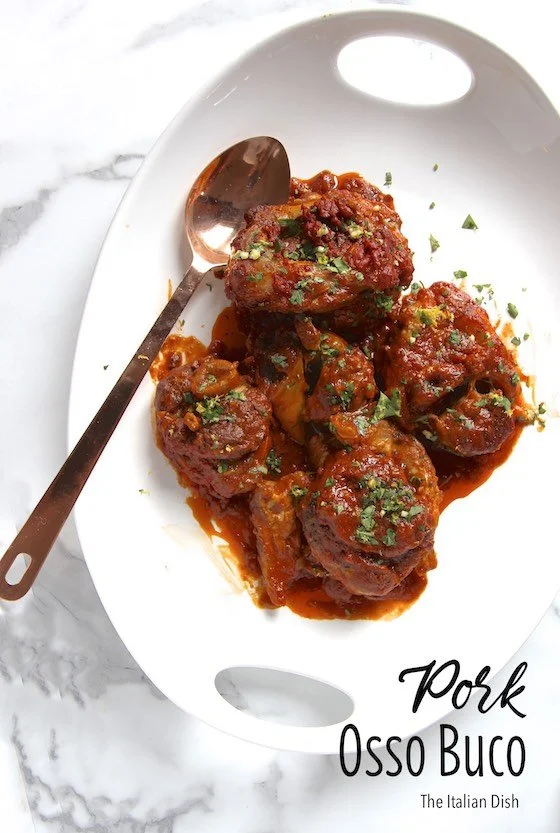
How to Trim a Whole Beef Tenderloin

The holidays are upon us and for many people, this is the one time they fix a whole beef tenderloin. Roasting a whole tenderloin is super simple to do, but most people skip the actual preparation of trimming the tenderloin, which they leave to their butcher. This usually makes the tenderloin more expensive to buy. Learning to trim it properly yourself can be a big savings and is easy to do. I'm going to give you step-by-step photos to show you how.
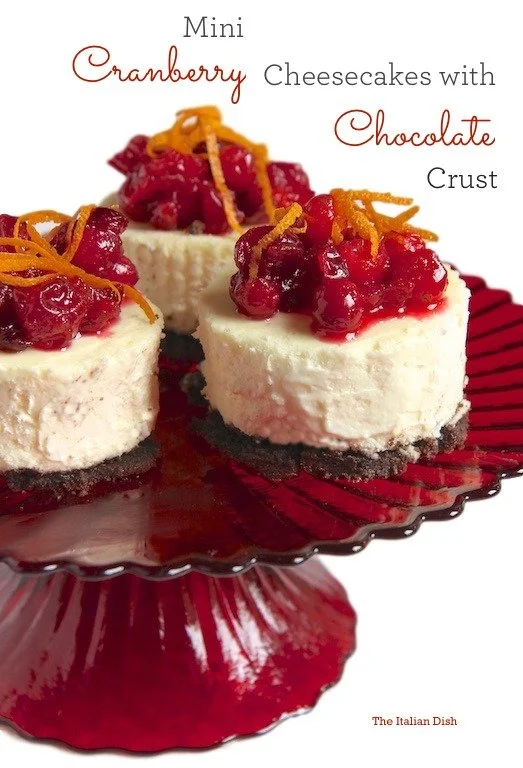
Mini Cheesecakes with Cranberry Topping & Chocolate Crust

Sometimes serving individual little cheesecakes is just a little more special than slicing servings from a large cheesecake. If you're having a small dinner with just a few people, mini cheesecakes are a fun option. I have two ways to make mini cheesecakes, which are easy and work well - one is Wilton's inidividual mini cheesecake pans and the other is this Norpro mini cheesecake pan. But what if you don't have these pans and don't want to invest in something like this when you're only going to use them once in a blue moon? You can bake a whole cheesecake in a 9x13 pan and just cut out individual cheesecakes with a cutter.
Thanksgiving Recipe Roundup
Thanksgiving is just around the corner and so I thought I would compile a little roundup of recipes from the blog that might give you some new ideas or helpful tips. These are some of my favorites - some oldies but goodies! There's everything from a very different way to make turkey to a fun version of pumpkin pie. I hope you enoy some of these posts!
Happy Thanksgiving!
Elaine
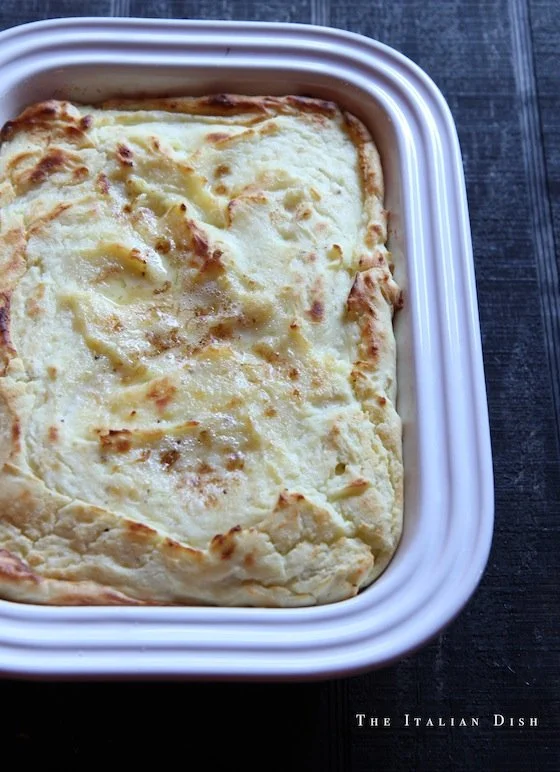
Make Ahead Buffet Mashed Potatoes
Worried about having the time or energy to make mashed potatoes while you're juggling the turkey, side dishes and all your relatives? You can make this dish the day before Thanksgiving and have it all ready to pop in the oven on Thanksgiving Day or even the week before Thanksgiving and freeze it. It's delicious.


Roasted Cherry Tomato Pasta

It's that time of year again when the cherry tomatoes are overflowing in your garden and the Farmer's Markets. We love eating them raw in salads, of course, but how about roasting them until they are soft and sweet and serve them over pasta? This simple dish is a snap to make and you probably have most of the ingredients on hand anyway.
This dish is not about the pasta being overly dressed - remember, the sauce on pasta should just complement the pasta, not drown it. Garlic is sauteed in a little good olive oil and then a spash of white wine and chicken broth are added with some seasoning. There's a hint of tomato sauce, but not much. The star of the show here is the roasted cherry tomatoes, so we let them shine with just a light sauce underneath them.

Charred Corn Summer Salad

This is one of my favorite summer salads. With sweet corn coming into season and tomatoes and peppers just around the corner, this is a great Farmer's Market dish. The dressing that I make for this makes the salad bright and crisp. It's easy to feed a crowd with this.
I like to grill the corn first in its husks and then char it. I leave the corn in its husks and soak it in water for about 30 minutes. This allows the corn to steam on the grill first before pulling back the husks and giving the corn a final char.
For the sweet peppers, you can use any sweet pepper you like but I am really loving the mini sweet peppers right now for raw dishes - you can slice them into such nice little rings.

Chocolate Crostata with Mascarpone Mousse

"Crostata" is a term used for an Italian tart. This dessert is a chocolate lover's dream and comes from Katherine Thompson, the pastry chef at several top NYC restaurants, including L'Artusi in the West Village and L'Apicio in the East Village. The recipe is from a book called "Women Chefs of New York", which features great women like Sara Jenkins, April Bloomfield and (my favorite) Gabrielle Hamilton. My future daughter-in-law, Robyn, gave me this terrific book for Christmas and as soon as I saw this recipe, I wanted to make it.