Swiss Chard Agnolotti with Brown Butter
 October 23, 2017
I'm going to be doing a whole series of pasta recipes this fall and winter. It's so fun to make homemade pasta and I hope if you've never tried before that maybe you will give it a go this year. This recipe is for agnolotti, a stuffed pasta that is easy and fast to make. I'm giving you step by step photos plus a little video to give you the confidence to try.
This agnolotti is made with a swiss chard and cheese filling. This filling isn't hard to make at all - the chard is simply chopped a little and then cooked down over the stove in a bit of water. If you have a food processor, you can process the filling in a snap.

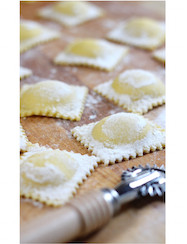
Assembling the agnolotti is very easy - the filling is just piped onto a sheet of the pasta, the pasta is folded over, pressed and pinched at regular intervals and then cut apart with a pastry wheel. You can really get quite fast at doing them once you get the hang of it. Try different sizes - you can make very tiny agnolotti, too, with just a little filling inside each one.
This pasta is simply dressed - no fancy sauces here. You don't want to detract from the filling so I am using a simple Brown Butter sauce, cracked black pepper and Parmigiano Reggiano cheese. Making Brown Butter only takes a few minutes and is worth the extra step.


Swiss Chard Agnolotti with Brown Butter
for a printable recipe click here
You will need pasta rollers (unless you like to roll the pasta out with a rolling pin), a pastry cutter wheel, a pastry bag with a round piping tip and a small pastry brush. If you don't have a bag with a piping tip, you can use a large ziploc bag.
Makes about 125 agnolotti, depending on how big you make your agnolotti. They freeze beautifully, so as long as you are making them, you might as well make a lot! Retain how many you want to serve the day you are making them and then freeze the rest by placing them on sheet pans in the freezer until they are hard and put them in freezer plastic bags.
*I give two ways to make the pasta - the second way involves using some semolina flour, which will give the pasta a little more "tooth". It is a little more dense and will require one more egg. It is my preferred way to make pasta. If you don't want to mix the two flours, you can do what I do and buy this wonderful flour from Hayden Mills*, which is already mixed AP flour and semolina flour. The amount of flour for either way will vary slightly depending on the kind of eggs you have, the humidity in your kitchen, etc. The flour is added gradually to allow for these variables.

for the pasta:
2¼ cups AP or Italian 00 flour (approximately)
3 eggs
or
1½ cups AP or Italian 00 flour (approximately)
¾ cups semolina flour*
4 eggs
for the filling:
2 bunches of Swiss Chard, chopped, stems removed (about 6 cups, packed)
½ cup freshly grated Parmigiano Reggiano cheese
1½ cups ricotta cheese
¼ teaspoon black pepper (finely ground)
⅛ teaspoon fine sea salt
for the Brown Butter:
½ cup salted butter (this will dress enough pasta for 2 - 3 servings)
to finish the dish:
½ Parmigiano Reggiano cheese to serve
Make the pasta (choose your method):
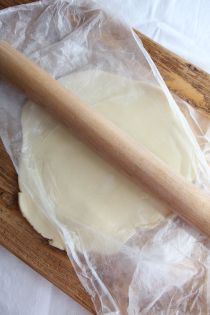
Food processor method: Place the eggs in a food processor and pulse twice. Add about ¾ of the flour and pulse until blended. Keep adding the rest of the flour until the dough gathers up into a ball. If the dough is still sticky, add more flour, a tablespoon at a time and pulse, until the dough comes together and gathers up in a ball and is not so sticky. Remove dough and place on counter. Knead until the dough is still moist but does not come off on your hands. If it does, add a dusting of flour until it doesn't stick to your hands. Place in a floured piece of plastic wrap and let rest on the counter for at least 20 minutes.
Automatic Mixer method: Place the eggs in the bowl of an automatic mixer and blend with a fork. Attach the dough hook attachment to the mixer and add 1½ cups of the flour. Mix with the dough hook until blended. Keep adding the rest of the flour until the dough gathers up into a ball. If the dough is still sticky, add more flour, a tablespoon at a time and mix until the dough is not so sticky. Remove dough and place on counter. Knead until the dough is still moist but does not come off on your hands. If it does, add a dusting of flour until it doesn't stick to your hands. Place in a floured piece of plastic wrap and let rest on the counter for at least 20 minutes.
Hand method: Place the eggs in a medium bowl and blend with a fork. Add the flour, a cup at a time, and keep blending until the dough gathers together. Keep adding the rest of the flour until the dough gathers up into a ball. If the dough is still sticky, add more flour, a tablespoon at a time and mix until the dough is not so sticky and pulls away from the bowl. Remove dough and place on counter. Knead until the dough is still moist but does not come off on your hands. If it does, add a dusting of flour until it doesn't stick to your hands. Place in a floured piece of plastic wrap and let rest on the counter for at least 20 minutes.
Make the filling: Place the chopped swiss chard in a large pot with just about an inch of water. Cover and steam for about 8 minutes, until the chard is nicely wilted and tender. Drain. Squeeze in a towel until most of the moisture is gone. Remove any little remaining stems. Place in a food processor and pulse until chopped finely (if you don't have a food processor, you'll have to chop finely by hand). Add the cheeses, salt and pepper and pulse again until blended. Taste and add more salt if you like.
Place half the filling in a pastry bag with a round piping tip (I use a ¾" tip - Ateco #804). If you don't have a piping tip, put the filling in a large ziploc bag and cut off a small corner. If you want to make smaller agnolotti, use a smaller tip.
Fill a little dish with water and have a small pastry brush ready.


Assemble agnolotti:
Cut off a small piece of pasta dough. Keep remaining pasta wrapped in plastic wrap so it doesn't dry out. Run the pasta dough through the pasta rollers at the widest setting about three times (or roll out by hand with a rolling pin). The pasta should become soft and velvety. Narrow the rollers and continue to run the dough through the rollers until it is about 1/8" thick. On my KitchenAid rollers, I do not go beyond either 4 or 5. You don't want the dough so thin for a stuffed pasta that it can burst when it cooks. Roll just one sheet at a time because you don't want the pasta to dry out.
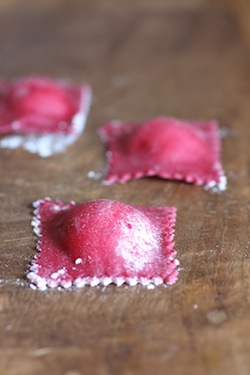
Lay the sheet on a lightly floured counter so that it doesn't stick. Pipe a line of filling across the length of the pasta sheet. Dip the pastry brush in the water and wet the pasta just above the filling. Fold the pasta sheet over, onto the wet part, making sure any air isn't trapped. Seal the pasta by pressing down on the wet part and running your finger all along the pasta sheet. Pinch and seal the filling at 1" intervals, lifting up a bit on the pasta as you go. With a pastry cutter wheel, cut the pasta about an inch above the filling, all the way down the length of the sheet. (see photos) Then cut the pasta where you sealed it with your fingers, cutting from the bottom toward the top of the pasta sheet, forming the agnolotti. If the pastry cutter sticks at any time, dust the pasta lightly with the flour.
Place the agnolotti on a floured rimmed baking sheet. Cover with plastic wrap and refrigerate until ready to cook. Continue with the remaining filling and pasta. After cutting agnolotti, gather up scraps and knead a little and use them to make more agnolotti. Freeze remaining agnolotti and store in plastic bags for later use.
Make Brown Butter:
In a small saucepan, bring the butter to a simmer. Cook the butter over medium heat for a couple of minutes. The water in the butter will cook off and then it will all at once begin to foam. You can smell the butter turning toasty at this point. Watch carefully and simmer until the butter is just a golden brown color - this part will go quite quickly and you don't want to burn the butter. Transfer the butter to a heatproof small bowl or a glass Pyrex. The butter will quickly separate - you will see the brown milk solids at the bottom. Strain the butter to remove the brown particles.
To serve:
Fill a large pot of salted water and bring to a boil. Have a medium sized bowl and a serving platter ready for the pasta. Place the agnolotti in the boiling water but do not return it to a boil - you don't want to burst the pasta. (If you are cooking a lot of agnolotti, you should do it in a couple of batches so as to not crowd the pot. If you are making enough for just two or three people, it won't matter). Bring the water back to a simmer and cook the agnolotti gently for a few minutes until they are done. This is a matter of preference in how tender or toothy you want the pasta - either way, cook until the raw flour taste is gone and the pasta is as tender as you like it. Remove the agnolotti with a handled strainer and place in the bowl. Drizzle the butter over the pasta, toss, grind a good amount of pepper and sprinkle the cheese over the pasta and gently toss. Pour out onto the serving platter and sprinkle with additional cheese if you like.









Reader Comments (8)
These look amazing! I want to try to do this. Thank you for this post.
You must be taking a break from knitting!! I'm glad you did because I'm saving this recipe. We love our ravioli so I imagine this will be simply delicious. I love your pasta -- it looks so rich. Hope your Fall is going well. It will be easier to knit with the cooler weather. :-) Abbracci!
So maybe I will actually make homemade pasta now. I would love to serve this!
This looks delicious - I love pasta like this. Will definitely try this.
I had pastas filled with greens many times in Italy - they are very popular. Thanks for the recipe. These look fun to make.
So I made this recipe over the weekend and I can't tell you how much fun it was! Everyone loved it - your photos and videos gave me the confidence to do it. Thank you! I can't believe I made such a dish.
What a fantastic post! The information is very useful. Thank you for sharing this here.
I’ve made this and it’s fantastic